Sử dụng API
Tạo một Client để sử dụng API
Bây giờ bạn có một mô hình hoạt động của trang web đang chạy như một SPA gọi dữ liệu thông qua RESTful API được lưu trữ trên AWS Lambda và cung cấp từ Amazon API Gateway. Các nguồn cấp dữ liệu này được coi là công khai vì người dùng không cần đăng nhập và cung cấp thông tin đăng nhập cho lệnh gọi tới API. Trong bài tập này, bạn sẽ xem xét cách bạn có thể yêu cầu xác thực để thực hiện lệnh gọi API và việc sử dụng Khóa API để thực thi điều chỉnh tốc độ cuộc gọi và quản lý hạn ngạch. Để chứng minh, bạn sẽ sử dụng một ứng dụng Java client, để chỉ ra cách bạn có thể sử dụng các Java SDK được tạo tự động trong các ứng dụng của bạn.
Nội dung
- Tạo Response Model cho TripSearch API
- Gán TripsFromCityResponse model cho API /tripsfromcity
- Tạo một ứng dụng client Java sử dụng API
- Tái tạo client SDK và cài đặt trên máy development
- Kiểm thử SDK vừa tạo mới với Ứng dụng Client Java
- Thiết lập API key trong mã nguồn Client và chạy lại Ứng dụng sử dụng API với tính năng throttling
Tạo Response Model cho TripSearch API
In order for the SDK generator to create the appropriate classes for a strongly-typed language like Java (as opposed to Javascript, for example) we need to tell API Gateway what the shape or schema of the request/response objects looks like. In the TripSearch API, we are using the GET method for each of the three API calls. Therefore, there is no schema for inbound requests because the city parameter is passed on as part of the URL. If we instead changed the method to POST, we would need to pass in the city parameter in the body payload, and would need to create a model for this object schema for the code generator to create a Java class for us to bind to.
Để trình tạo SDK có thể tạo các lớp thích hợp cho một ngôn ngữ mạnh như Java (đối lập với Javascript), chúng ta cần cho API Gateway biết hình dạng hoặc schema của các đối tượng yêu cầu/phản hồi trông như thế nào. Trong TripSearch API, bạn đang sử dụng phương thức GET cho mỗi lệnh gọi API. Do đó, không có schema nào cho các yêu cầu gửi đến vì tham số city được truyền như một phần của URL. Thay vào đó, nếu bạn thay đổi phương thức thành POST, bạn sẽ cần truyền tham số thành phố trong tải trọng body và sẽ cần tạo một mô hình cho schema đối tượng này cho trình tạo mã để tạo một lớp Java để bạn sử dụng.
The result data from the API calls is returned in the body of the response. In order for the code generator to create an appropriate class to represent this response, we need to create a response model, and set it as the method response model. Dữ liệu kết quả từ các lệnh gọi API được trả về trong body của phản hồi. Để trình tạo mã có thể tạo một lớp thích hợp để đại diện cho phản hồi này, chúng ta cần tạo một mô hình phản hồi và đặt nó làm mô hình phản hồi phương thức.
- Truy cập API Gateway console và chọn Models là
iDevelop - Trip Search API. - Chọn Create
- Ở Model name nhập
TripsFromCityResponse - Ở Content-type nhập
application/json - Ở Model schema nhập vào mô tả bên dưới:
{
  "type" : "object",
  "properties" : {
    "succeeded" : {
      "type" : "boolean"
    },
    "errorMessage" : {
      "type" : "string"
    },
    "errorType" : {
      "type" : "number"
    },
    "data" : {
      "type" : "array",
      "items" : {
        "type" : "object",
        "properties" : {

			"date": {
				"type" : "number"
			},
       		"originCity": {
				"type" : "string"
			},
			"destinationCity": {
				"type" : "string"
			},
			"airline": {
				"type" : "string"
			}
          }
        }
      }
  },
  "title" : "TripsFromCityResponse"
}
- Chọn Create model
Gán TripsFromCityResponse model cho API /tripsfromcity
- Chọn Resources là
iDevelop - Trip Search API. - Chọn method GET ở
/tripsfromcity/{city} - Chọn Method Response
- Trong bảng /tripsfromcity/{city} - GET - Method Response chọn icon tam giác cạnh HTTP Status để xem panelpanel.
- Ở mục Response Body for 200 chọn biểu tượng bút chì kế bên Empty model.
- Trường sẽ trở thành một danh sách thả xuống. Lựa chọn TripsFromCityResponse và nhấp vào dấu tích màu xám để cam kết thay đổi.
- Từ menu Actions, chọn
Deploy API - Ở Deployment stage chọn
prodfrom the list and click Deploy - Trong mục prod Stage Editor xuất hiện, chọn SDK Generation
- Trong mục Platform chọn Java SDK
- Ở Service name nhập
TripSearch - Ở Java package name nhập
idevelop.api.sdk
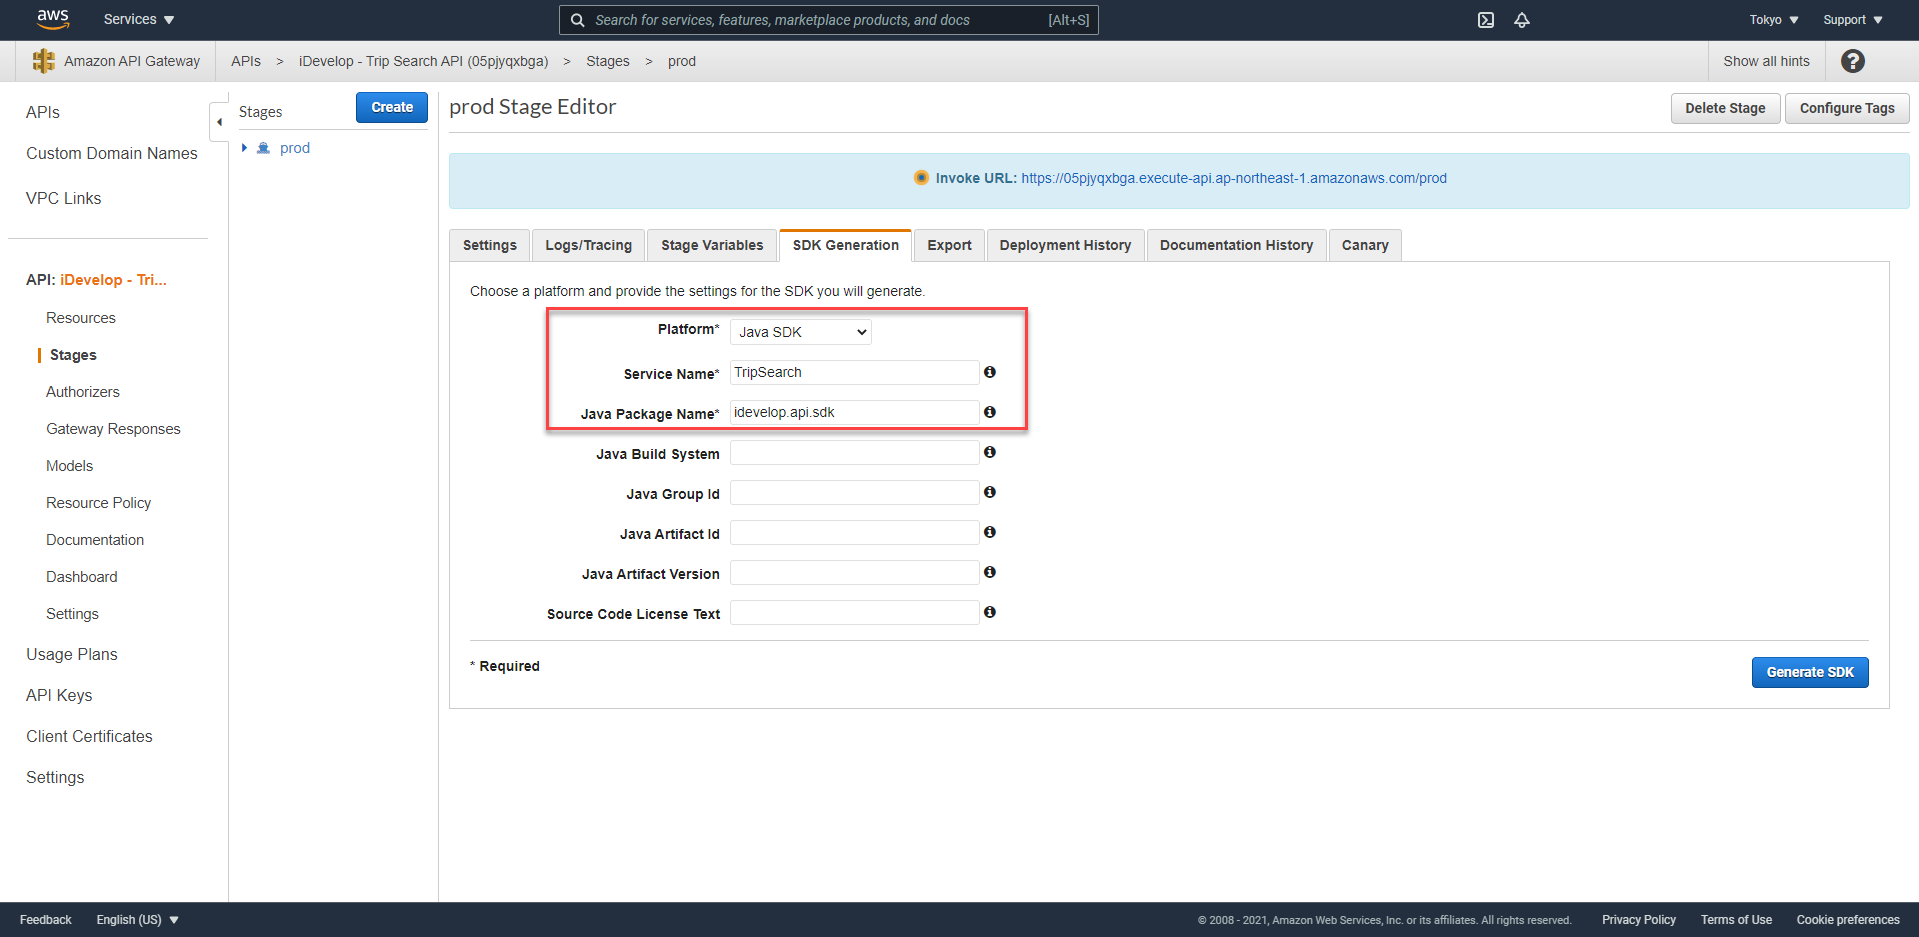
- Chọn Generate SDK. Java SDK sẽ được tạo và tải xuống dưới dạng tệp ZIP.
- Giải nén tệp ZIP đã tải xuống trên môi trường làm việc của bạn
- Trong cửa số lệnh,
cdvào vị trí giải nén mã nguồn và chạy lệnh sau:
mvn install

# if you are using Eclipse IDE on Windows
%M2_HOME%\bin\mvn install
Việc này sẽ biên dịch và cài đặt SDK trong kho lưu trữ Maven cục bộ của bạn và chúng tôi sẽ đề cập đến nó trong các bước tiếp theo.
Tạo một ứng dụng client Java sử dụng API
- Tải xuống gói mã nguồn cho một ứng dụng thử nghiệm từ TripSearchJavaClient.zip và giải nén trong môi trường làm việc của bạn.
Nếu bạn đang sử dụng Cloud9, hãy tham khảo lệnh bên dưới:
cd ~/environment
curl -L https://workshops.devax.academy/monoliths-to-microservices/module6/files/TripSearchJavaClient.zip --output TripSearchJavaClient.zip
unzip TripSearchJavaClient.zip
- If you’re using Eclipse IDE, use the Open projects from filesystem location menu and browse to the filesystem location where you exploded the TripSearchJavaClient source code. Open the project.
If you’re using Cloud9, refer to the command below.
cd ~/environment/TripSearchJavaClient
mvn install

# if you are using Eclipse IDE on Windows
%M2_HOME%\bin\mvn install
- Run the project. It will use the TripSearch API to call
/tripsfromcityand search for trips with destinationMelbourne. You will see an output like this:
Got 2 items in 91ms
Got 2 items in 91ms
Got 2 items in 90ms
.
.
.
Got 2 items in 90ms
The example API consumer will time how long each call to the API takes, and display the results. It will make a maximum of 100 calls as quickly as it can.
If we had many of these clients consuming the API rapidly, we could overwhelm the provisioned infrastructure, so we need some way of throttling calls. We can use Usage Plans to do this.
- On the API Gateway console, click Usage Plans beneath the APIs navigator panel.
- Click Create to create a new Usage Plan
- For Name type
LabPlan - Under Throttling, for Rate type
1 - For Burst type
1 - Under Quota type
1000per month
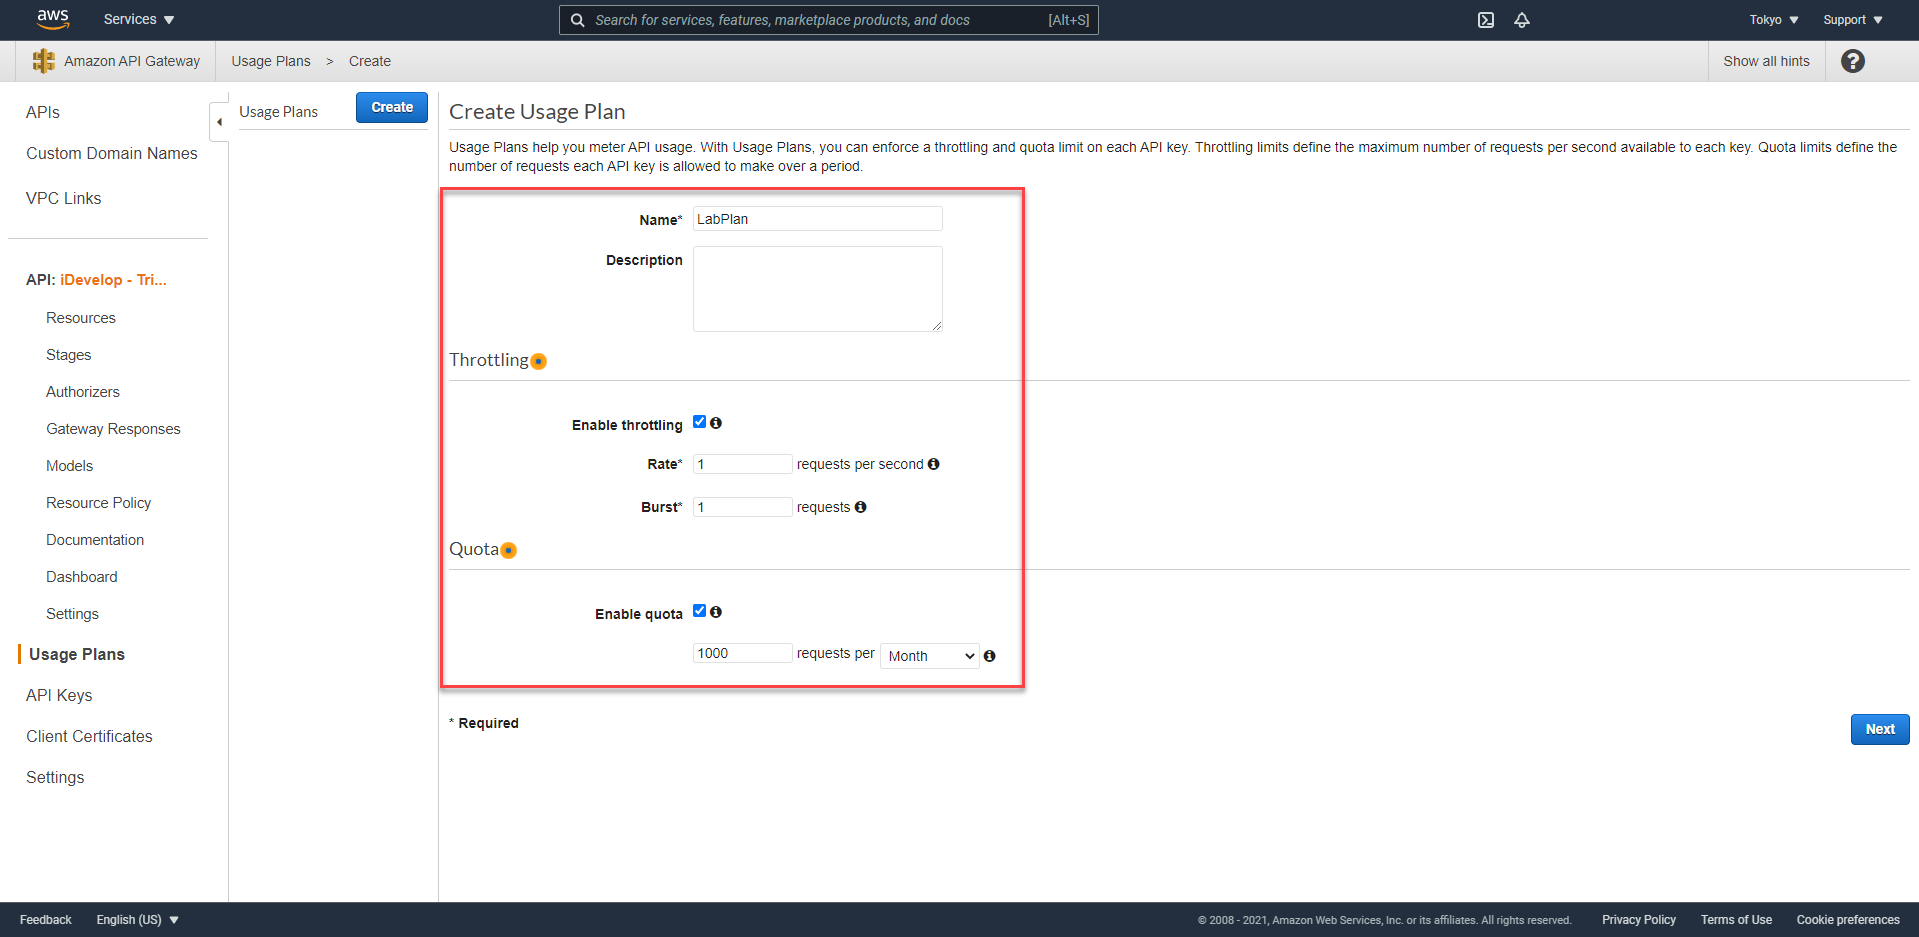
- Click Next
- Click Add API Stage
- In the API drop-down list, select
iDevelop - Trip Search API - In the Stage drop-down list, select prod
- Click the grey tick icon to commit the changes
- Click Next
- Click Create API Key and add to Usage Plan
- In the dialog that appears, for Name type
SDKClient - Click Save
- Click Done. A new API key will be created and associated with the usage Plan.
- Click the iDevelop - Trip Search API link beneath APIs on the left of the API Gateway console.
- Click the GET method beneath
/tripsfromcity/{city} - Click Method Request
- Under Settings, for API Key Required, click the pencil edit icon, and choose
truefrom the list.
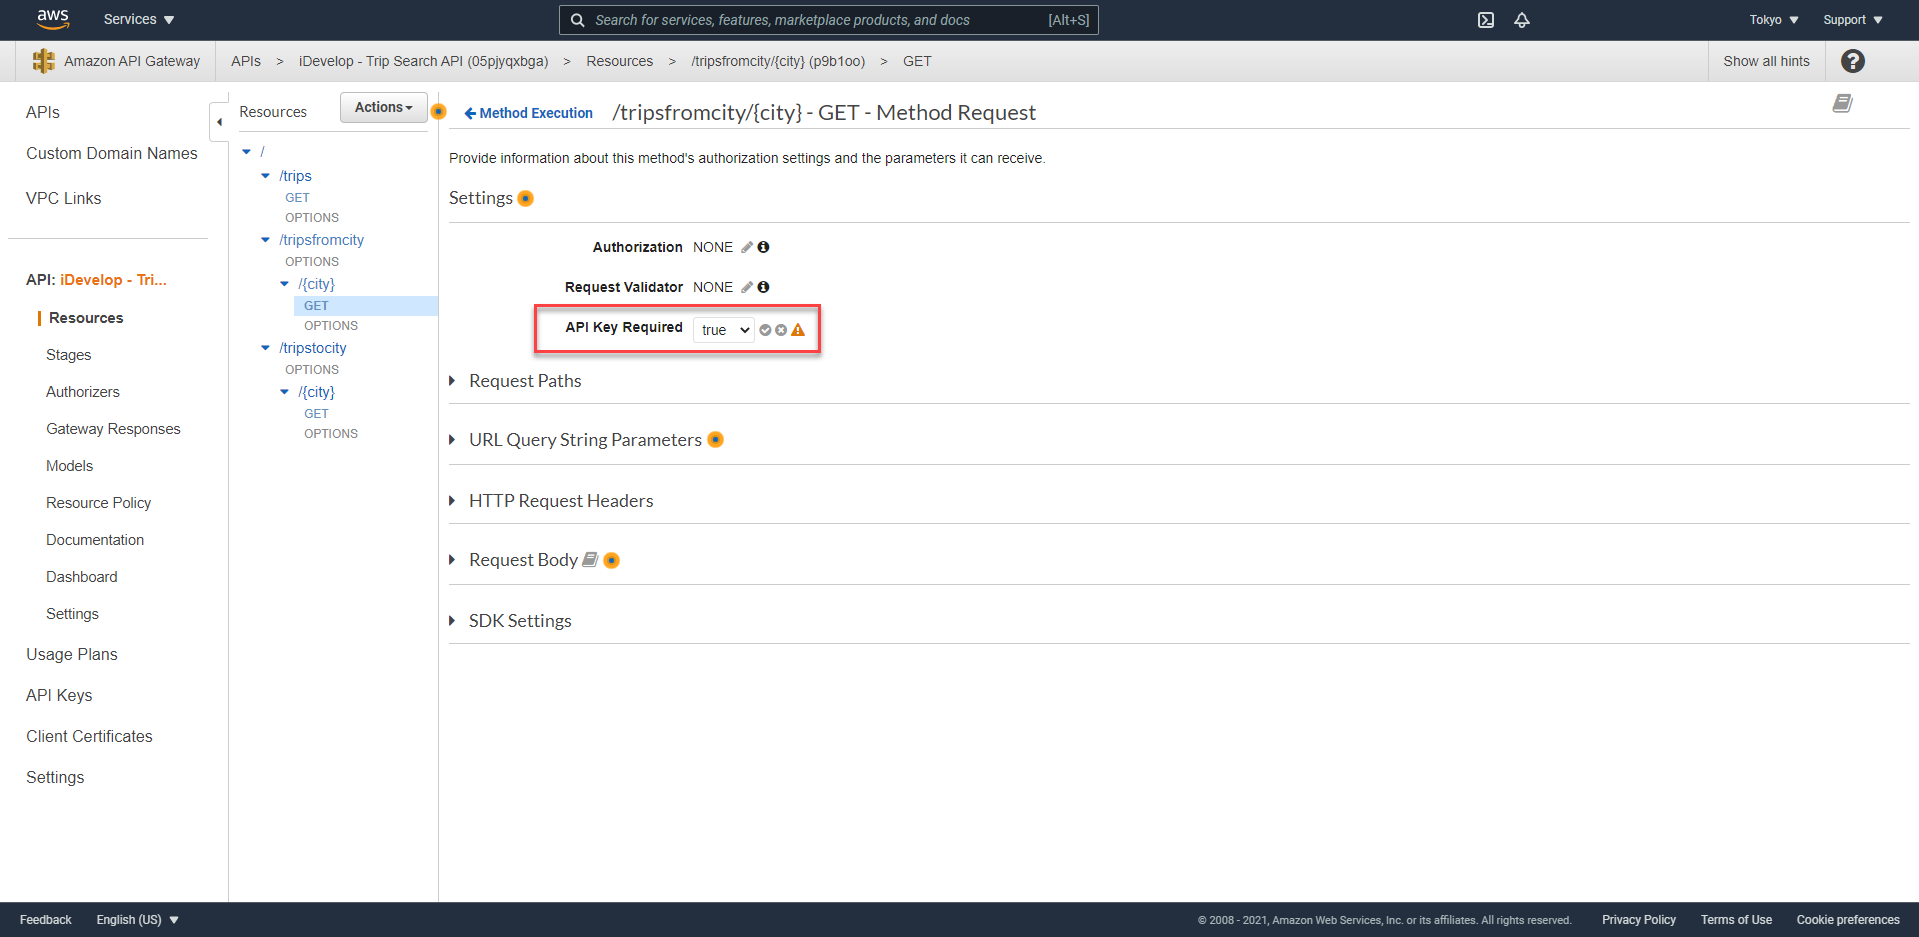
- Click the grey tick icon to commit the change
- From the Actions menu, select Deploy API
- Choose the prod stage and click Deploy to deploy the changes
Tái tạo client SDK và cài đặt trên máy development
- In the prod Stage Editor, click the SDK Generation tab
- For Platform, choose Java SDK
- For Service name type
TripSearch - For Java package name type
idevelop.api.sdk

- Click Generate SDK. The Java SDK will be generated and downloaded as a ZIP file.
- Explode the downloaded ZIP file on your filesystem.
- In a terminal window,
cdinto the folder where the downloaded SDK has been exploded (typically, the directory is called generated-code) and issue the following command:
mvn install
This will compile and install the SDK in your local Maven repository, overwriting the previous version. In the following steps, you will use this SDK artefact by referencing it in a client application POM file.
Kiểm thử SDK vừa tạo mới với Ứng dụng Client Java
In the IDE, re-run the application without making any changes. Since you have set the /tripsfromcity/{GET} endpoint to require an API Key, but have not actually set an API in the client application, you will see a Forbidden error in the console.
Thiết lập API key trong mã nguồn Client và chạy lại Ứng dụng sử dụng API với tính năng throttling
- The provided client source code needs to be updated to set the API Key in order to successfully call the
/tripsfromcity/{GET}method. - On the AWS API Gateway Console, click the API Keys tab
- Click the SDKClient link
- Click the Show link next to API Key to reveal the auto-generated API key. Copy the value into your clipboard.
- In the IDE, in the
/src/main/java/idevelop/api/tripsearch/sdk/app/App.javafile, paste in the API Key in your clipboard, in theAPI_KEYdefinition, replacing the<REPLACE_WITH_API_KEY>placeholder. - In the same file, locate the commented out call to
apiKey(API_KEY)in the TripSearch builder call. You may have to run aMaven Updateon the project to pick up the.apiKeyas we updated the jar in the last step and Eclipse may not have picked it up. Now that you have required an API Key in the API Gateway call, the SDK created for you will contain a call to allow the key to be set. If you have no API Key requirements, the code generator does not emit this functionality so in the provided code, it is commented out. You need to enable the call in the client code to allow the API Key to be set correctly. - Re-run the application in the IDE. Notice that the calls will now succeed, but, you will now periodically start receiving errors requesting you slow down the call-rate. This is because we set a maximum call-rate of 1 call per second per API key. You will see output like this:
Got 2 items in 97ms
Got 2 items in 125ms
Too Many Requests - waiting 1 second...
.
.
.
- As an experiment, edit the
API_KEYyou have set in the App class (for example, add a period at the end) which will cause it to be invalid. Re-run the app and notice that you now receive a Forbidden message. This is because you set the API Key as required for calls to the/tripsfromcitycall. - Experiment with the Rate and Burst settings in the Usage Plan to see how they affect the client app calling the API.
Note that you do not need to re-deploy the API nor re-create the SDK if you change the settings in the Usage Plan.