Create and Expose the API
Create and Expose the API with Amazon API Gateway
Now that you have created the Lambda functions, it is time to manually create the API Gateway deployment that will expose the microservice as an API.
Contents
- Expose the /tripsfromcity RESTful API endpoint
- Expose the /tripstocity RESTful API endpoint
- Deploy the API and test
- Exercise 2 - Use CloudFormation/SAM via the AWS CLI to deploy the HotelSearch microservice
- Test the HotelSpecials API
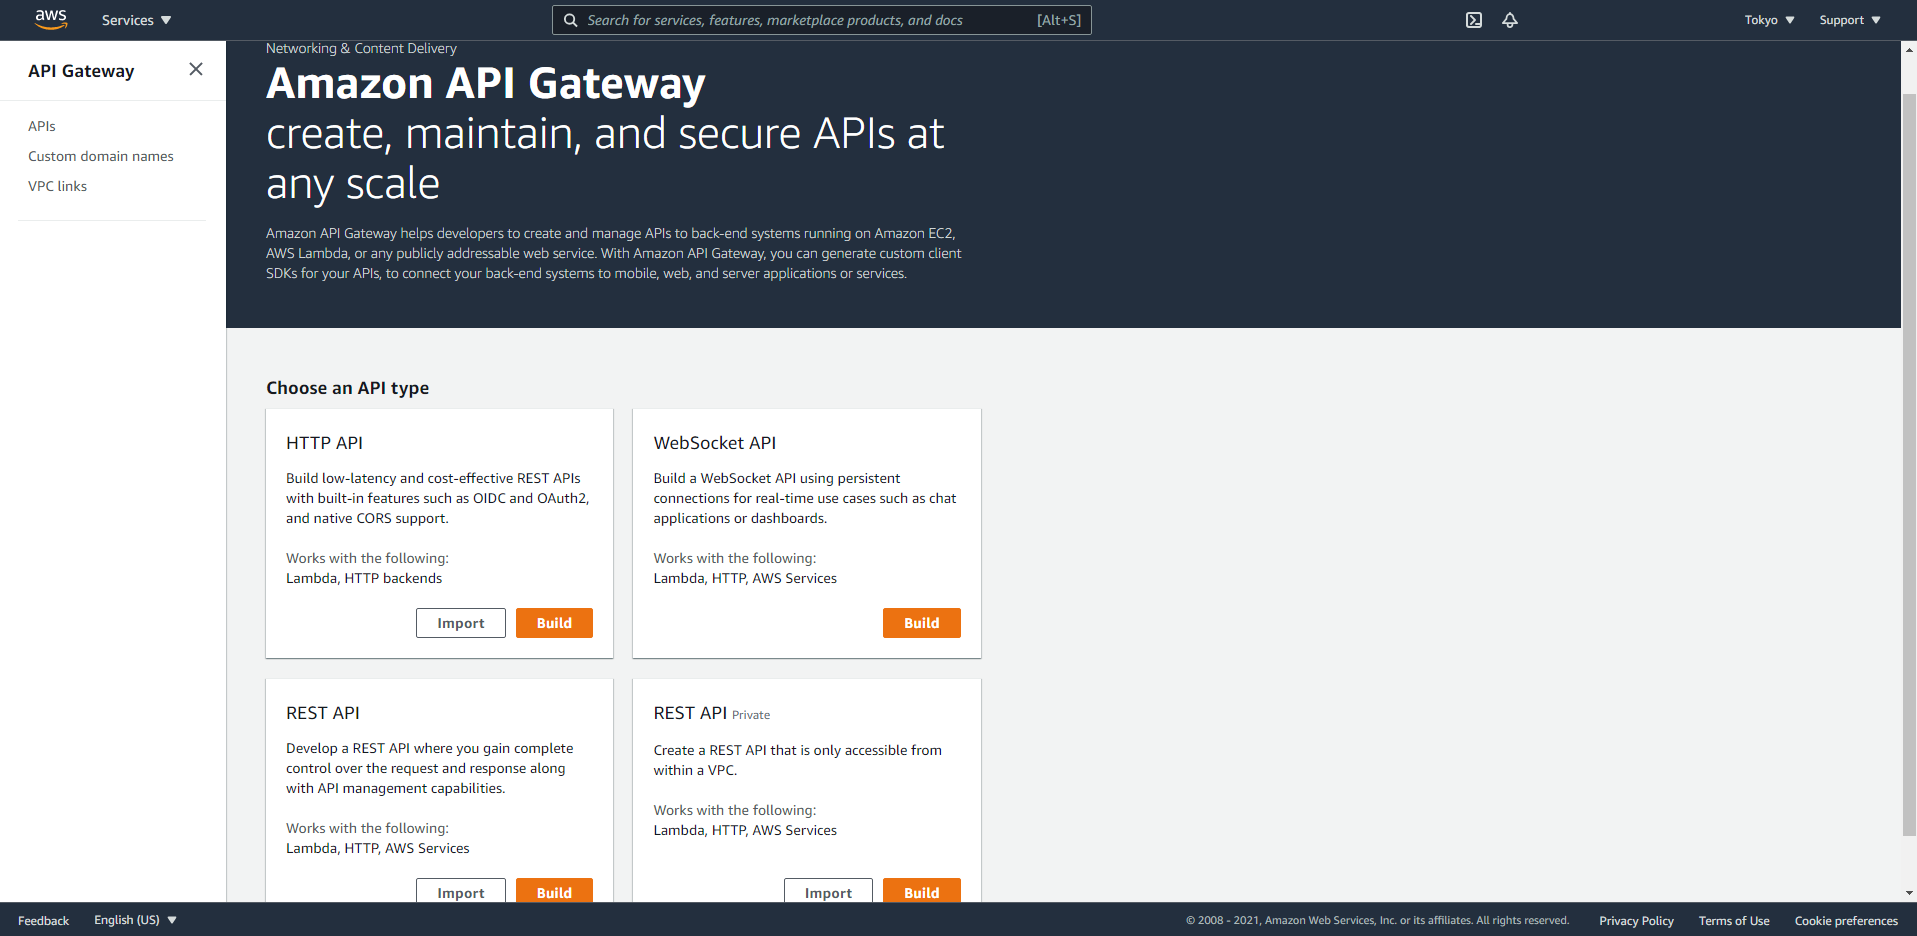
- Open the AWS API Gateway console by clicking Services and typing
apiin the filter box. Press Enter. - Click Get Started if shown.
- Go to create REST API and click Build. Make sure not to click the option with the word “Private”.
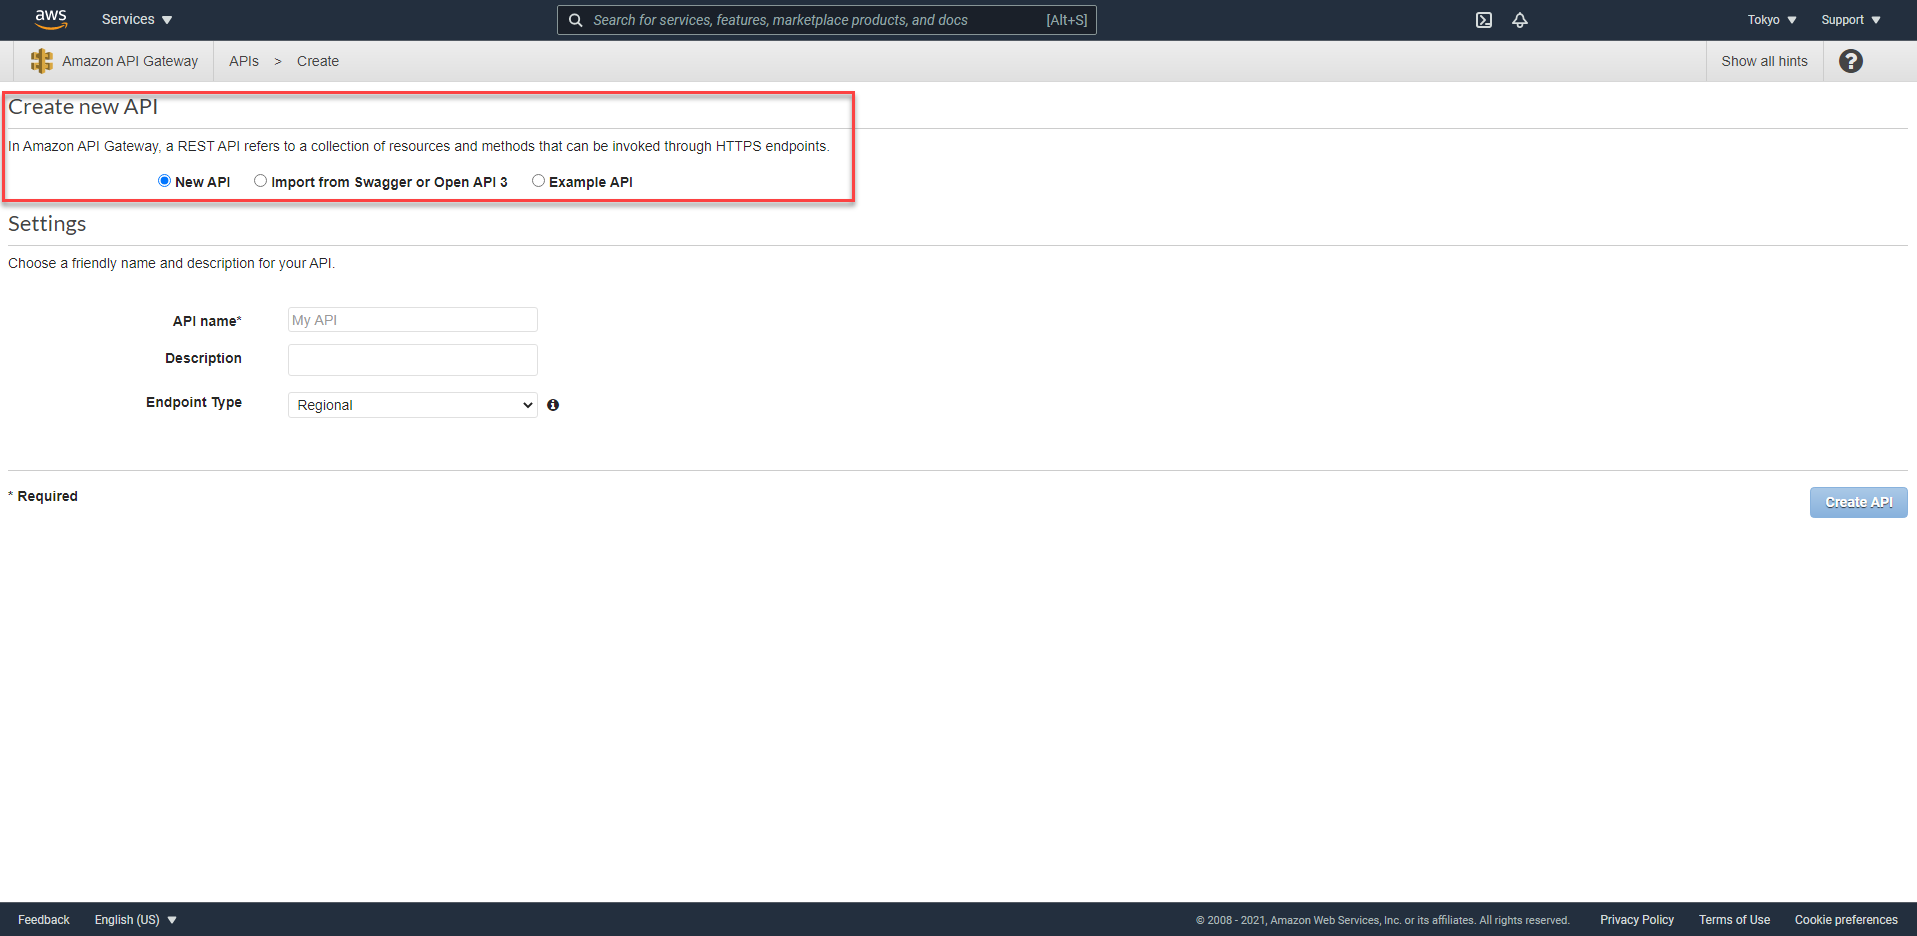
- If a new screen comes up, click OK. Make sure you have New API radio button selected:

- For API Name type
iDevelop - Trip Search API - For Description type Allows searching for trips from/to cities
- Click Create API.
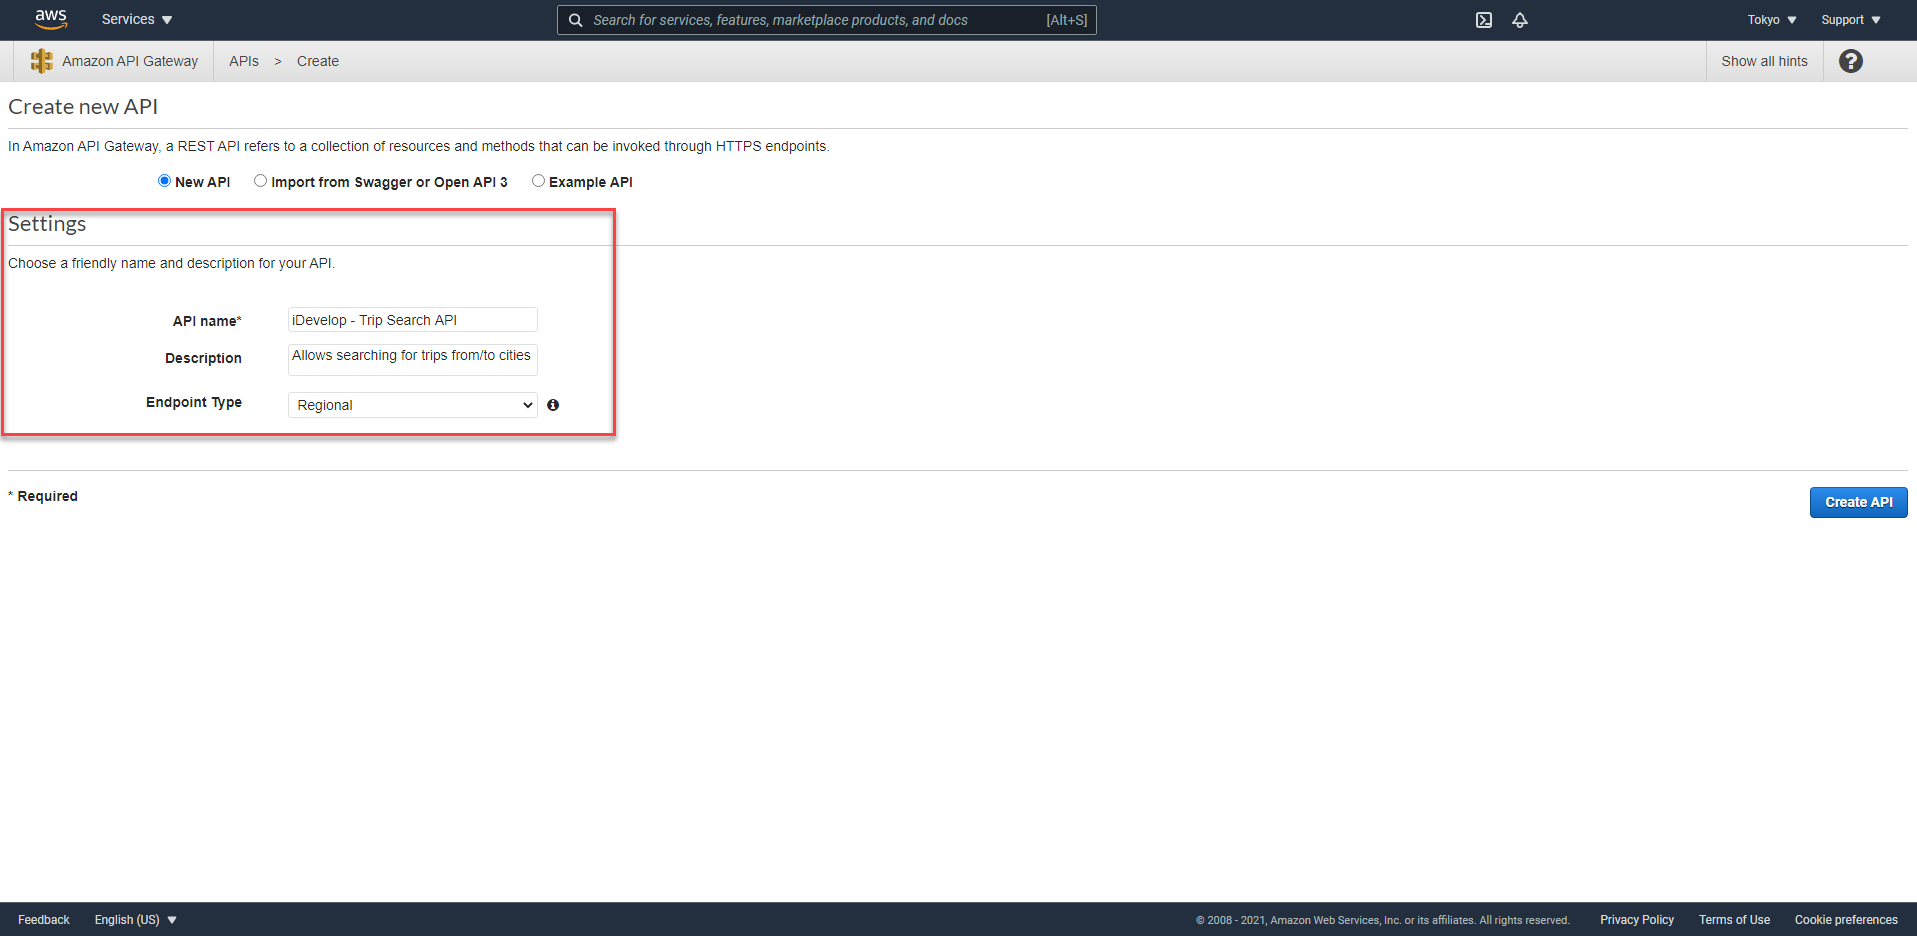
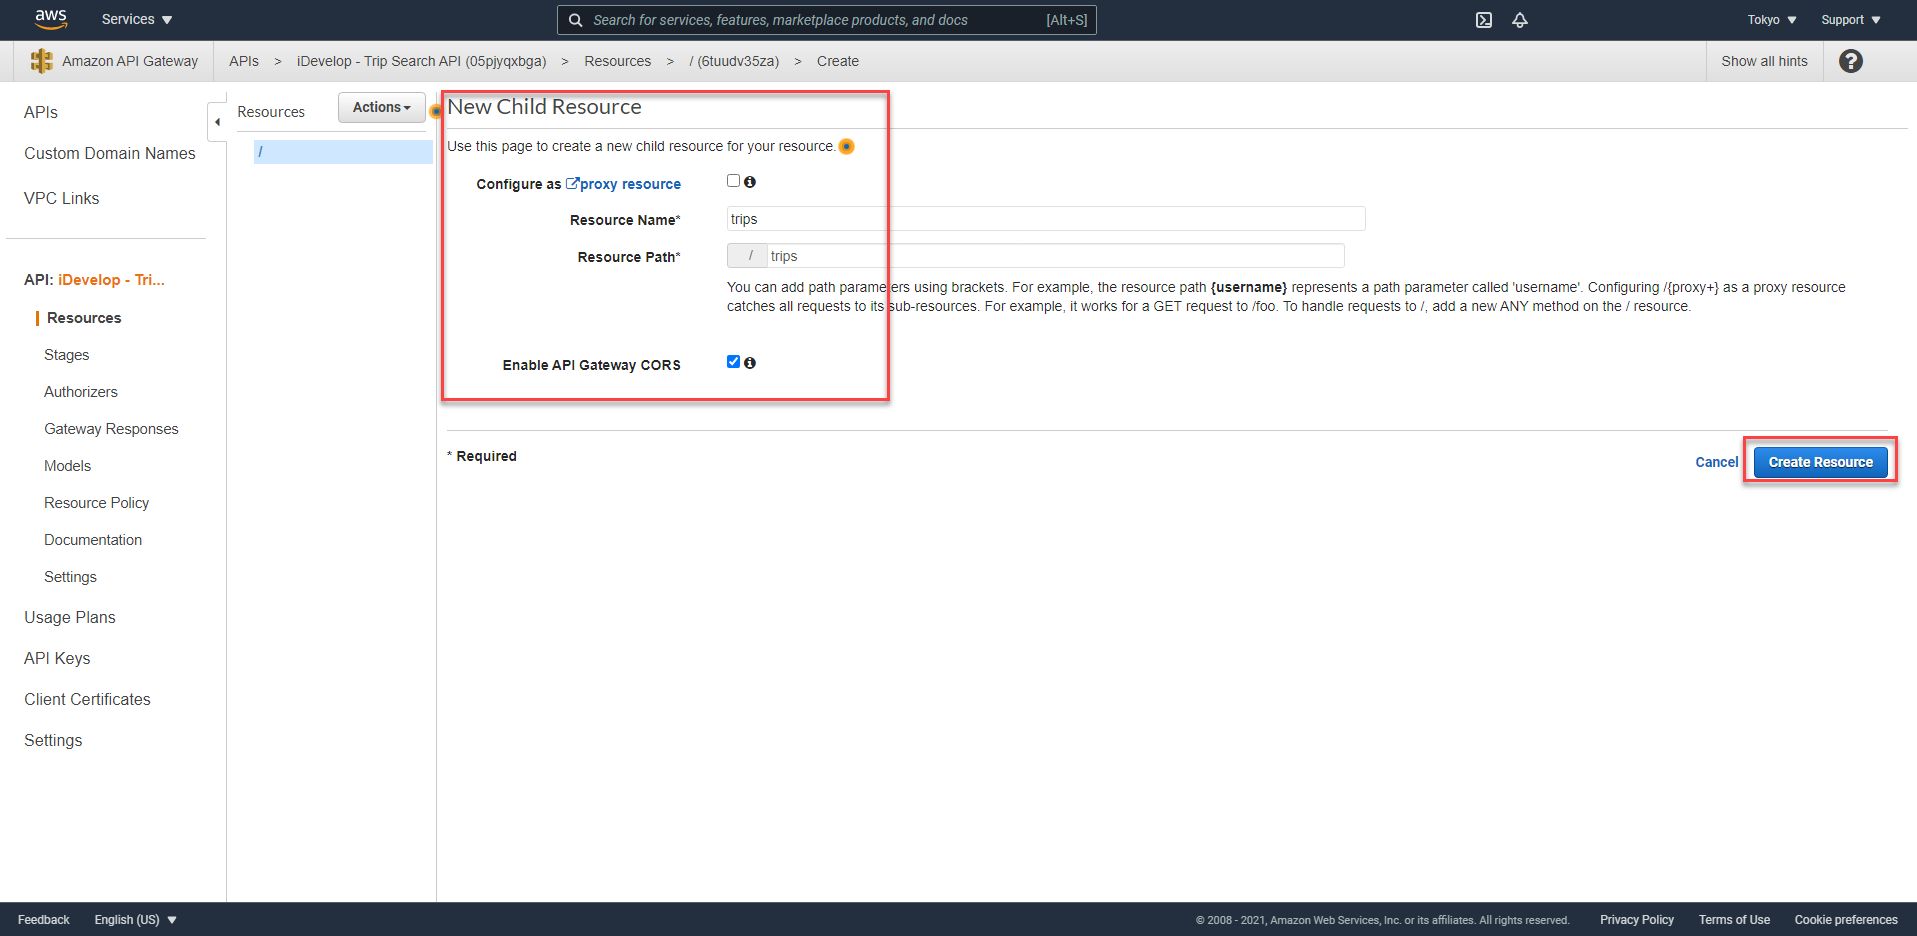
- The API will be created, and have a root path element and nothing else. Click on the / root path element and then click Actions to reveal the menu. Click Create Resource.
- In the New Child Resource panel, for Resource Name type
trips - For Resource Path type
trips - Check the Enable API Gateway CORS checkbox
- Click Create Resource
- The /trips resource will be created. Click on the /trips link, then click the Actions button and choose Create Method.
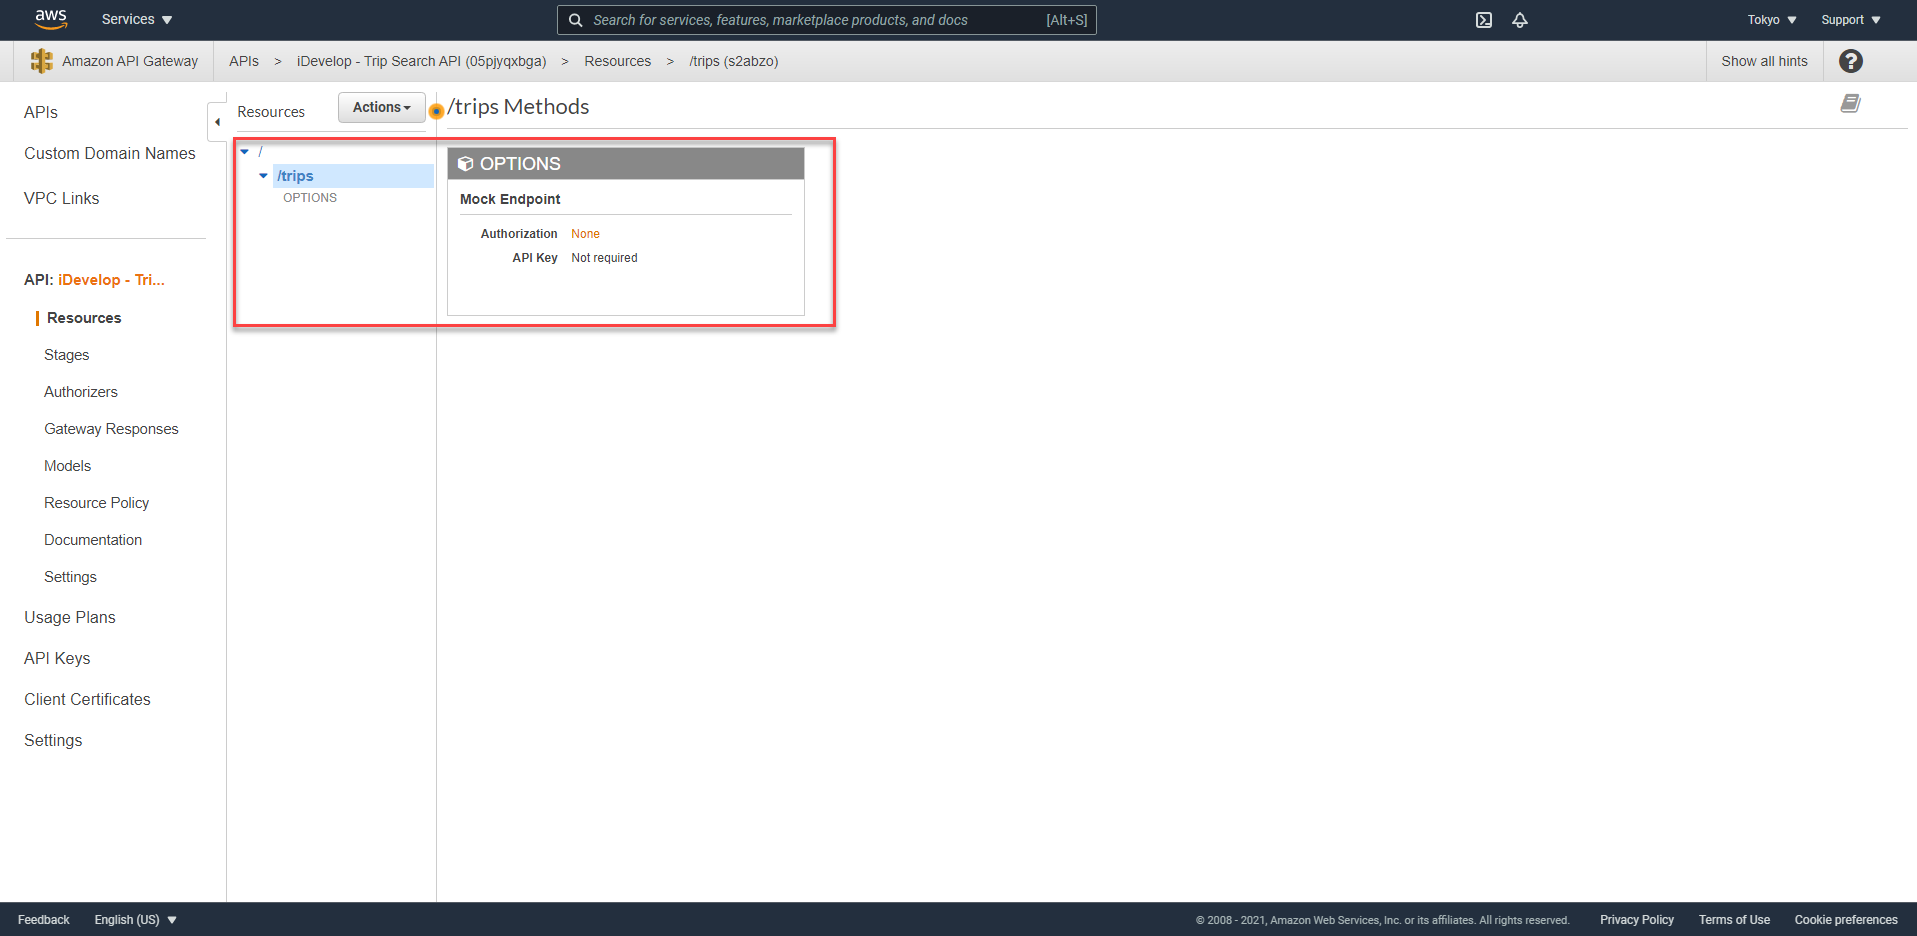
- In the dropdown list that appears, choose GET
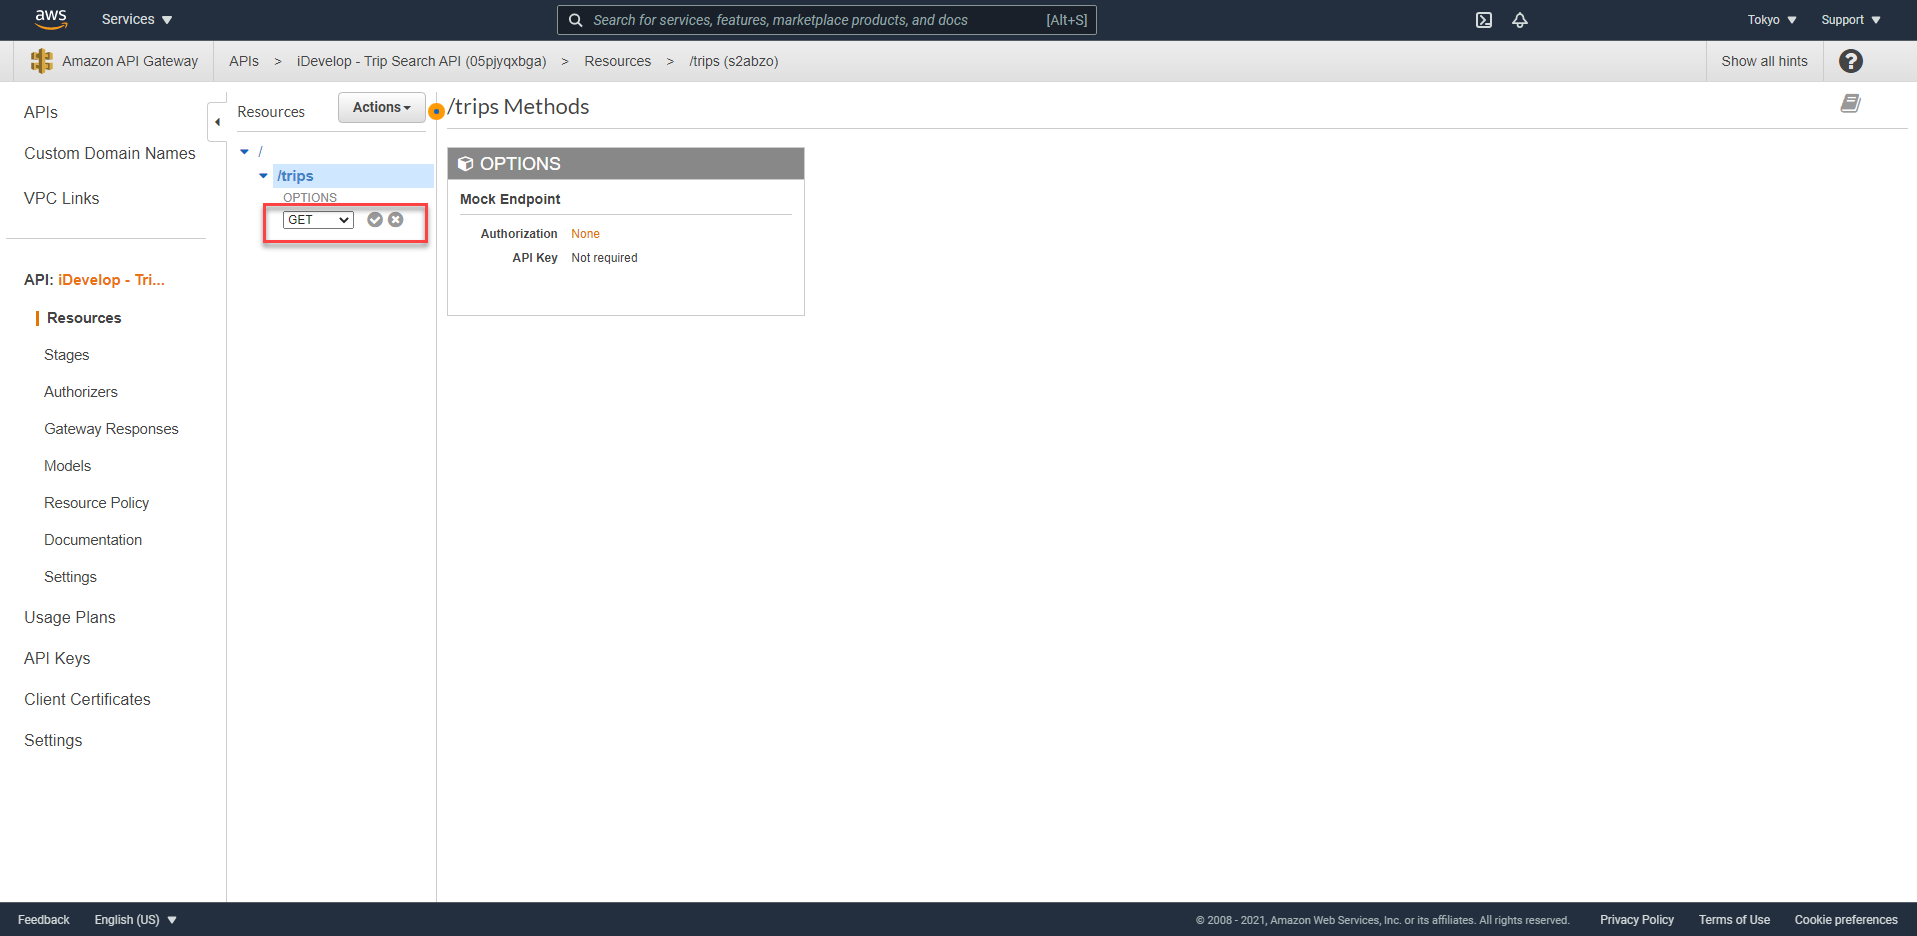
- Click the grey tick next to the dropdown list to commit the change.
- The /trips - GET - Setup panel will appear. For Lambda Region select
ap-northeast-1(or your region) - In the Lambda Function field, type
idevelopto reveal the available functions in the region and selectidevelopTripSearchFull.
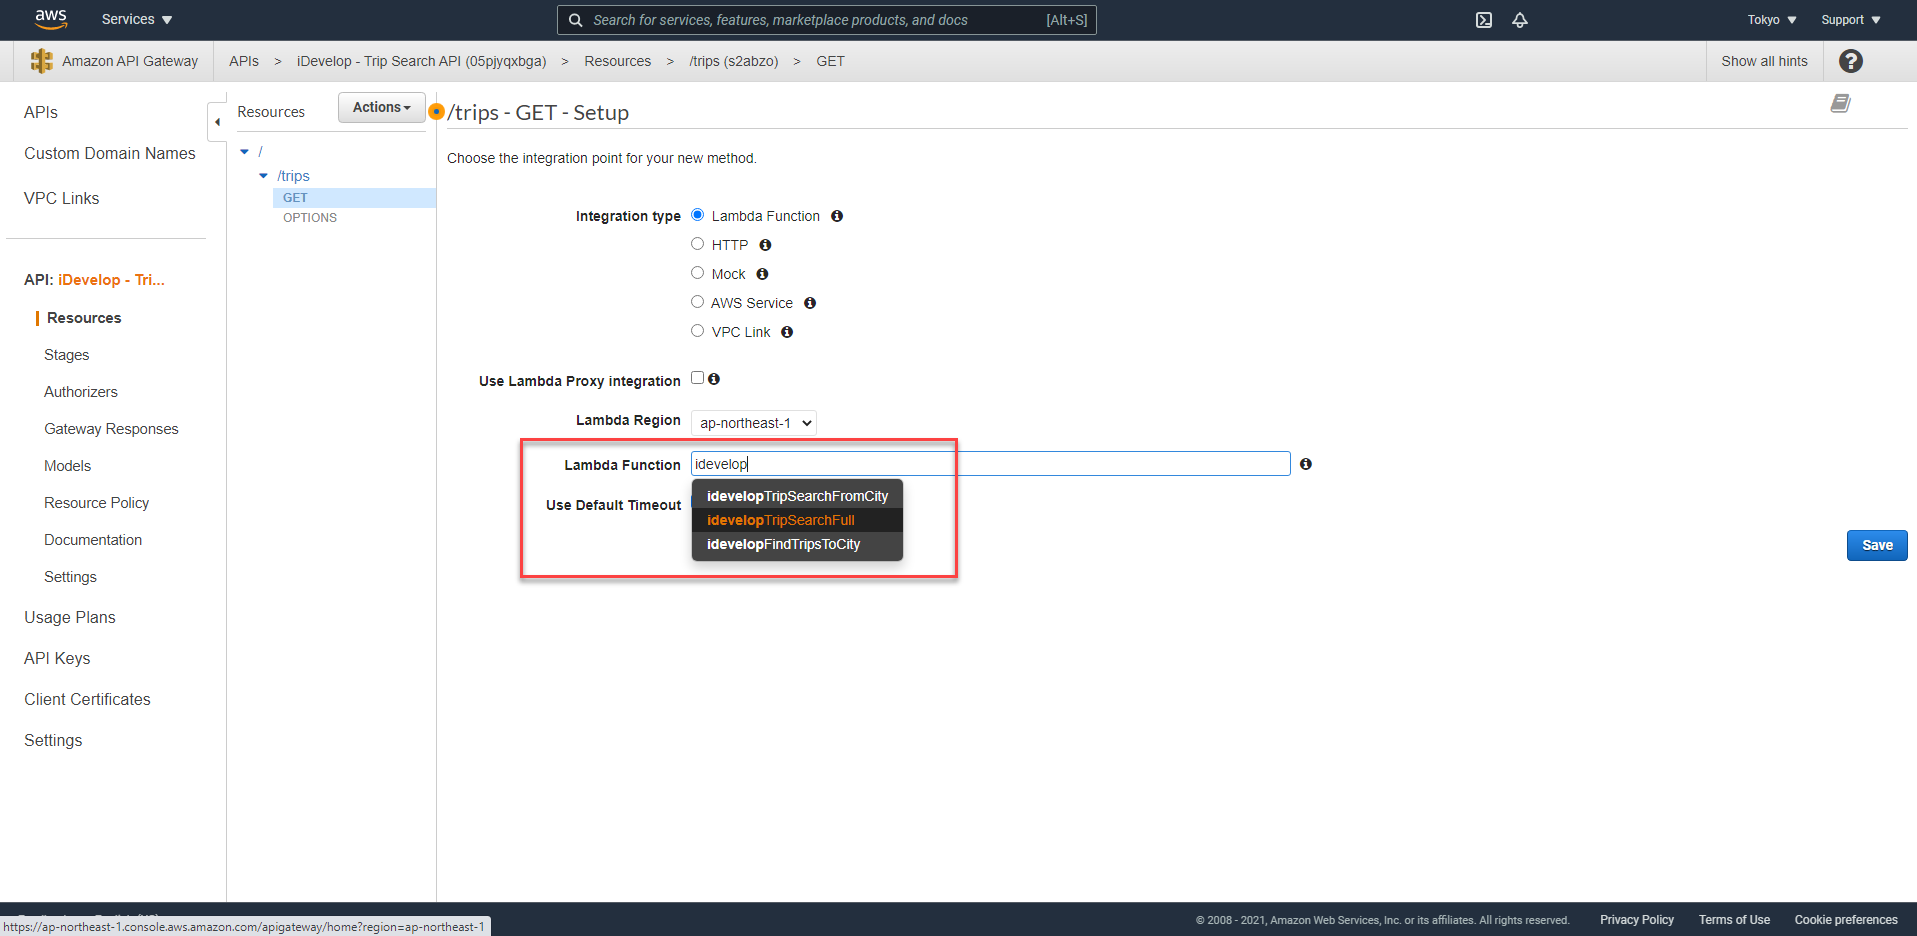
- Click Save.
- In the dialog that appears regarding adding permissions to Lambda, click OK.
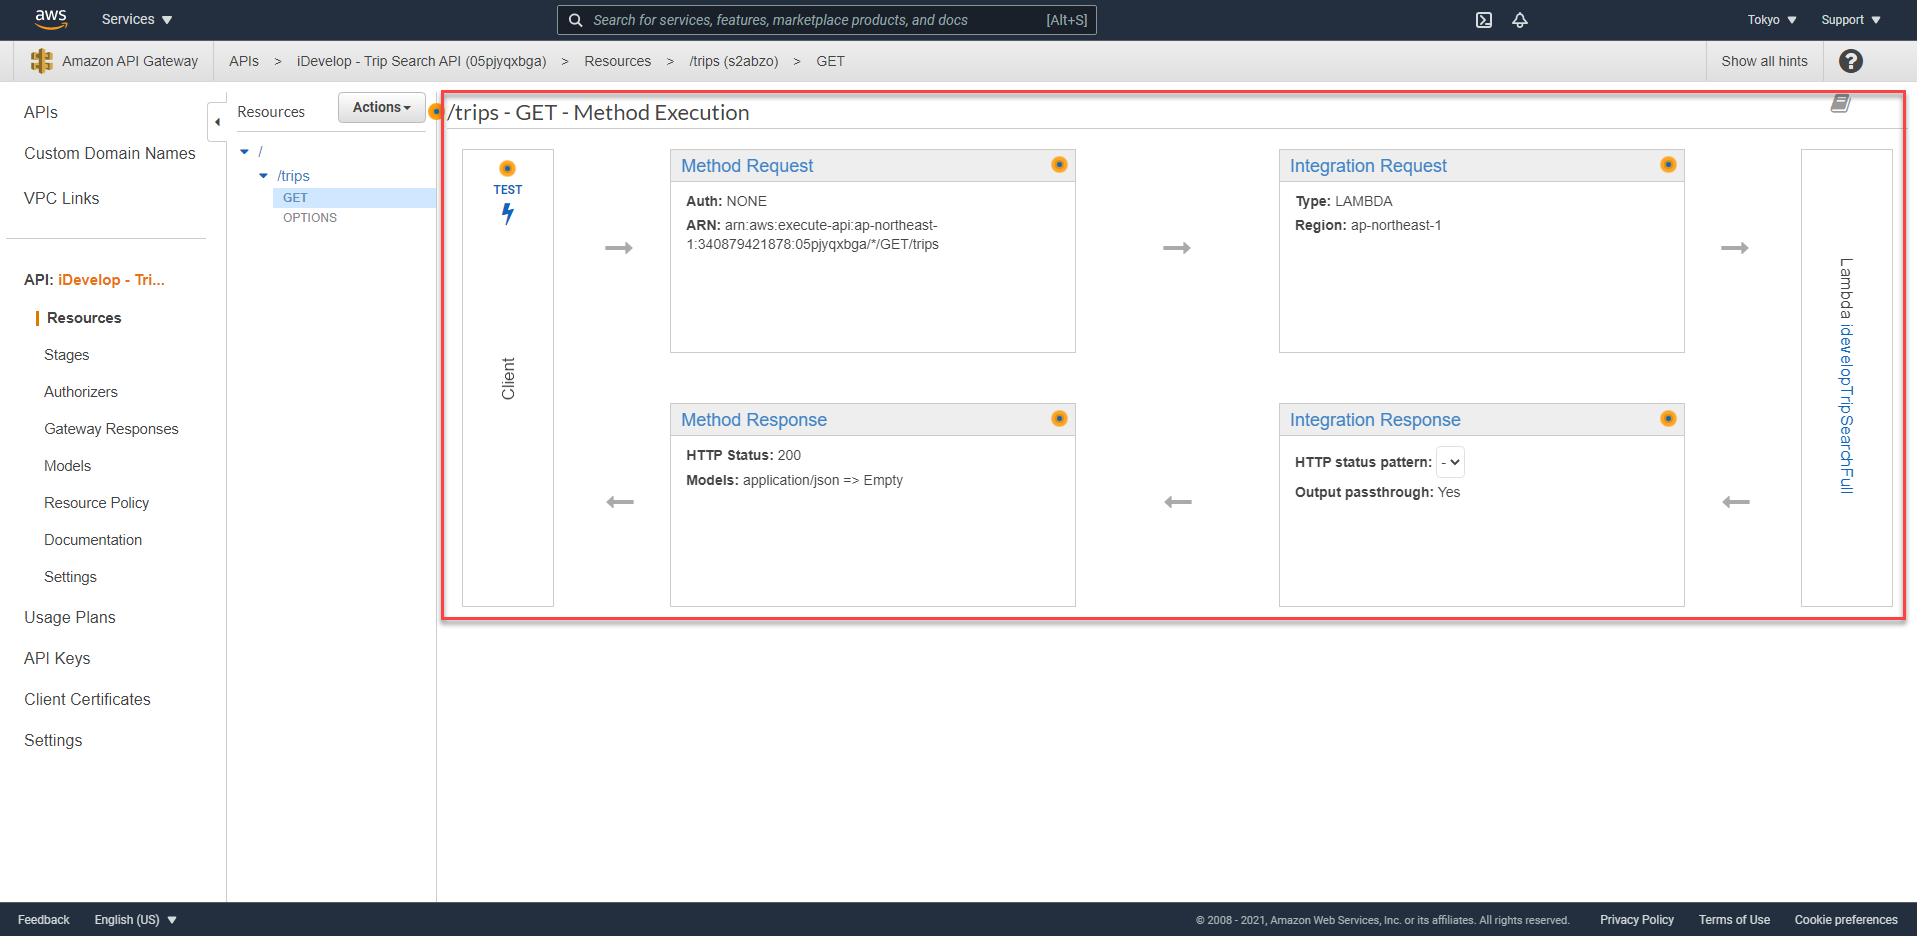
- When the method is created, you will see the Method Execution panel:
To test that the Lambda function is being called from the API, click the Test button.
- In the Method Test panel, scroll down to reveal the Test button.
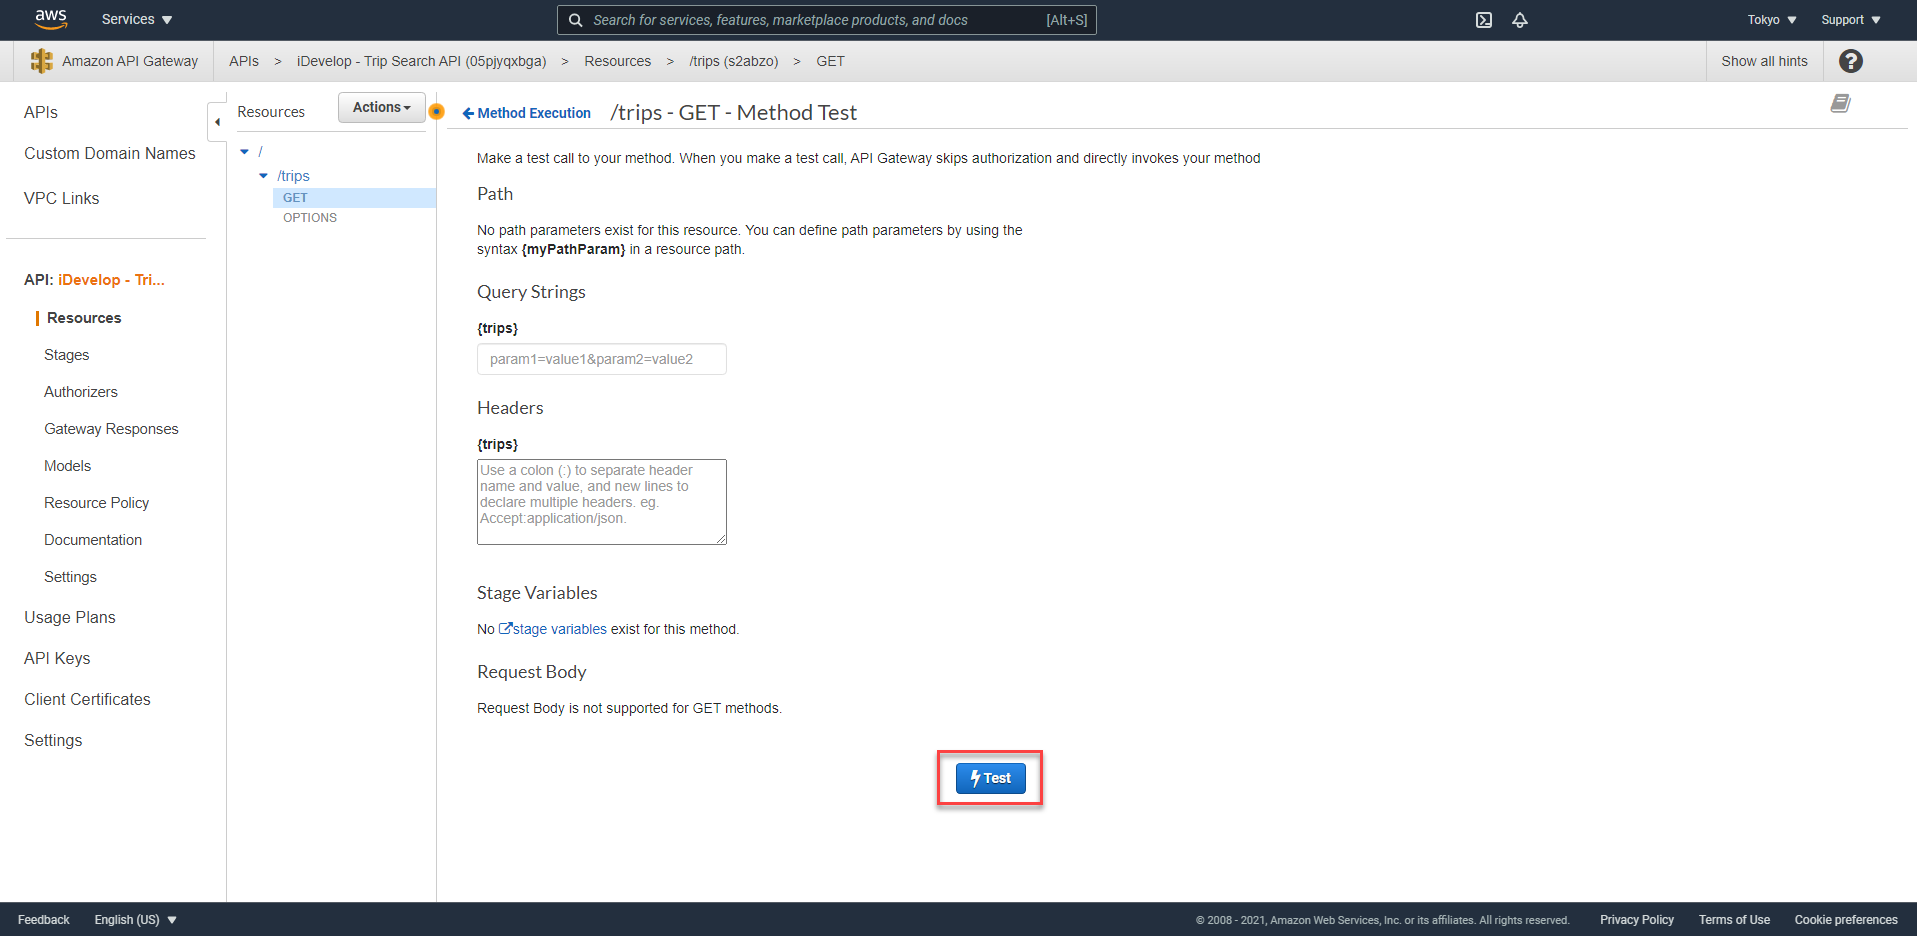
- Click the Test button. After a moment or two for the Lambda function to initialise and execute, you should see an output similar to this:
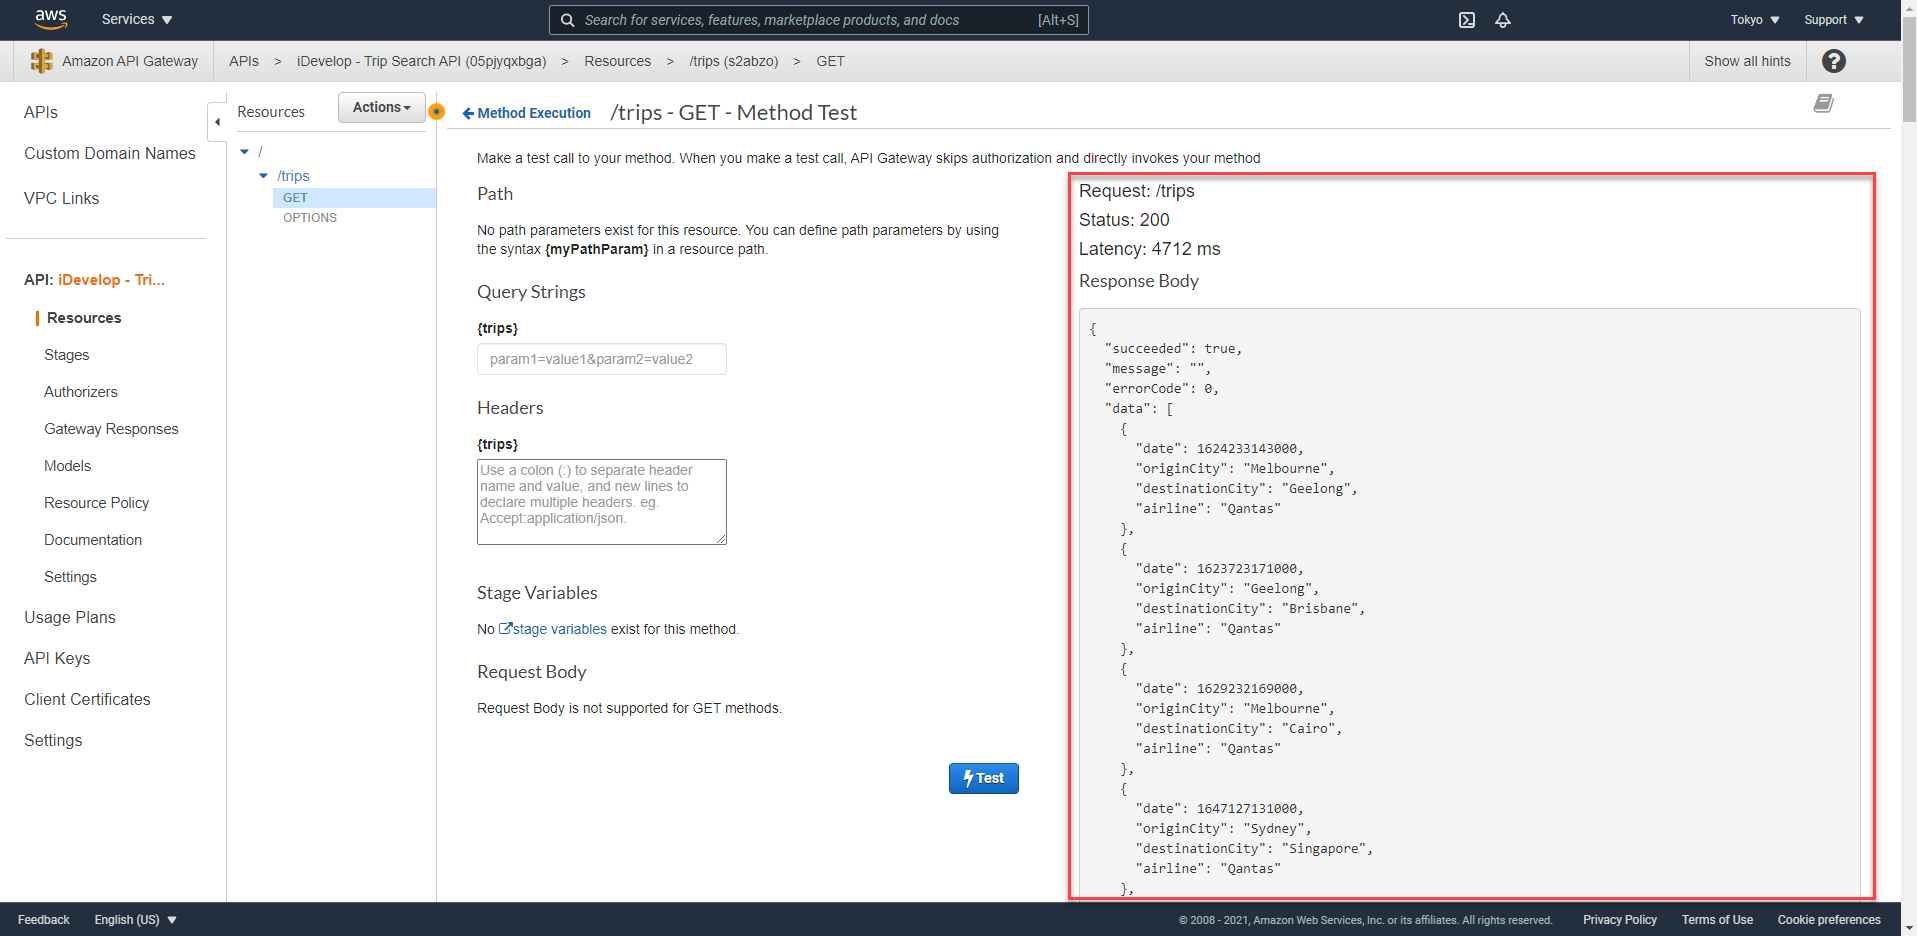
Note that the data you see will be different because it is randomly generated by the lab setup process.
- To allow access from a web browser, you need to enable CORS - Cross-origin scripting. Click on the /trips node and from the Actions menu, select Enable CORS.
- Click Enable CORS and replace existing CORS headers.
- On the dialog that appears, click Yes, replace existing values. When each of the listed items have a green tick against them, you can move on to the next section. This will only take a moment.
Expose the /tripsfromcity RESTful API endpoint
The first path we exposed was quite simple - /trips gets all the trips in the system. But we know our source code implementation allows us to specify a filter to query for trips that originate from a particular city or have a particular destination, so we want to expose this functionality to our API consumers. First, we will expose the /tripsfromcity path.
- Click the / root element in the Resources tree
- From the Actions menu choose Create Resource
- For Resource Name type
tripsfromcity - Check the Enable API Gateway CORS checkbox
- Click Create Resource
- Our call into the Lambda function requires a city parameter. We will follow the standard pattern for RESTful interfaces, and pass this parameter in as a URL parameter. With the /tripsfromcity node selected, from the Actions menu select Create Resource
- For Resource Name type
{city} - For Resource Path, delete the default and replace with
{city} - Click Create Resource
- With the /{city} node selected, from the Actions menu select Create Method
- In the dropdown list that appears, choose GET
- Click the grey tick next to the dropdown list to commit the change.
- The /tripsfromcity/{city} - GET - Setup panel will appear. For Lambda Region select
ap-northeast-1(or your target region) - In the Lambda Function field, type
idevelopto reveal the available functions in the region and selectidevelopTripSearchFromCity - Click Save
- In the dialog that appears regarding adding permissions to Lambda, click OK
- When the method is created, you will see the Method Execution panel, as before for the /trips resource. We can’t go ahead and test the API call just yet, because we need to transform the request through API Gateway so that the city parameter is passed through to the Lambda function correctly.
The devlounge.lambda.FindTripsFromCityHandler handler expects to see the input data in this JSON format:
{
	"payload" :
	{
        "city": "Melbourne"
    }
}
This would cause the Lambda function to search DynamoDB for all trips that originate from Melbourne. We need to add a Body Mapping Template for this method in API Gateway to correctly transform the request into this format.
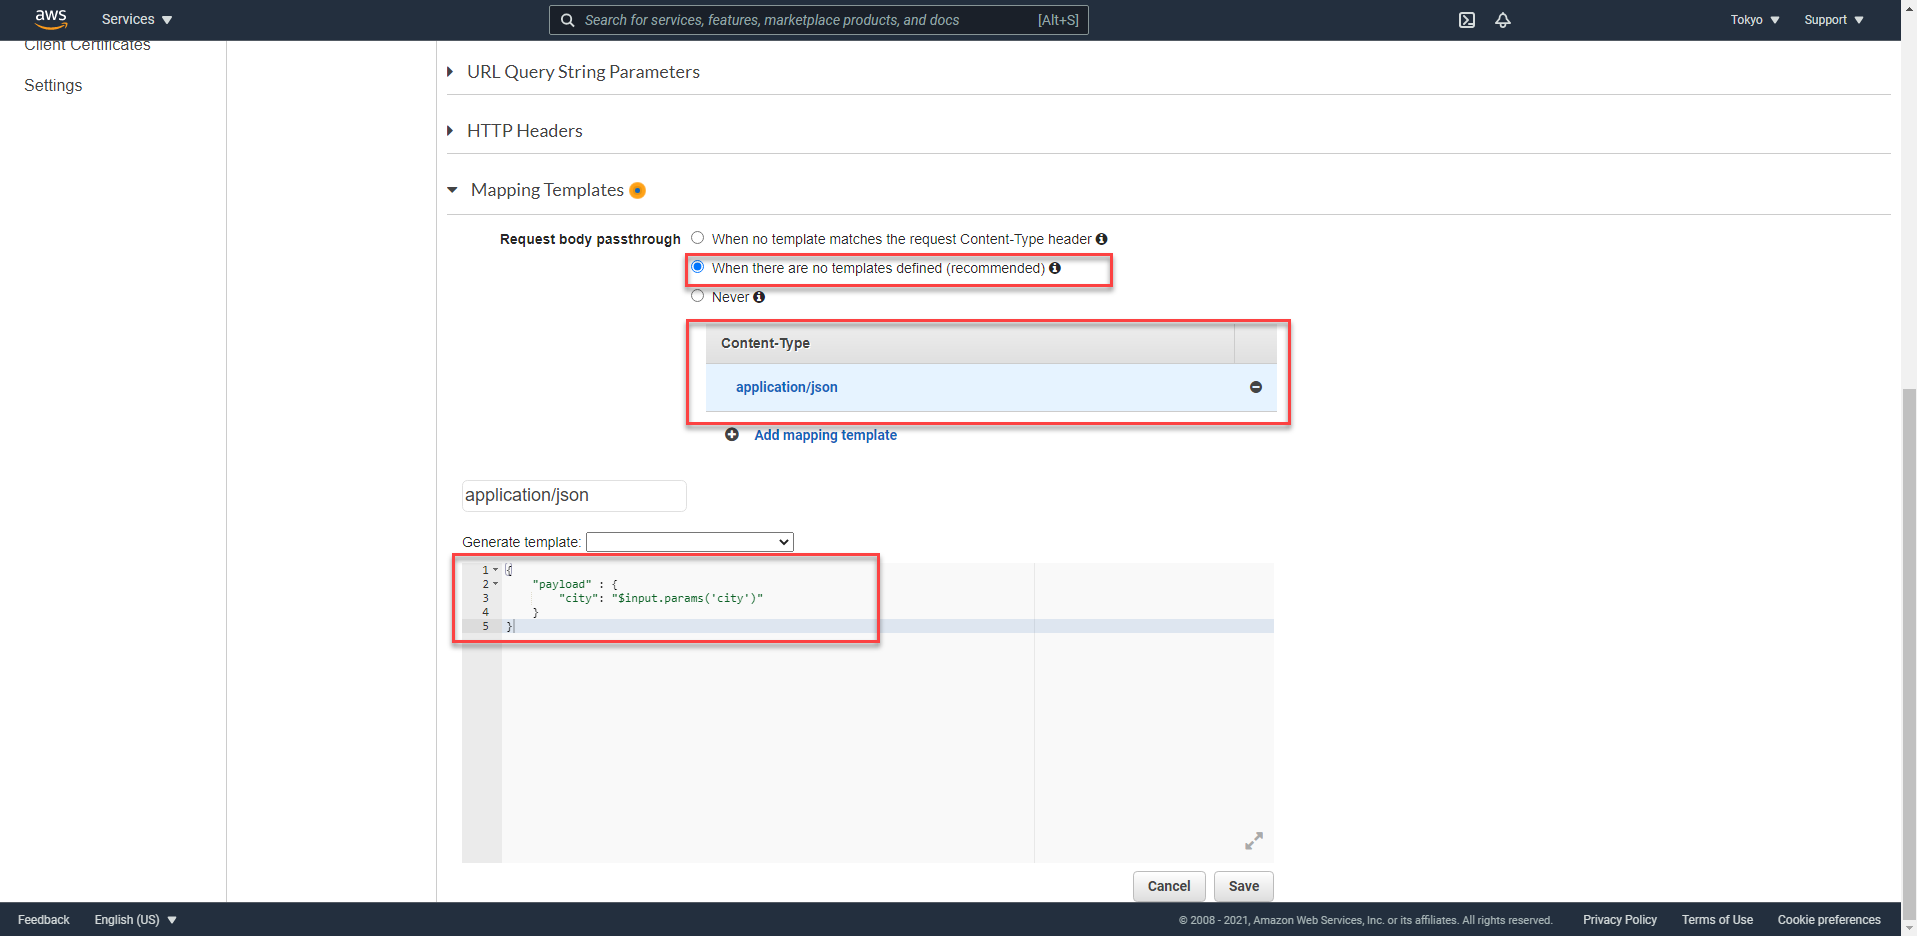
- In the /tripsfromcity/{city} - GET - Method Execution panel, click Integration Request
- Scroll down to Mapping Templates and open the section by clicking on the triangle to reveal the panel
- Select the When there are no templates defined (recommended) option
- Click Add mapping template
- For Content-Type type
application/jsonand click the grey tick icon to commit the change - Scroll further down to show the mapping template entry text field. Paste in the following template:
{
    "payload" : {
        "city": "$input.params('city')"
    }
}
- Click Save.
This template will take the parameter {city} from the URL and add it into a JSON payload that is sent to the Lambda function, as a property of the payload object, just as the Lambda function expects.
The schema defined here for this Lambda function is completely arbitrary, and in your own application you could use a completely different model. The mapping template gives you the flexibility to transform the inbound data on-the-fly through the API Gateway endpoint.
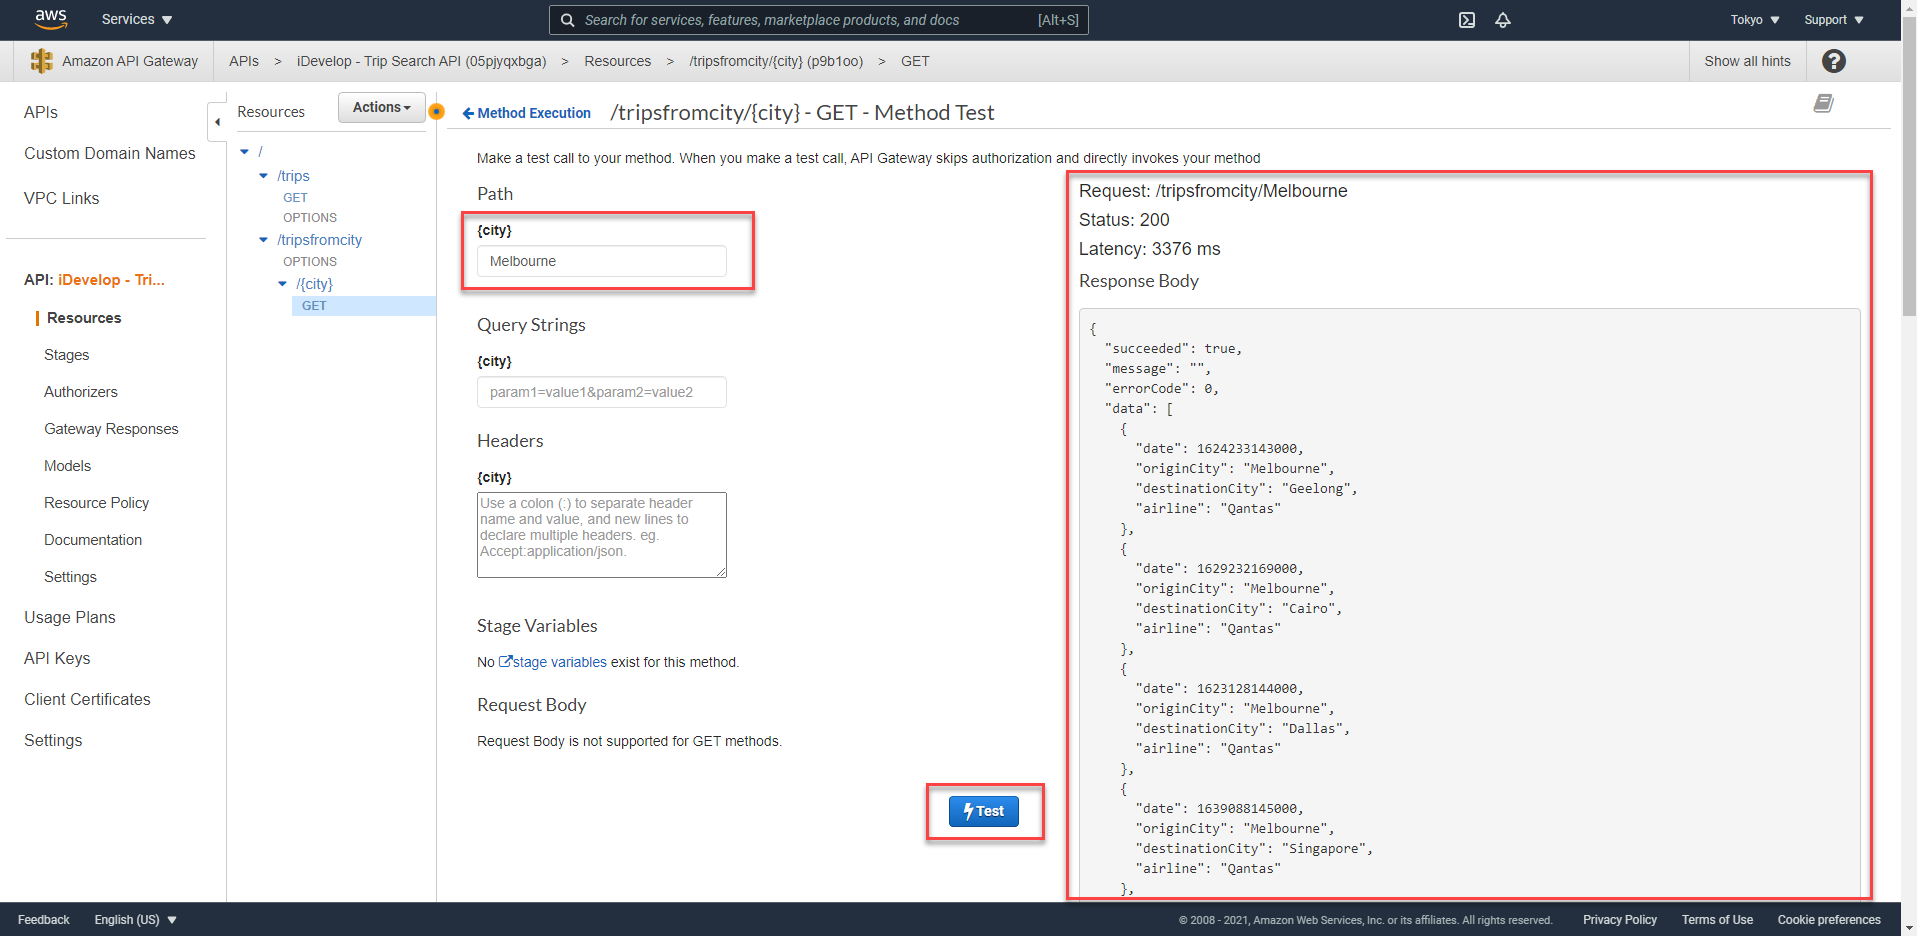
- We can now test the API call. Click Method Execution to go back to the Method Execution panel.
- Click Test to reveal the test panel
- Under Path, for the {city} parameter, type
Melbourne - Click Test
API Gateway will make the call into the Lambda function, passing the value Melbourne into the Body Mapping Template you have defined, which will insert the search parameter Melbourne into the JSON payload that is sent to the Lambda function. This will cause the function handler to consume the JSON and execute a search in the DynamoDB table, and return the results. You will see a result similar to this:
- To allow access from a web browser, you need to enable CORS - Cross-origin scripting. Click on the /tripsfromcity/{city} node and from the Actions menu, select Enable CORS.
- Click Enable CORS and replace existing CORS headers
- On the dialog that appears, click Yes, replace existing values. When each of the listed items have a green tick against them, you can move on to the next section. This will only take a moment.
Expose the /tripstocity RESTful API endpoint
Next, we will expose the final resource for our Trips API, /tripstocity:
- Click the / root element in the Resources tree
- From the Actions menu choose Create Resource
- For Resource Name type
tripstocity - Check the Enable API Gateway CORS checkbox
- Click Create Resource
- Our call into the Lambda function requires a city parameter. We will follow the standard pattern for RESTful interfaces, and pass this parameter in as a URL parameter. With the /tripstocity node selected, from the Actions menu select Create Resource
- For Resource Name type
{city} - For Resource Path, delete the default and replace with
{city} - Check the Enable API Gateway CORS checkbox
- Click Create Resource
- With the /{city} node selected, from the Actions menu select Create Method
- In the dropdown list that appears, choose GET
- Click the grey tick next to the dropdown list to commit the change.
- The /tripstocity/{city} - GET - Setup panel will appear. For Lambda Region select
ap-northeast-1(or your target region) - In the Lambda Function field, type
idevelopto reveal the available functions in the region and selectidevelopTripSearchToCity - Click Save
- In the dialog that appears regarding adding permissions to Lambda, click OK
- When the method is created, you will see the Method Execution panel, as before for the /trips resource. We can’t go ahead and test the API call just yet, because we need to transform the request through API Gateway so that the city parameter is passed through to the Lambda function correctly.
The devlounge.lambda.FindTripsToCityHandler handler expects to see the input data in this JSON format:
{
	"payload" :
	{
        "city": "Melbourne"
    }
}
This would cause the Lambda function to search DynamoDB for all trips that have Melbourne as a destination. We need to add a Mapping Template for this method in API Gateway to correctly transform the request into this format.
- In the /tripstocity/{city} - GET - Method Execution panel, click Integration Request
- Scroll down to Mapping Templates and open the section by clicking on the triangle to reveal the panel
- Select the When there are no templates defined (recommended) option
- Click Add mapping template
- For Content-Type type
application/jsonand click the grey tick to commit the change - Scroll further down to show the mapping template entry text field. Paste in the following template:
{
    "payload" : {
        "city": "$input.params('city')"
    }
}
- Click Save
This template will take the parameter {city} from the URL and add it into a JSON payload that is sent to the Lambda function, as a property of the payload object, just as the Lambda function expects.
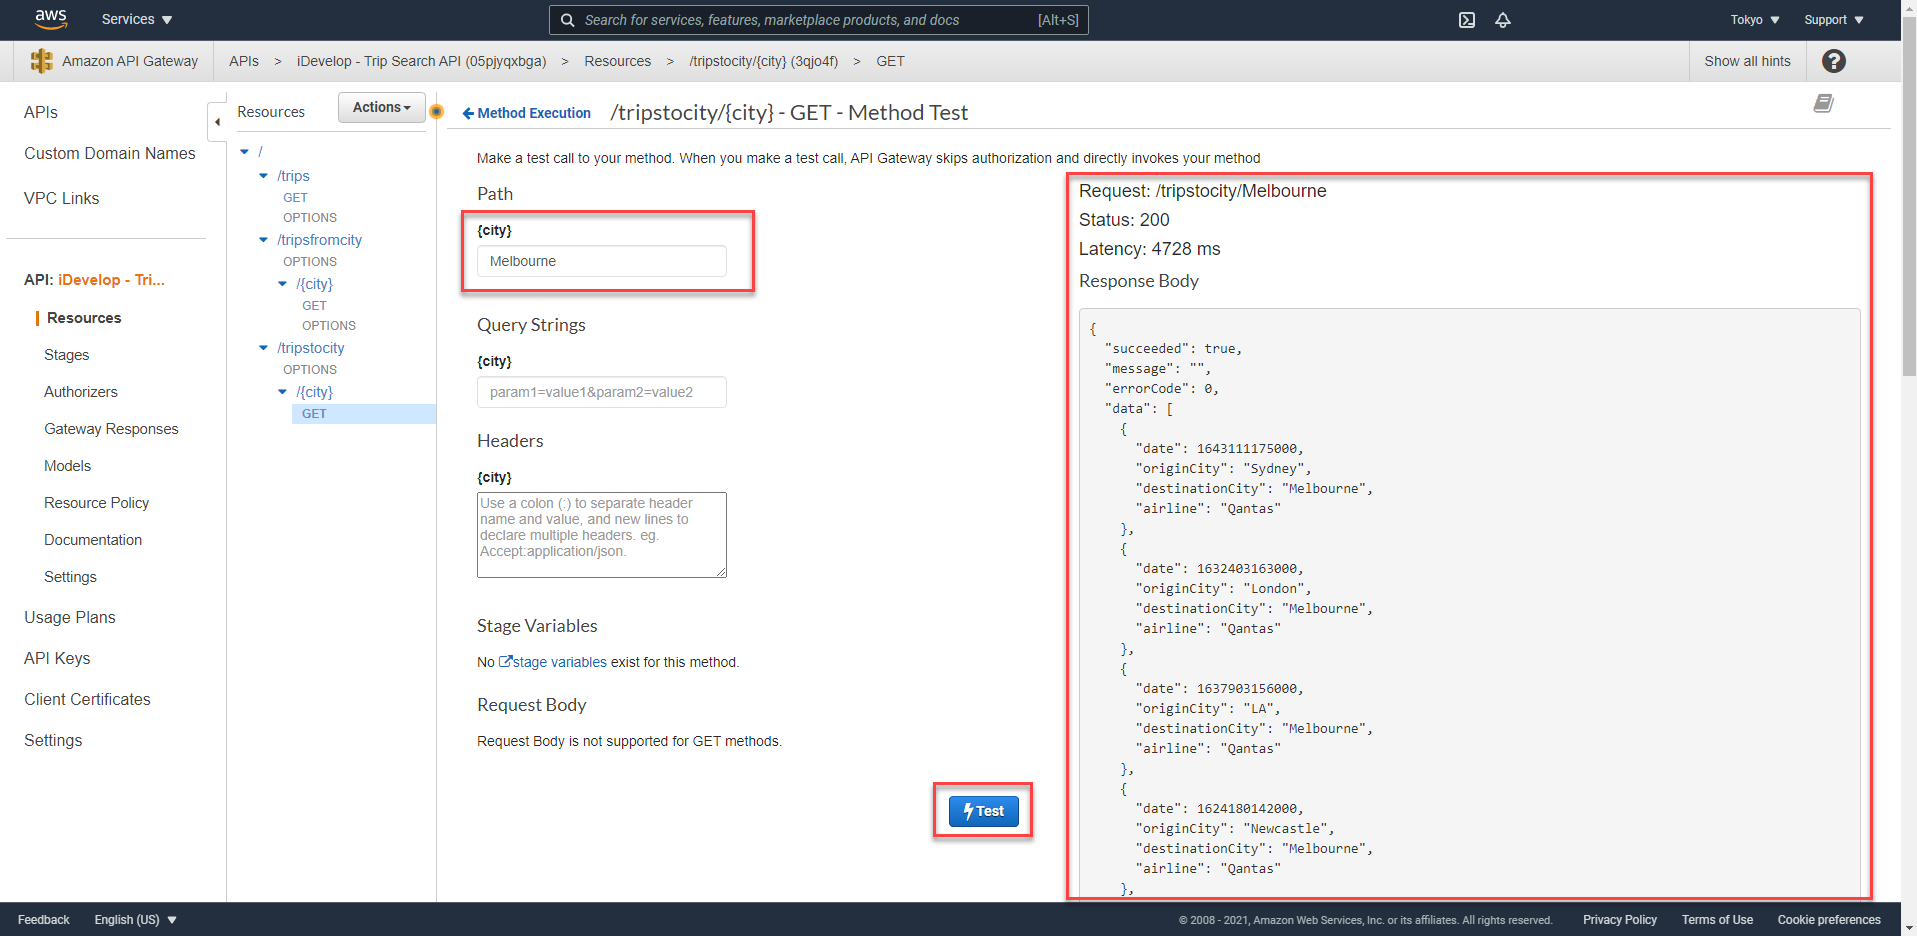
- Test the /tripstocity API call to confirm it is functioning as expected.
- To allow access from a web browser, you need to enable CORS - Cross-origin scripting. Click on the /tripstocity/{city} node and from the Actions menu, select Enable CORS.
- Click Enable CORS and replace existing CORS headers
- On the dialog that appears, click Yes, replace existing values. When each of the listed items have a green tick against them, you can move on to the next section. This will only take a moment.
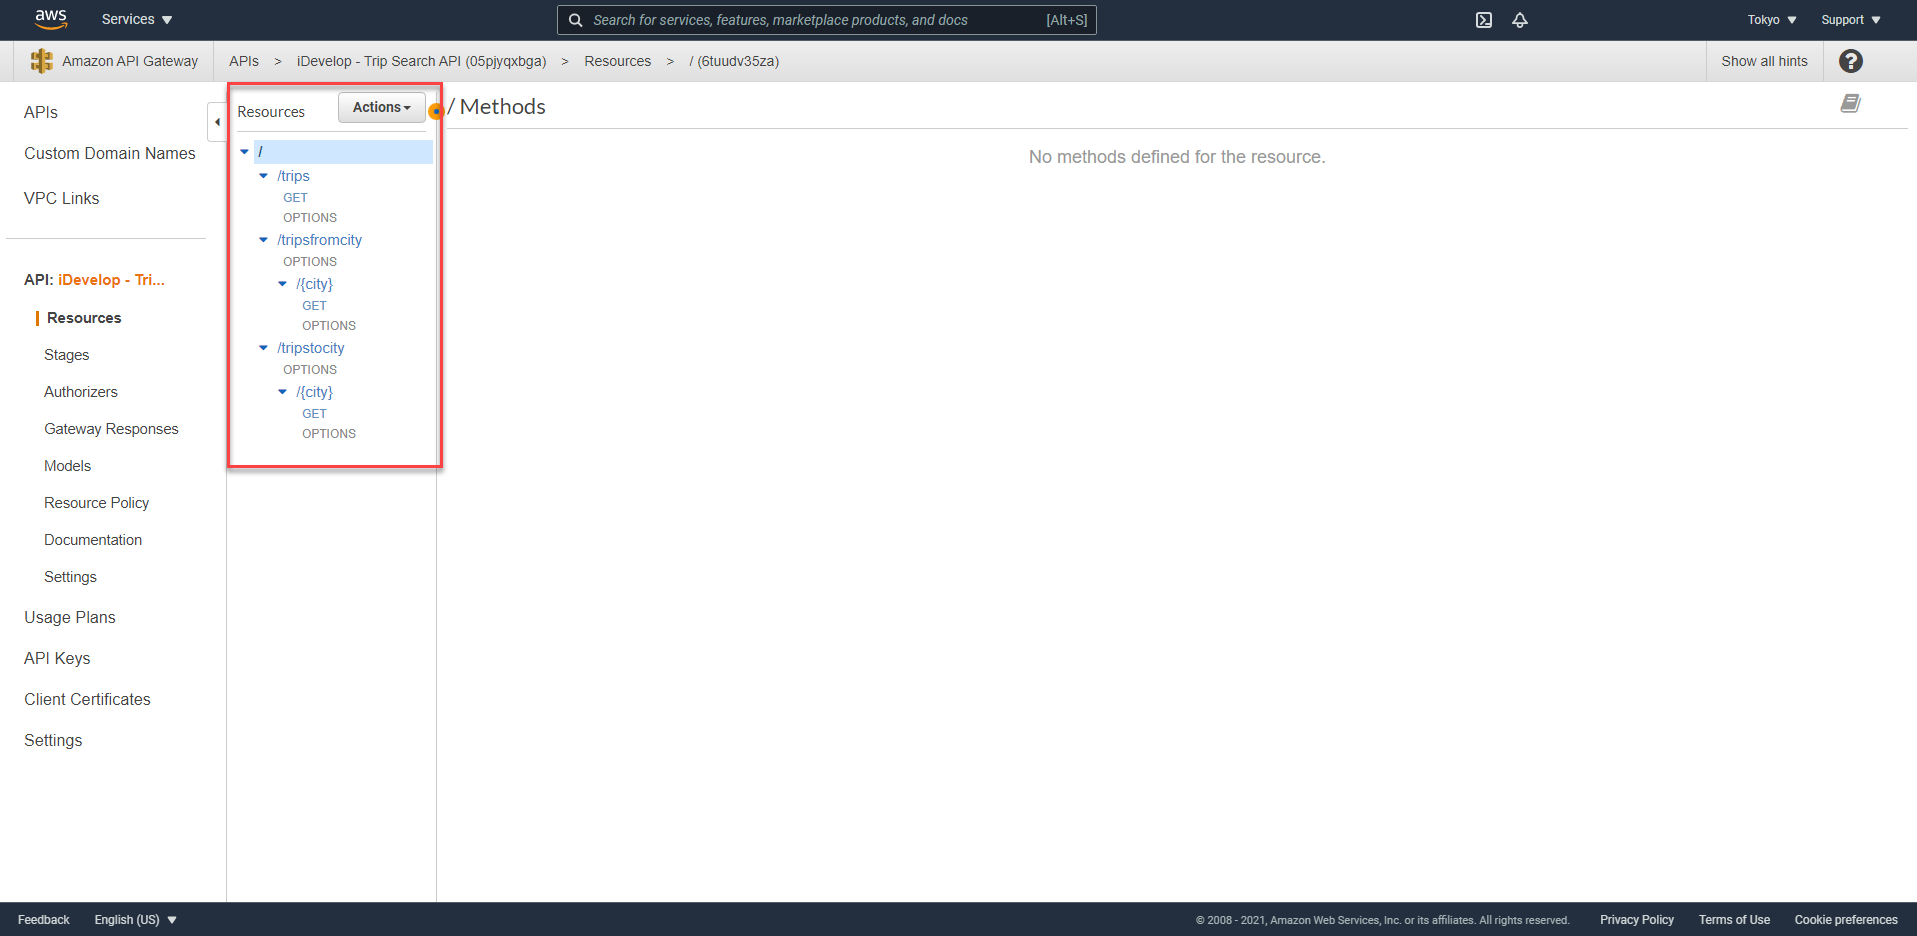
If you have completed the steps above as described, you will have a resources tree that looks like this:
Deploy the API and test
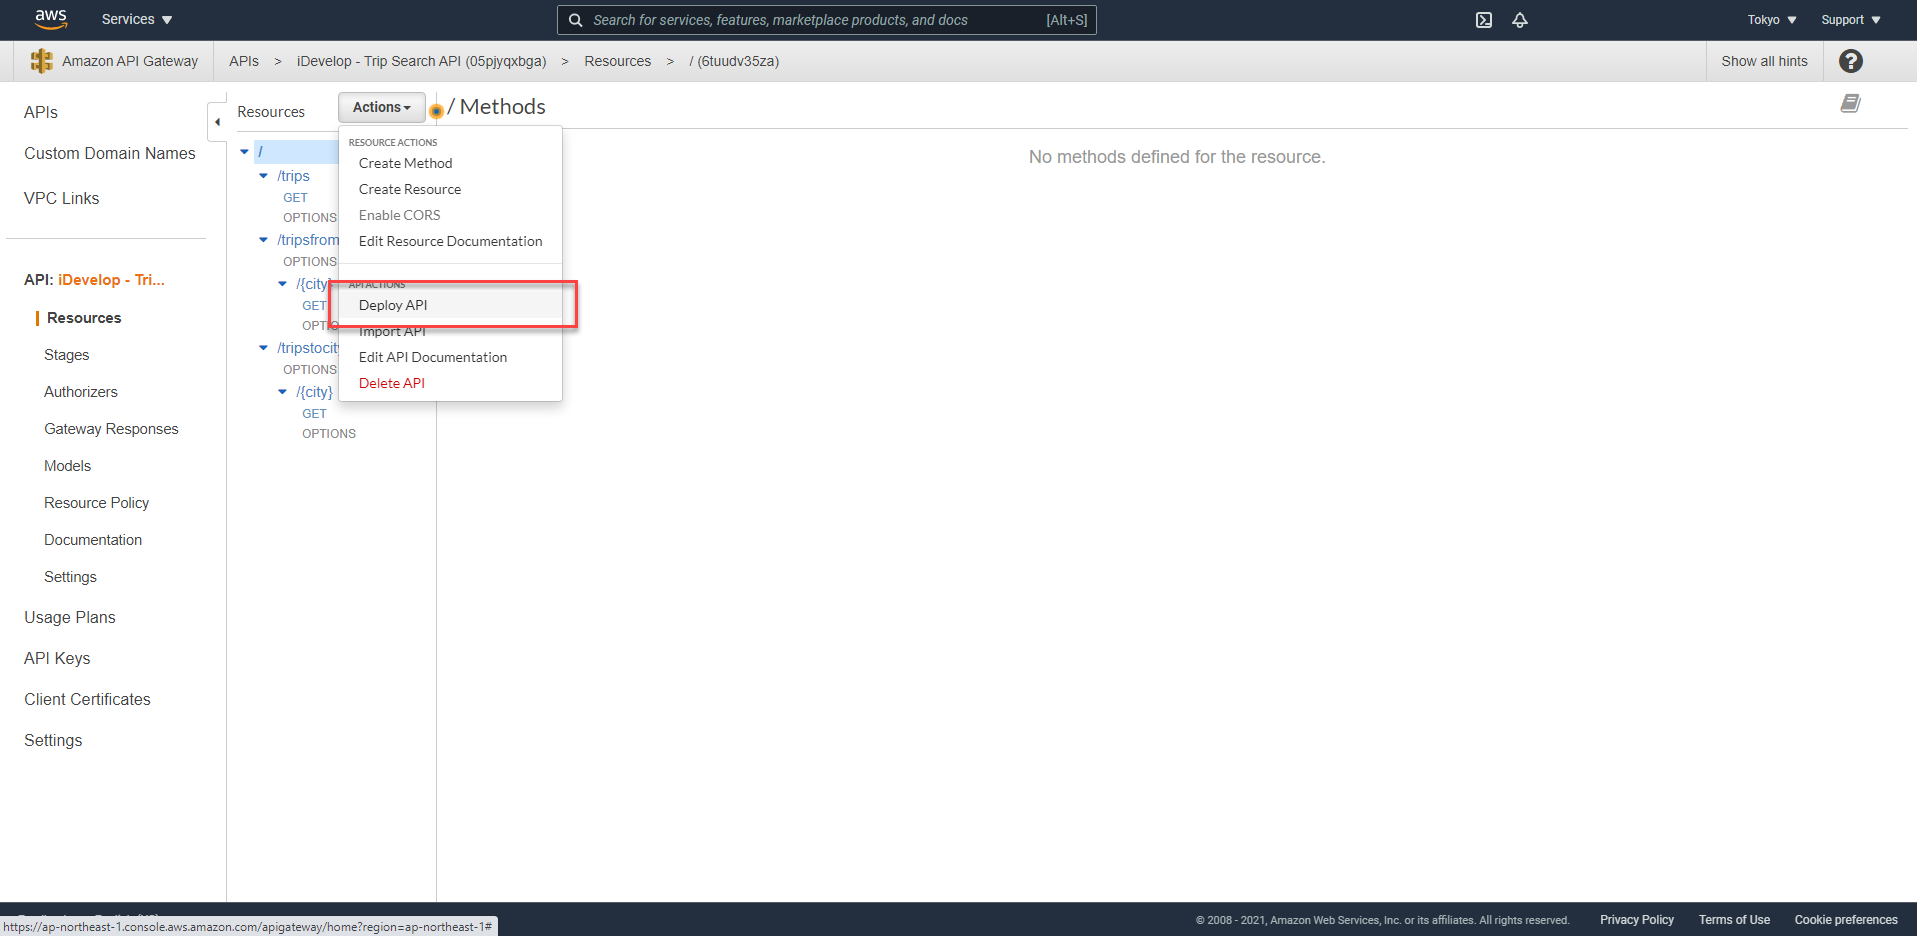
- Now that you have confirmed that the microservices are functioning correctly, you are ready to deploy the API and test it from the publicly available endpoint. Click the / root element of the API and click the Actions button.
- Select Deploy API
- In the Deploy API dialog that appears, for Deployment stage choose
[New Stage]to create a new deployment stage. - For Stage name type
prod - For Stage description type
Trips API - For Deployment description type
Initial deployment - Click Deploy
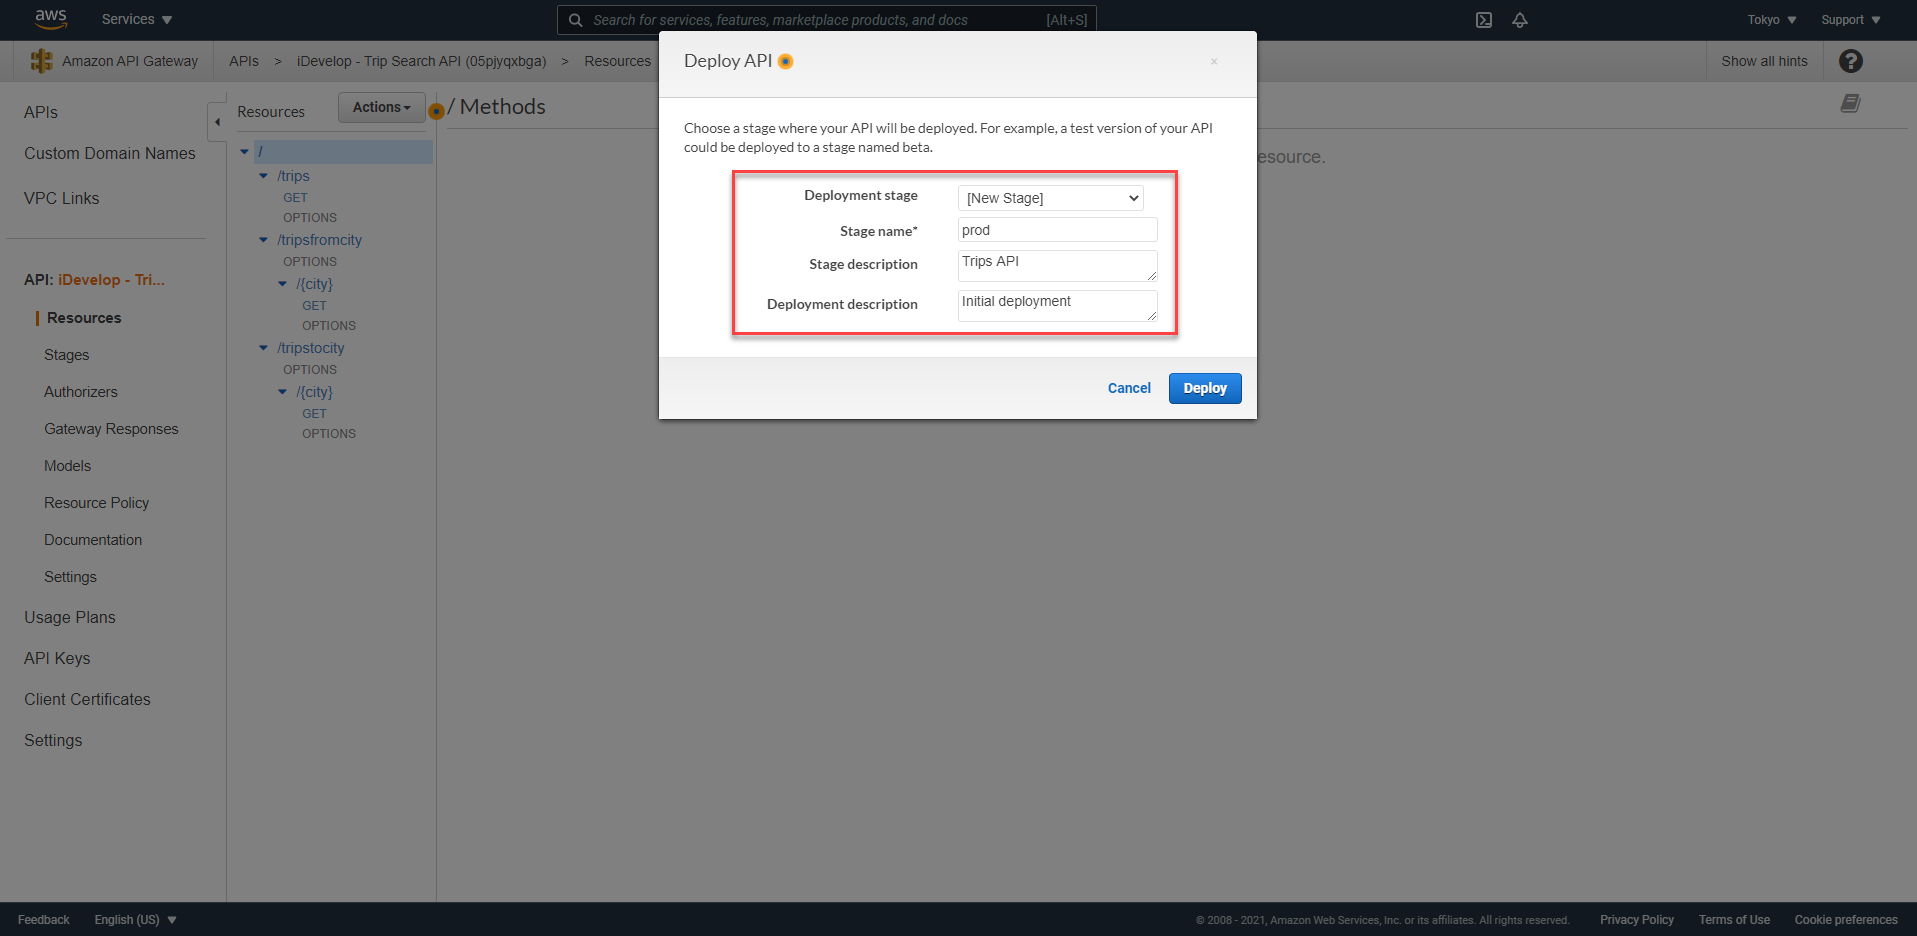
The new stage prod will be created and you will see the prod Stage Editor
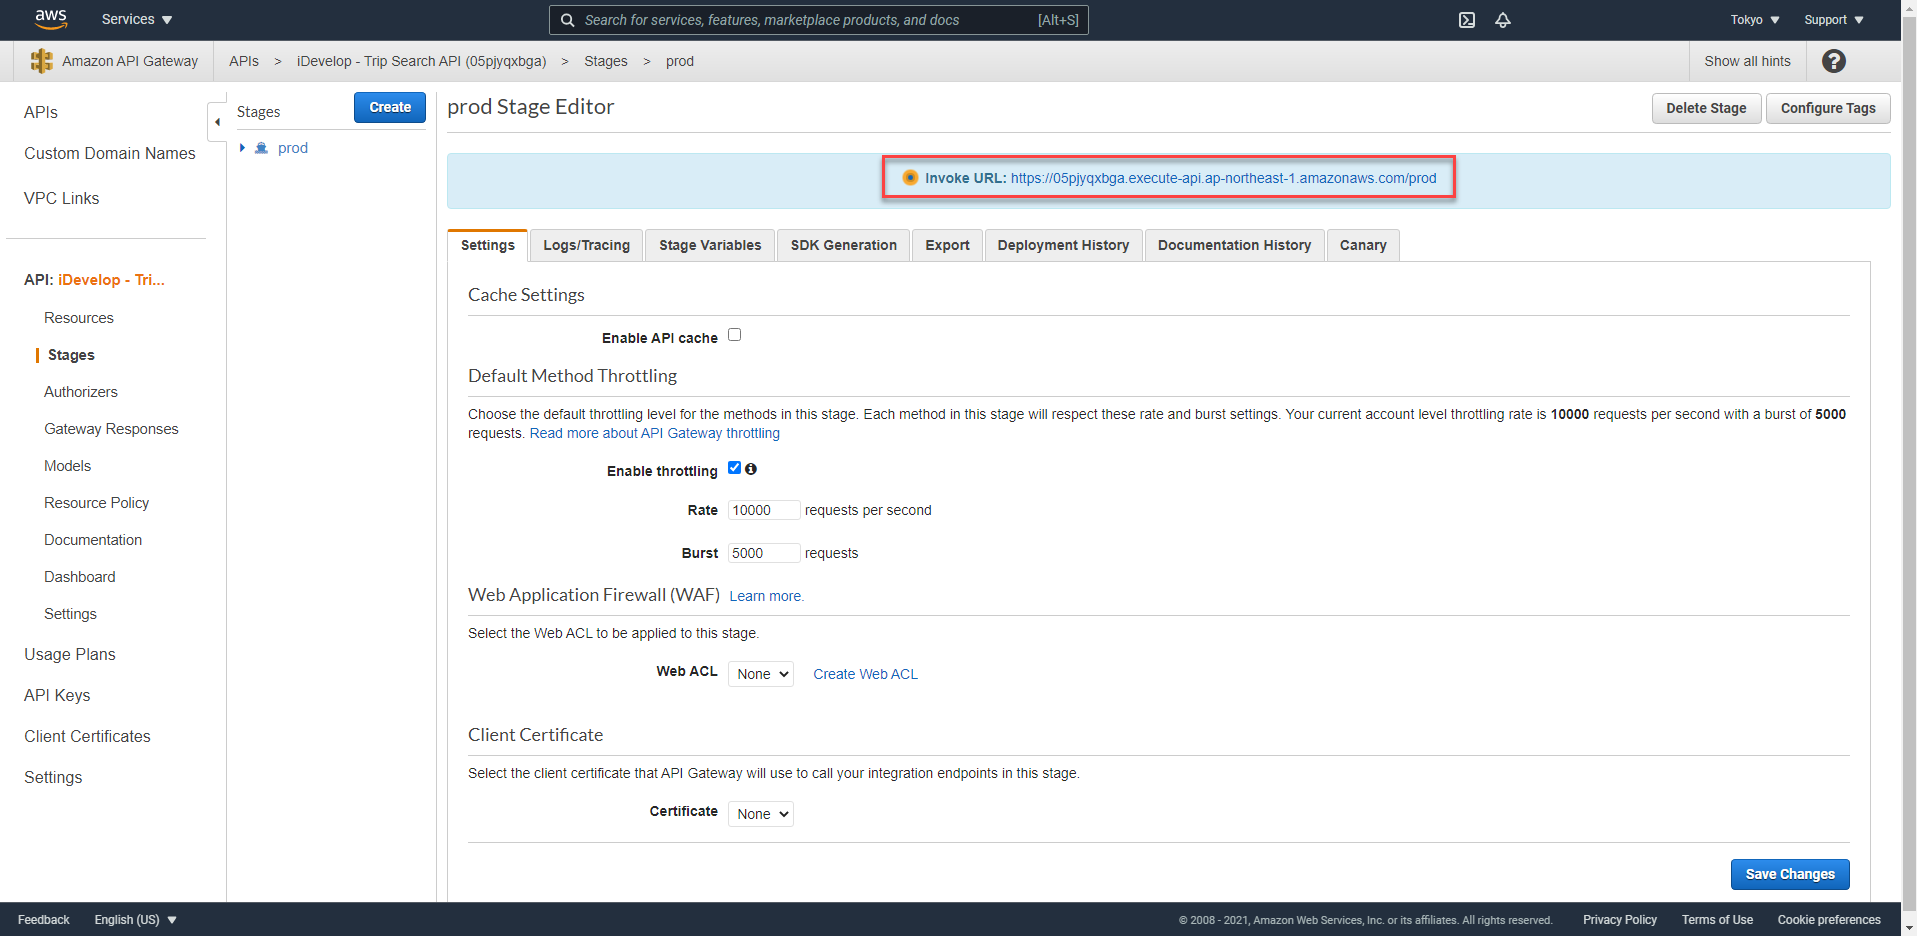
- Click the Invoke URL link. A new window will open and hit the stage endpoint. You will see an error message stating
{"message":"Missing Authentication Token"}. This is because there is no handler for the root of the stage - you have only defined resources/methods beneath the /trips, /tripsfromcity and /tripstocity paths. Edit the URL in the URL bar of the browser and append /trips then press Enter. The page will refresh, and then display all of the available trips as JSON. The output will be similar to this:
{
	"succeeded": true,
	"message": "",
	"errorCode": 0,
	"data": [{
		"date": 1511866019000,
		"originCity": "Dallas",
		"destinationCity": "Santigo de Chile",
		"airline": "Qantas"
	}, {
		"date": 1514831014000,
		"originCity": "London",
		"destinationCity": "Melbourne",
		"airline": "Qantas"
	}]
}
- Test the other two methods /tripsfromcity and /tripstocity in a similar way, but this time, you need to provide the city to search for. For example, use
/tripsfromcity/Melbourneto search for all trips that leave from Melbourne.
If the data looks right, and there are no errors, you are ready to move on to the next exercise.
Exercise 2 - Use CloudFormation/SAM via the AWS CLI to deploy the HotelSearch microservice
In the previous steps, you manually deployed and configured the TripSearch microservice, including the Lambda functions and API Gateway resources. You will have noticed that there are quite a few steps required, and doing this manually is time consuming and prone to errors. In this step, you will use the AWS CLI and CloudFormation/SAM to deploy the HotelSearch microservice, instead of manually deploying the resources.
By using CloudFormation/SAM, many of the manual steps will be taken care of for you, streamlining the deployment process. You will still have to manually trigger the process, but the actual deployment will be automated.
The HotelSpecials microservice needs to access a MySQL database to retrieve the hotel specials data. The lab environment has automatically deployed and seeded a database for you, and the connection details are provided in Cloudformation Outputs tab with instructions below on where to update the placeholder in the template you will use to deploy the microservice. The MySQL instance has been deployed using Amazon RDS and is not publicly-accessible since it is launched in a private subnet. Therefore, for the Lambda function to be able to connect to the database, the Lambda function will also need to be deployed into a private subnet by enabling VPC Integration. The template.yml file provided has all the required setup to do this, you just need to update the placeholders as per the below instructions.
- The lab setup has created an S3 bucket for you to store the deployment artefact for the Lambda function for the HotelSpecials microservice. First, you need to test and build the deployment package.
Download the source code bundle from HotelSpecials.zip and explode the zip file onto your filesystem.
- In a terminal window,
cdinto the filesystem location where you exploded the HotelSpecials source code, and build the deployment artefact by issuing the following command:
mvn package shade:shade
The deployment artefact (JAR file) will be built and stored in ./target/hotelspecials-1.0.0.jar
- Locate the file
template.ymlin the HotelSpecials source code folder, and open it in a text editor such as Eclipse. Search/Replace the following placeholders with the actual values from Cloudformation Outputs tab:
- <DatabaseSecurityGroup>
- <DatabaseSubnet1>
- <DatabaseSubnet2>
- <RDSEndpoint>
Save the template.yml file once you have made the changes.
- Use the AWS CLI to package the Lambda function (from the deployment artefact you just built). Run the following command from the commandline:
aws cloudformation package --template template.yml --s3-bucket <S3BucketLambdaCode> --output-template template-export.yml
Replace the with the value shown in Cloudformation Outputs tab for the key S3BucketLambdaCodeBucketName. Do not include the *<** and *>** symbols.
The command will upload the build artefact to the S3 bucket, and then update the template.yml pointer to the code artefact on S3, and write out a new template with this update included, to a file called template-export.yml
It will take a moment or two for the upload of the artefact to complete.
- Use the AWS CLI to create and deploy a CloudFormation Change Set:
aws cloudformation deploy --template-file template-export.yml --stack-name HotelSpecialsAPI --capabilities CAPABILITY_IAM
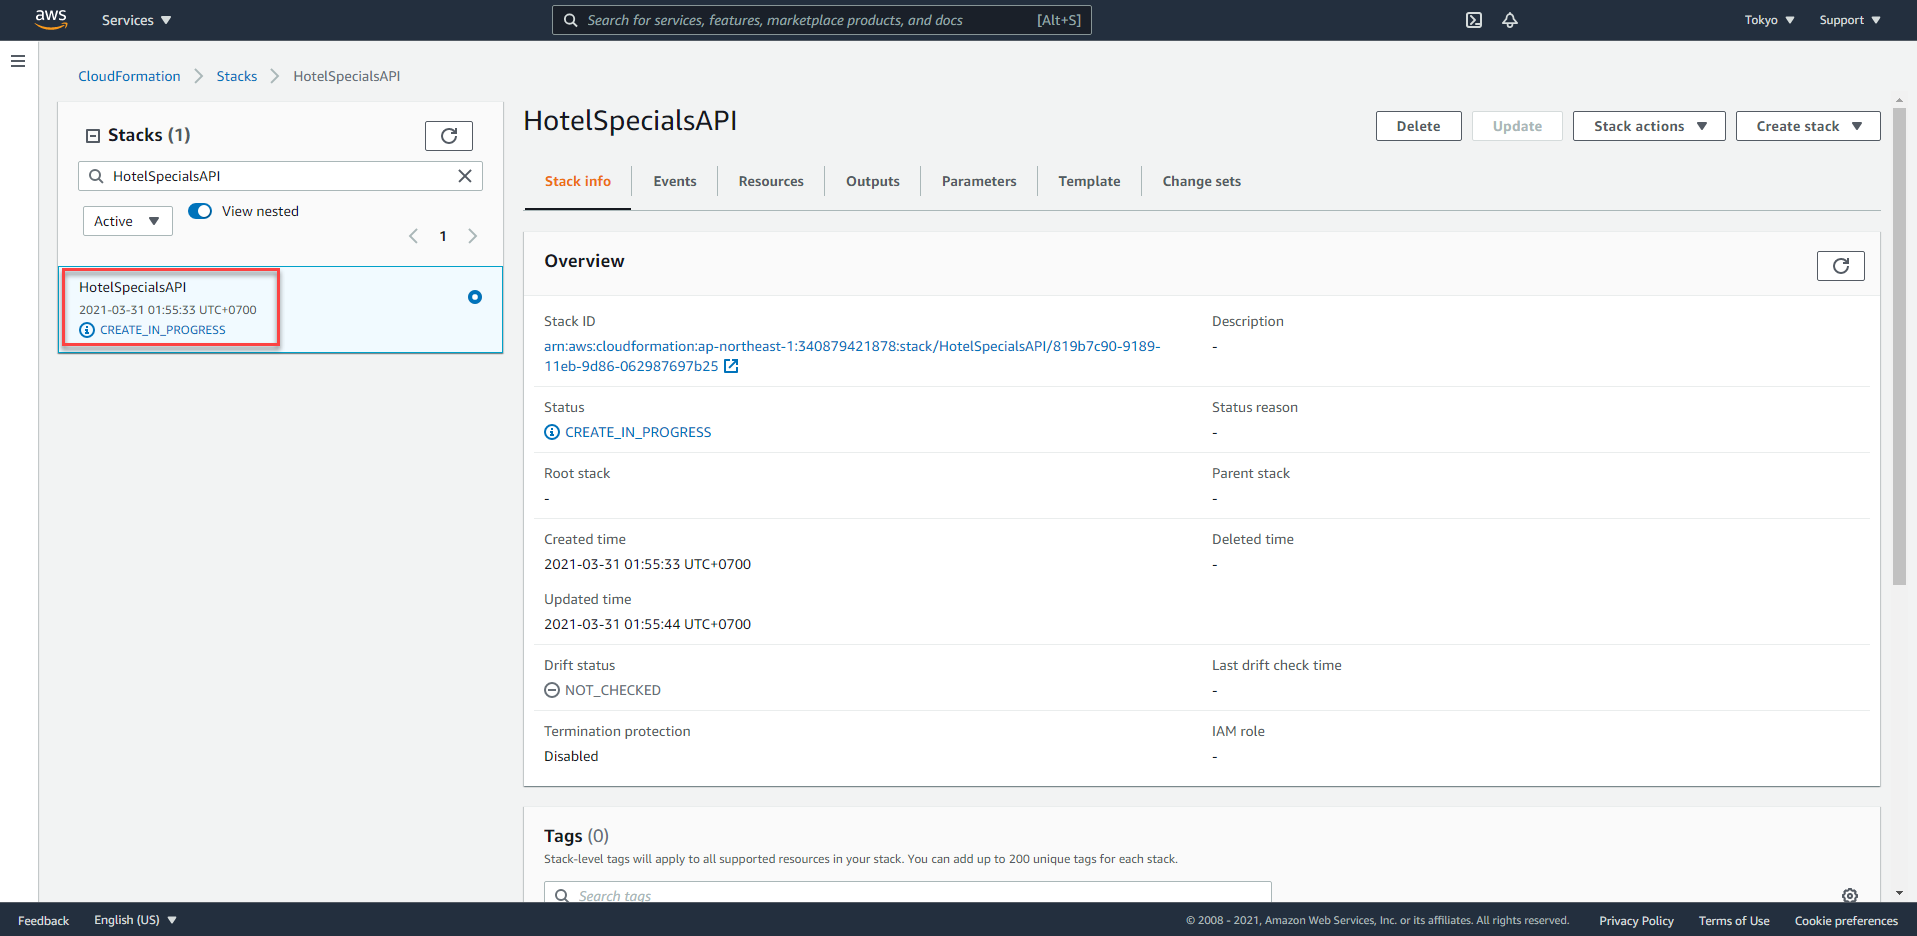
- In the web browser, open the CloudFormation console. You should see an output like this:

This indicates that the CloudFormation Change Set has been created. The command you issued will create the Change Set and then automatically execute the Change Set, so if you refresh the stack list again, you will see:
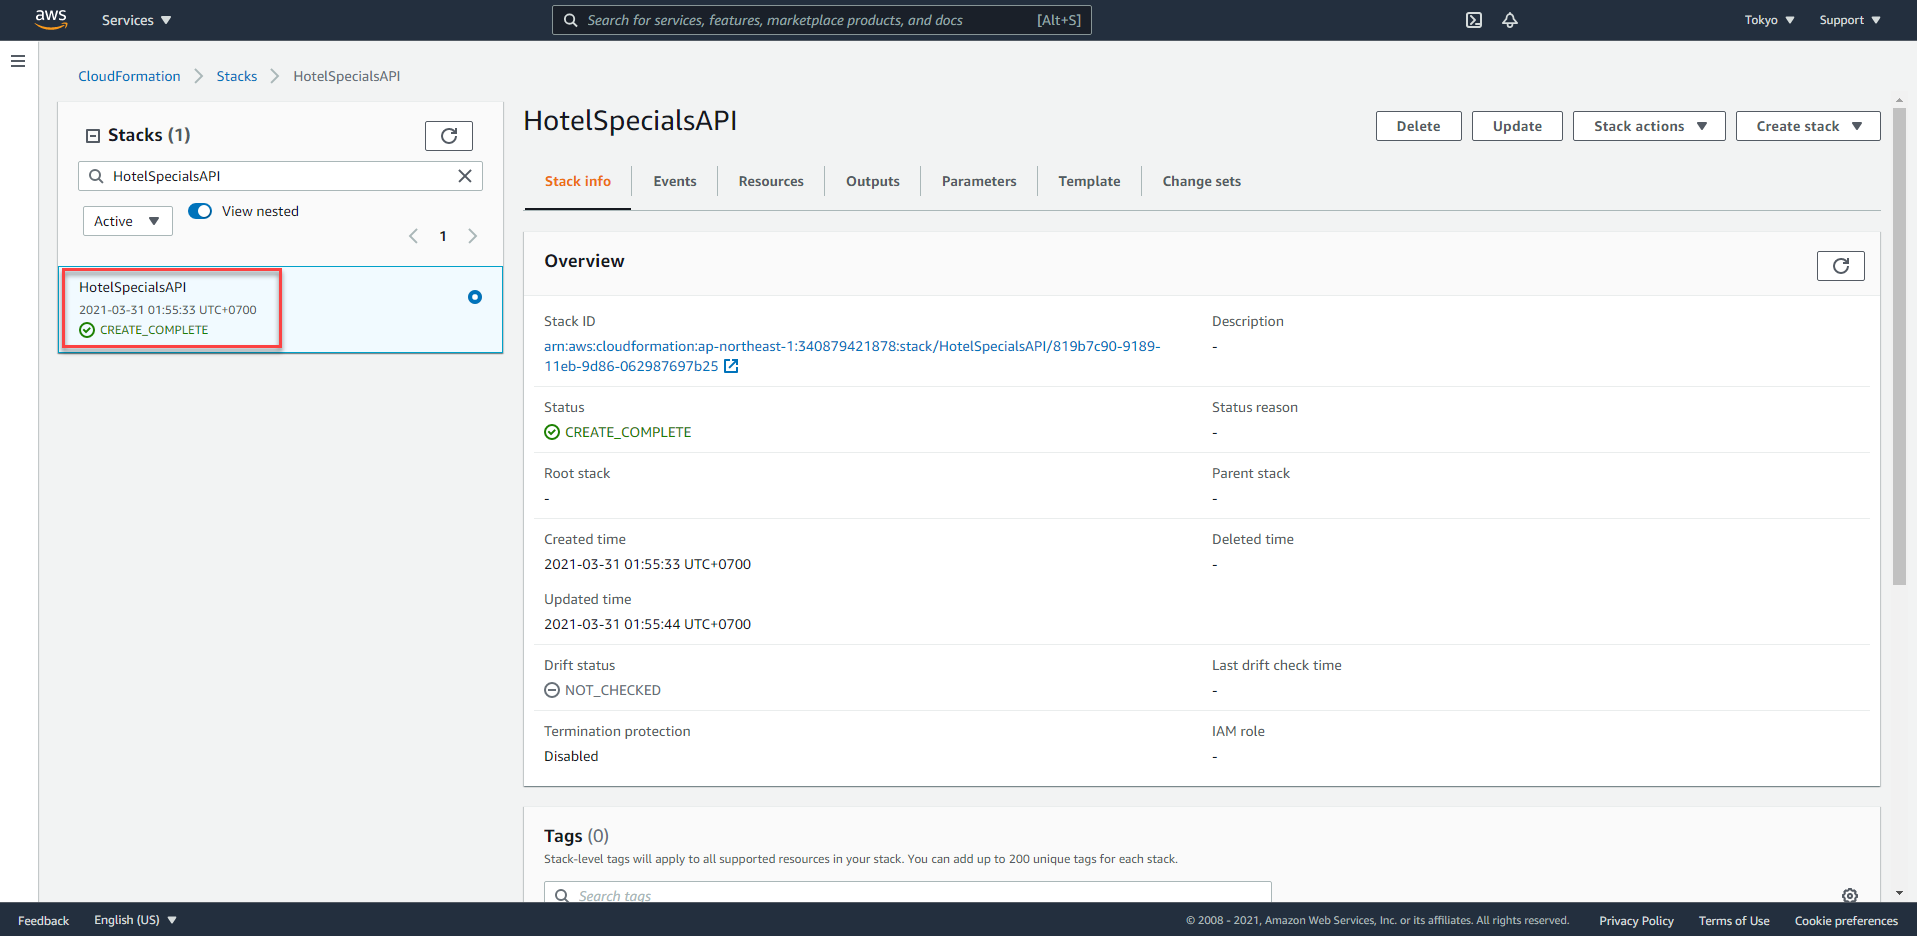
This indicates that the Change Set is being applied to the CloudFormation stack named HotelSpecialsAPI
It will take a few moments to complete the execution. If you refresh, you will eventually see:
-
Click the HotelSpecialsAPI stack’s check box to highlight it, click the Events tab and review the steps that the CloudFormation template has applied to your environment. These will match the resources and actions in the
template-output.ymlfile. -
When the Change Set has been executed, your HotelSpecials API has been deployed. Open the API Gateway console in the browser and under APIs, click the iDevelop - Hotel Specials API link to reveal the resources for the API:
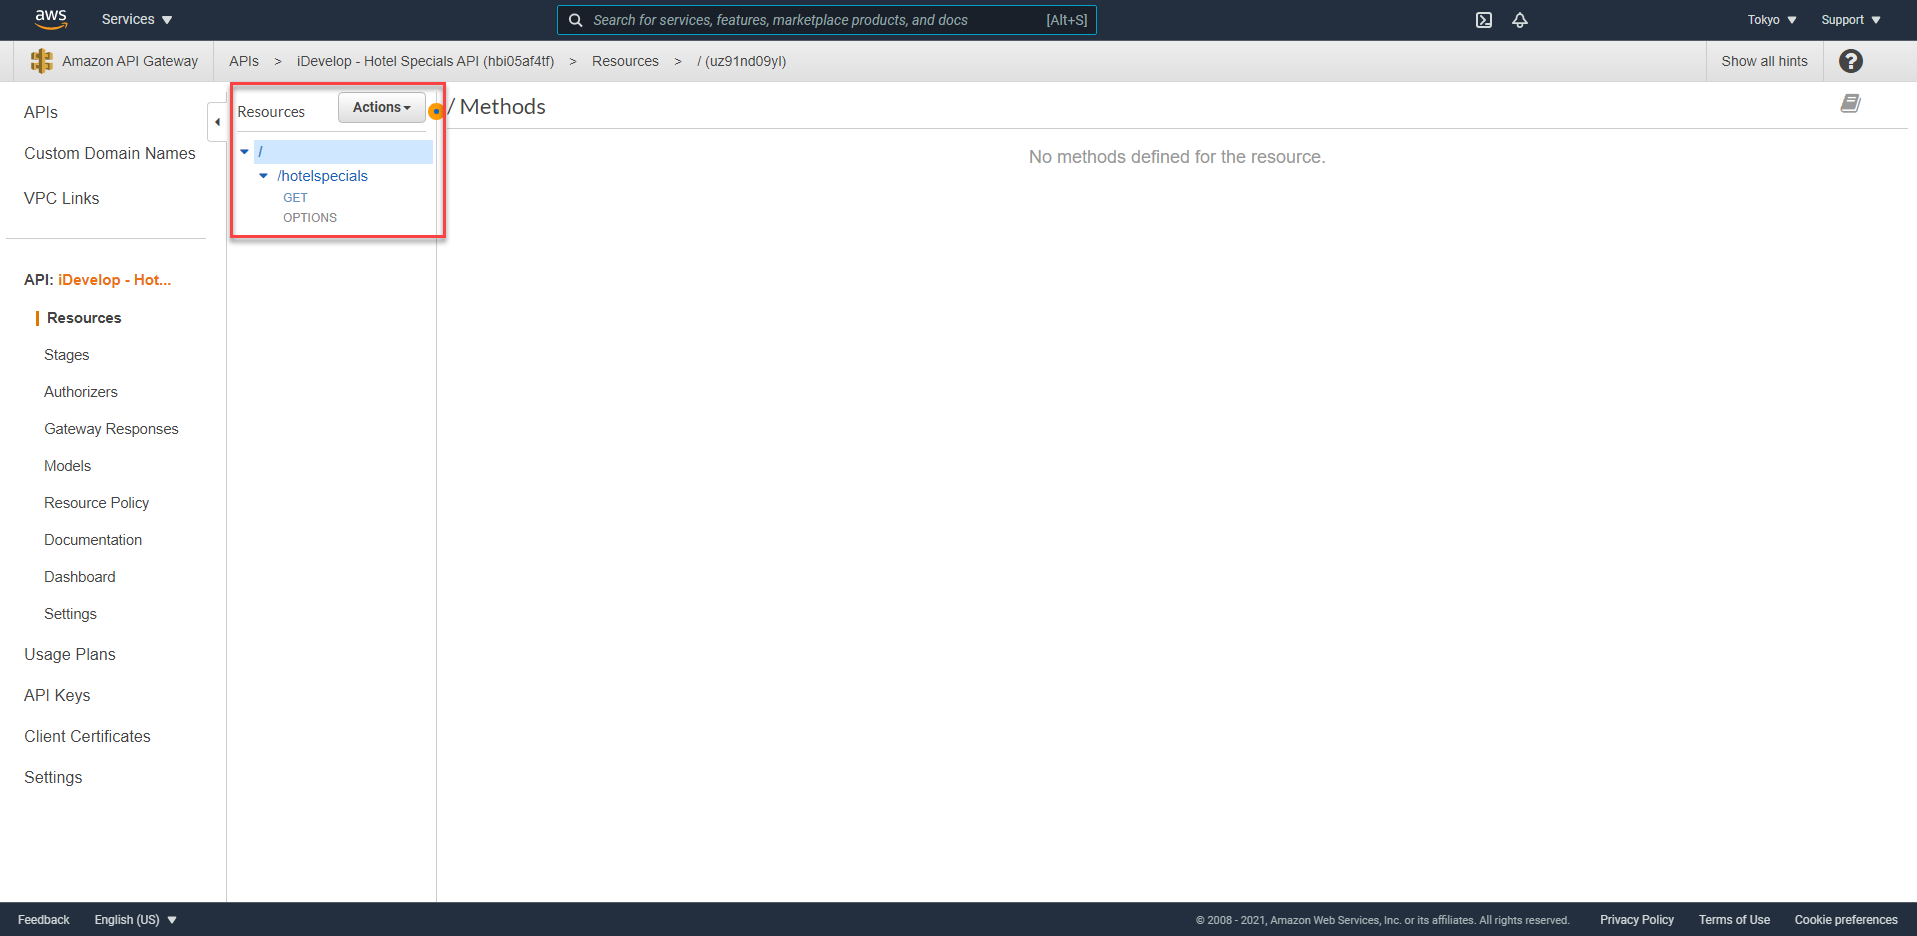
Note that a single GET method is defined, as per the template.yml CloudFormation template you deployed.
- Click on the GET method beneath /hotelspecials to reveal the /hotelspecials - GET - Method Execution panel. Click Integration Request

- The Integration Request panel will be shown. Note the Lambda Function specified:
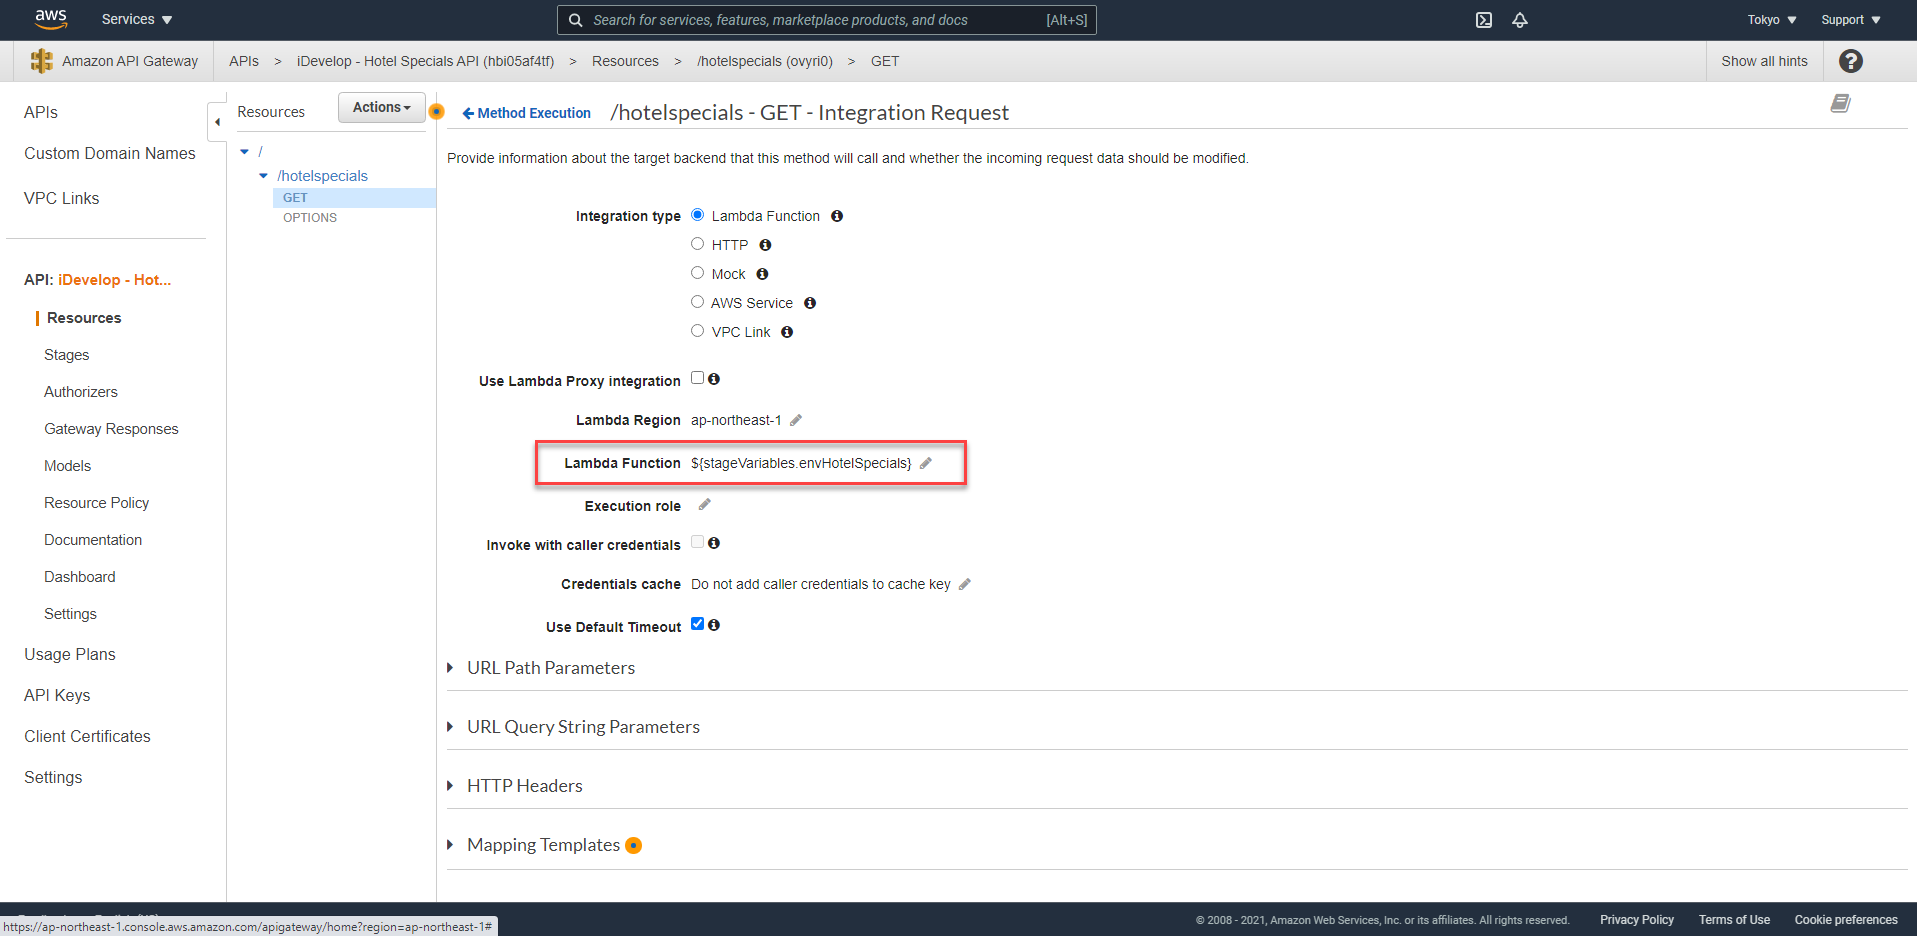
The specified value is not a Lambda function, but instead, is a Stage Variable that will be replaced at runtime by API Gateway. Therefore, in order for this API call to succeed, the Stage in API Gateway must have defined a value for the envHotelSpecials stage variable.
Click on the Stages link beneath the iDevelop - Hotel Specials API on the left:

- Click on the prod stage link
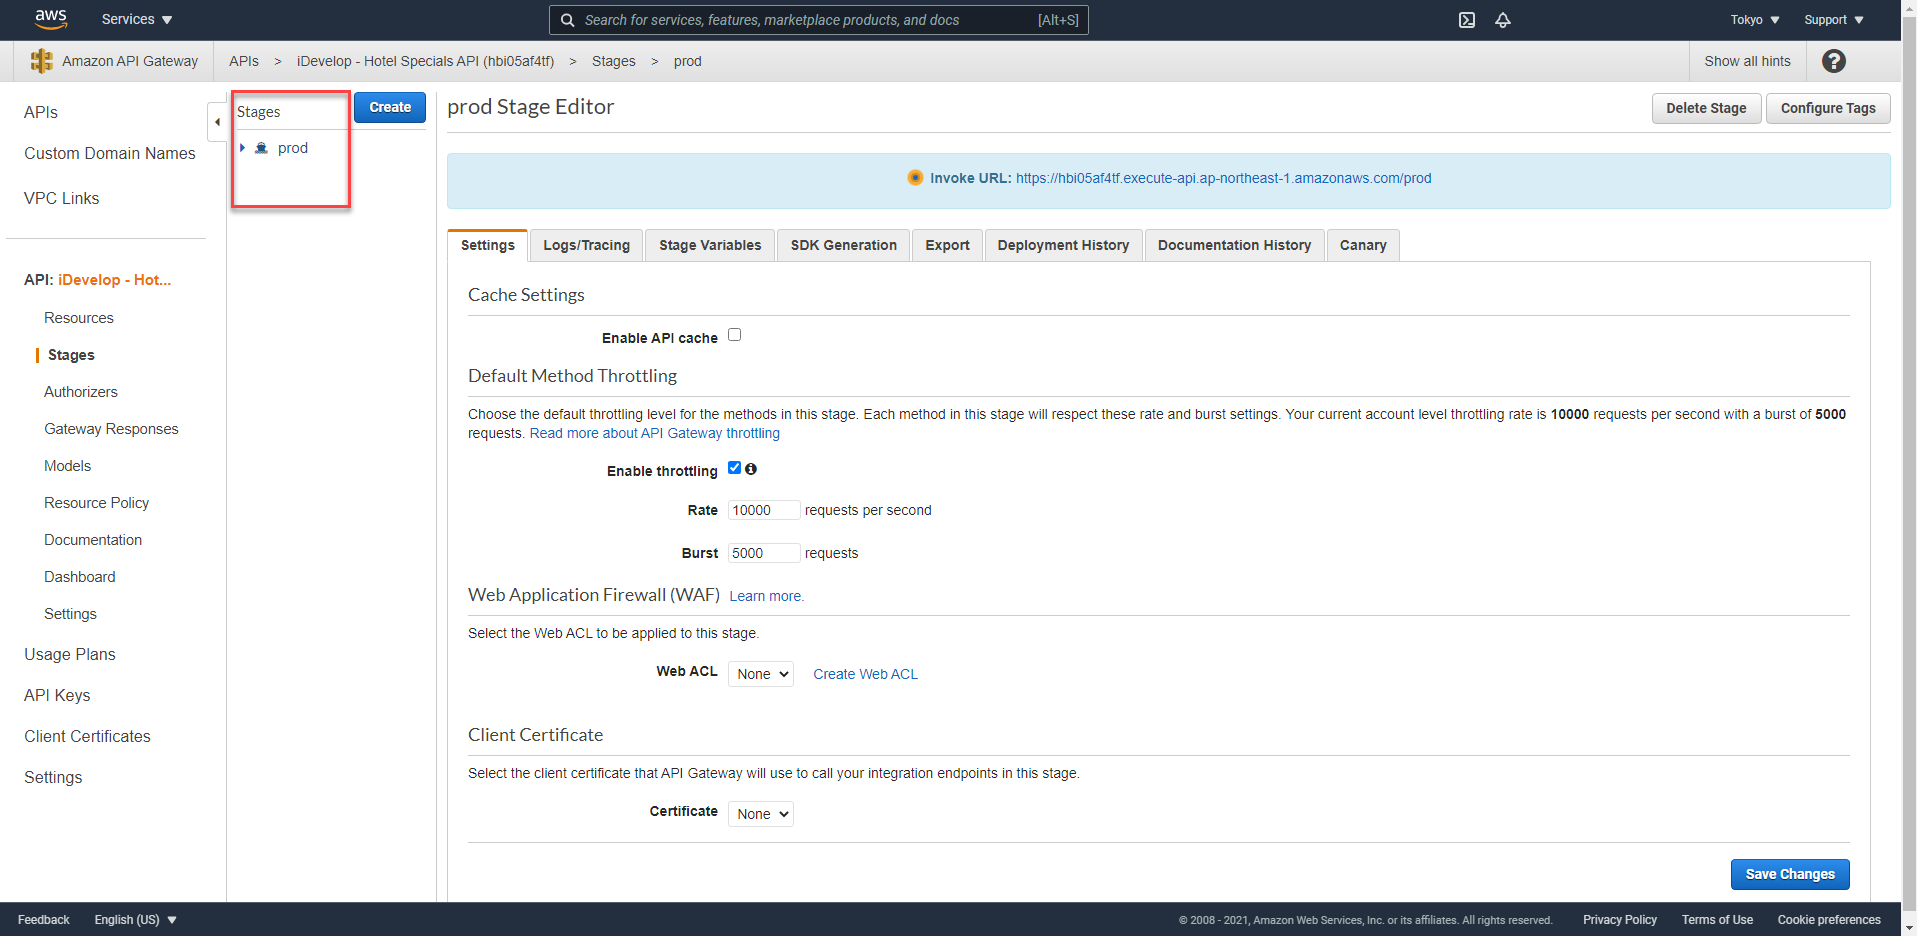
- In the prod Stage Editor click the Stage Variables tab
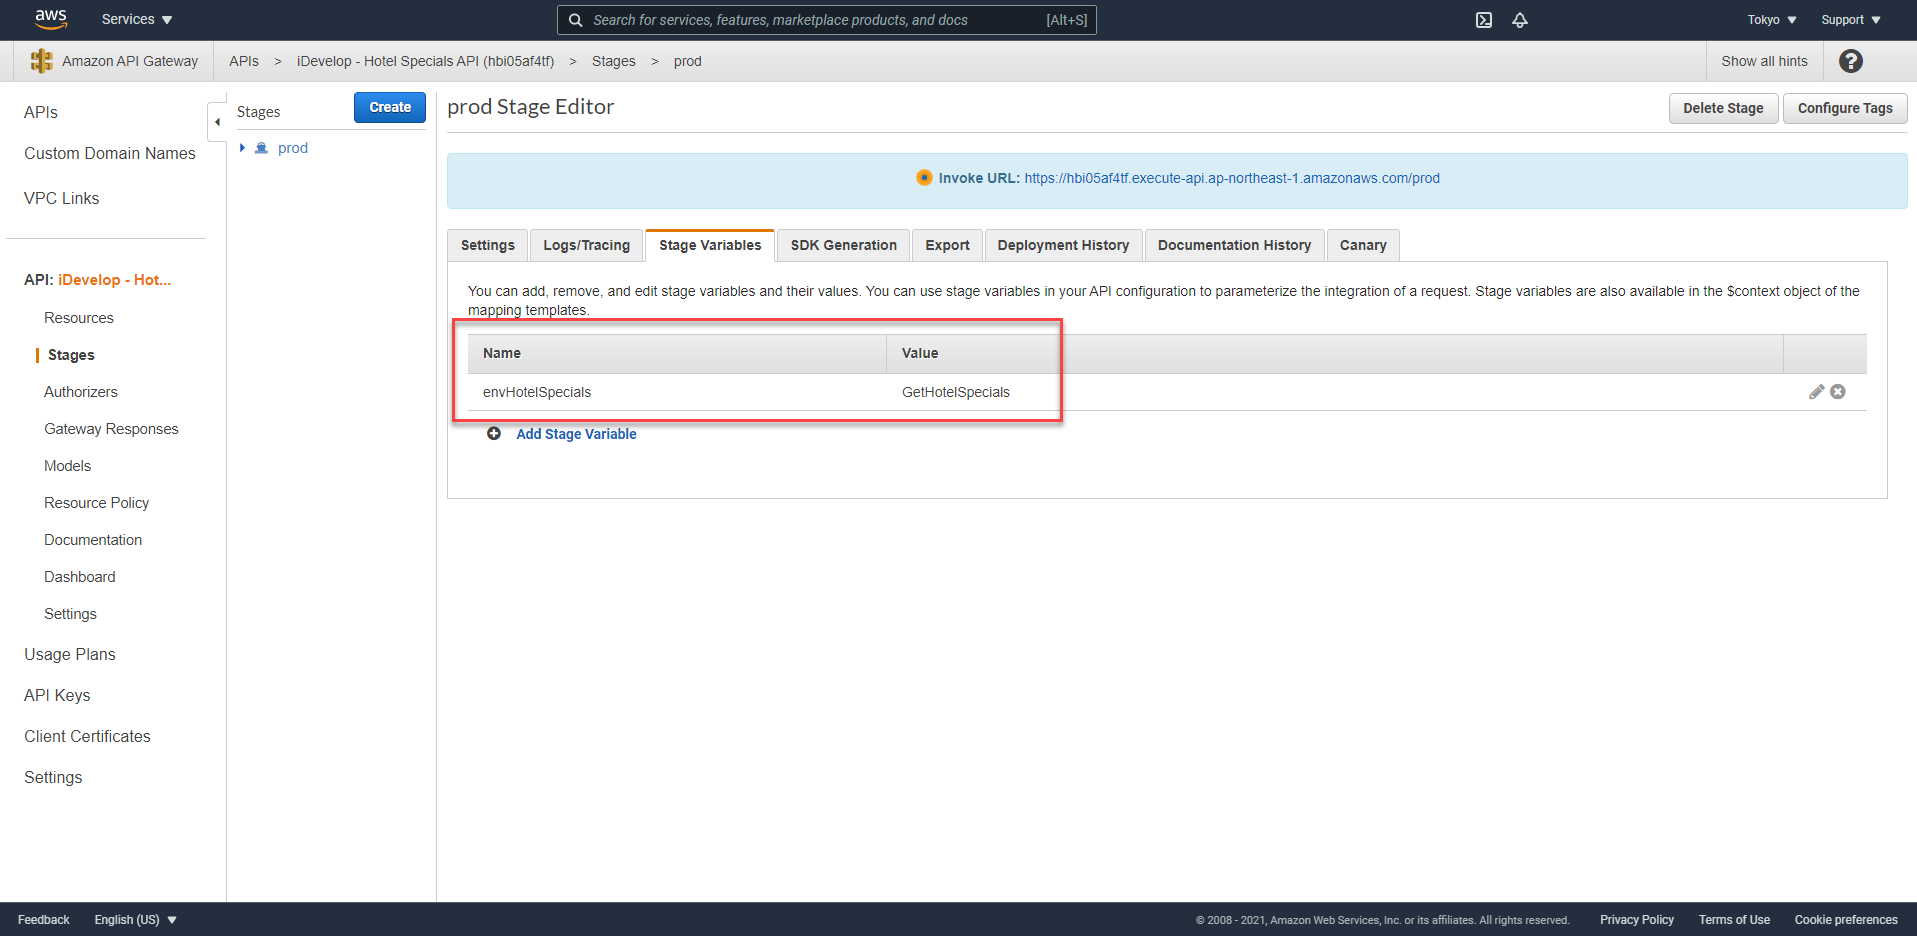
Note that a single variable is defined - envHotelSpecials - which correlates to the stage variable name the GET method was expecting. The value of the variable is GetHotelSpecials which is the name of the Lambda function that the template created using the JAR file you built and uploaded during the package/deploy process.
Using stage variables gives you a level of indirection at runtime, and also when designing your CloudFormation/SAM templates. You can update the value of a stage variable at any time without having to re-deploy the API.
Test the HotelSpecials API
You are now ready to test the HotelSpecials API.
- Expand the prod root element in the Stages list to reveal the hierarchy.
- Click on the GET method
- Click on the Invoke URL value in the prod - GET - /hotelspecials panel. After a moment while the Lambda function is initialised, you should see the JSON result of querying the mySQL database from the Lambda function.
{
	"succeeded": true,
	"message": "",
	"errorCode": 0,
	"data": [{
		"hotel": "Sommerset Hotel",
		"description": "Minimum stay 3 nights",
		"cost": 474,
		"expiryDate": 1504064184038,
		"location": "Sydney",
		"id": 1
	}, {
		"hotel": "Freedmom Apartments",
		"description": "Pets allowed!",
		"cost": 501,
		"expiryDate": 1504068564781,
		"location": "Sydney",
		"id": 2
	}]
}
If you see a JSON payload with no errors, you have successfully deployed an API and supporting Lambda function that queries the mySQL database.
Notice how much quicker and easier that was to deploy without any manual intervention?
That is the power of automation. In the next exercise, we will take this one step further, using the (now familiar) CI/CD pipeline approach to deploy our next API.