Eclipse Environment
The next microservice we need for our TravelBuddy serverless application is the FlightSpecials API. We have seen FlightSpecials before in this course, so it should be familiar to you. It functions the same way as the HotelSpecials API in that it must be deployed with VPC integration so it can connect to the MySQL database to query for data. Instead of manually packaging and deploying this microservice, we will use CodeStar to build out a full CI/CD pipeline for us, as we have done in previous labs. So, since you have created CI/CD pipelines using AWS CodeStar a few times now, we are not going to provide you with full step-by-step instructions. If you need help, ask a Lab Assistant how to complete the tasks required to create a new CodeStar project and deploy the FlightSpecials code over the sample application provided by CodeStar.
Contents
- Create a CI/CD pipeline with AWS CodeStar
- Update placeholder parameters in the CloudFormation template
- Update the target AWS region in the swagger.yml API definition file
- Check changes into source control to trigger a deploy
- Test the FlightSpecials API
Create a CI/CD pipeline with AWS CodeStar
- Create a new AWS CodeStar Web Service project targeting Java on AWS Lambda. Call the project
FlightSpecialsAPI. If you need help with this task, see the CodeStar documentation. - Import the CodeStar project into the Eclipse IDE. See the documentation if you need help with this.
Remember, your Git credentials for this Lab are provided in output section of the CloudFormation template.
If using Cloud9 remember to add thegit config helpers. - Right-click FlightSpecials and save the file to your local machine. Explode the ZIP file.
- Create a new branch in git for the new implementation you are about to create. Call the new branch
new-implementation - Overwrite the implementation provided by CodeStar with the contents of the ZIP file you just exploded. We have provided a
copy_files.shscript in theFlightSpecials.zipbundle that you can use, as before in previous lab exercises. To use it, run the below command by replacingpath/to/your/working/folderE.G.:
copy_files.sh /path/to/your/working/folder
Don’t forget to use the Maven | Update Project feature of the Eclipse IDE to ‘rethink’ the project after the change to the source code.
Give CloudFormation permission to create an IAM role
As part of our microservice setup, we will be assigning a new IAM Role to our Lambda function to allow it to perform various tasks. When CodeStar created our project, it created an IAM Role that gave CloudFormation just enough permissions to deploy the Hello World example service. These permissions are not enough for our more advanced requirements. So we need to adjust the policies assigned to the CloudFormation role, to extend those permissions.
- Open the AWS IAM Console in the browser.
- Click Roles on the navigation pane.
- In the Filter box, type
CodeStarWorker-flightspecialsa-CloudFormationto locate the correct IAM Role.
If you can’t find the role, it may be too early - CodeStar may still be provisioning the pipeline and may not yet have created the role. Check the progress of the provisioning in the CodeStar dashboard.
- Click on the role to open the details panel.
- Click Attach Policy, in the Filter box, type
idevelopto shortlist the available policies. Select theidevelopCodeStarCloudFormationPolicypolicy shown in the list. This policy has been created for you by the lab setup process, and has the permissions assigned to it to allow CloudFormation to work on our behalf when creating the Lambda execution role. - Select the listed policy and click Attach Policy
Update placeholder parameters in the CloudFormation template
- The CloudFormation template
template.ymlthat was provided as part of theFlightSpecials.zipfile has some placeholder values that you need to update to match the values from your lab account before you can deploy the updates. These include Subnet Ids, Security Group Ids and the RDS Instance Endpoint, which are unique to your lab account and unknown at this stage to the template.
In the Eclipse IDE, open the template.yml file and search for each of the items in the table below in the Replace column, and replace them with the values that are found in Cloudformation Outputs tab:
| Item to replace | Description |
|---|---|
| <DatabaseSubnet1> | First network subnet for the mySQL database |
| <DatabaseSubnet2> | Second network subnet for the mySQL database |
| <DatabaseSecurityGroup> | The security group for the mySQL database |
| <RDSEndpoint> | The mySQL database endpoint |
- When you’ve completed updating the values, the VPCConfig section will look similar to this (with different values):
VpcConfig:
  SecurityGroupIds:
    - sg-858e61e3
  SubnetIds:
    - subnet-3c989d4a
    - subnet-a04255c4
Environment:
  Variables:
    JDBC_CONNECTION_STRING: jdbc:mysql://qlxx5jzrxxxby.cig0rzmdedgf.ap-northeast-1.rds.amazonaws.com:3306/travelbuddy?useSSL=false&serverTimezone=UTC&autoReconnect=true
    JDBC_UID: root
    JDBC_PWD: labpassword
Update the target AWS region in the swagger.yml API definition file
The swagger.yml file provided in the zip bundle is the definition for the API that exposes the microservice via Amazon API Gateway. It needs to be updated with details of your lab AWS Account Id and target AWS Region before you can deploy your microservice.
- In the Eclipse IDE, locate the
swagger.ymlfile and open it in the text editor - Search for the text
REPLACE_AWS_REGIONand replace it with the region you are using (for example,ap-northeast-1) - Search for the text
REPLACE_AWS_ACCOUNTIDand replace it with the your AWS Account Id. You can find your AWS Account Id in the lab dashboard. - Save the file.
Check changes into source control to trigger a deploy
- Now that you have completed updating files, you need to add the changed files to your
new-implementationgit branch and commit the files. You can use the Eclipse IDE or the commandline. In this example, we will use the commandline, but note for the final push you will need to use the Eclipse IDE since it is configured with your Git credentials, whereas the commandline has not:- Issue
git statusto review the changed code files - Issue
git add .to add in the changed files - Issue
git commit -m "Baseline implementation"to commit the changes and provide a message - Issue
git checkout masterto switch back to the master branch - Now merge the changes for your new implementation into the master branch by issuing
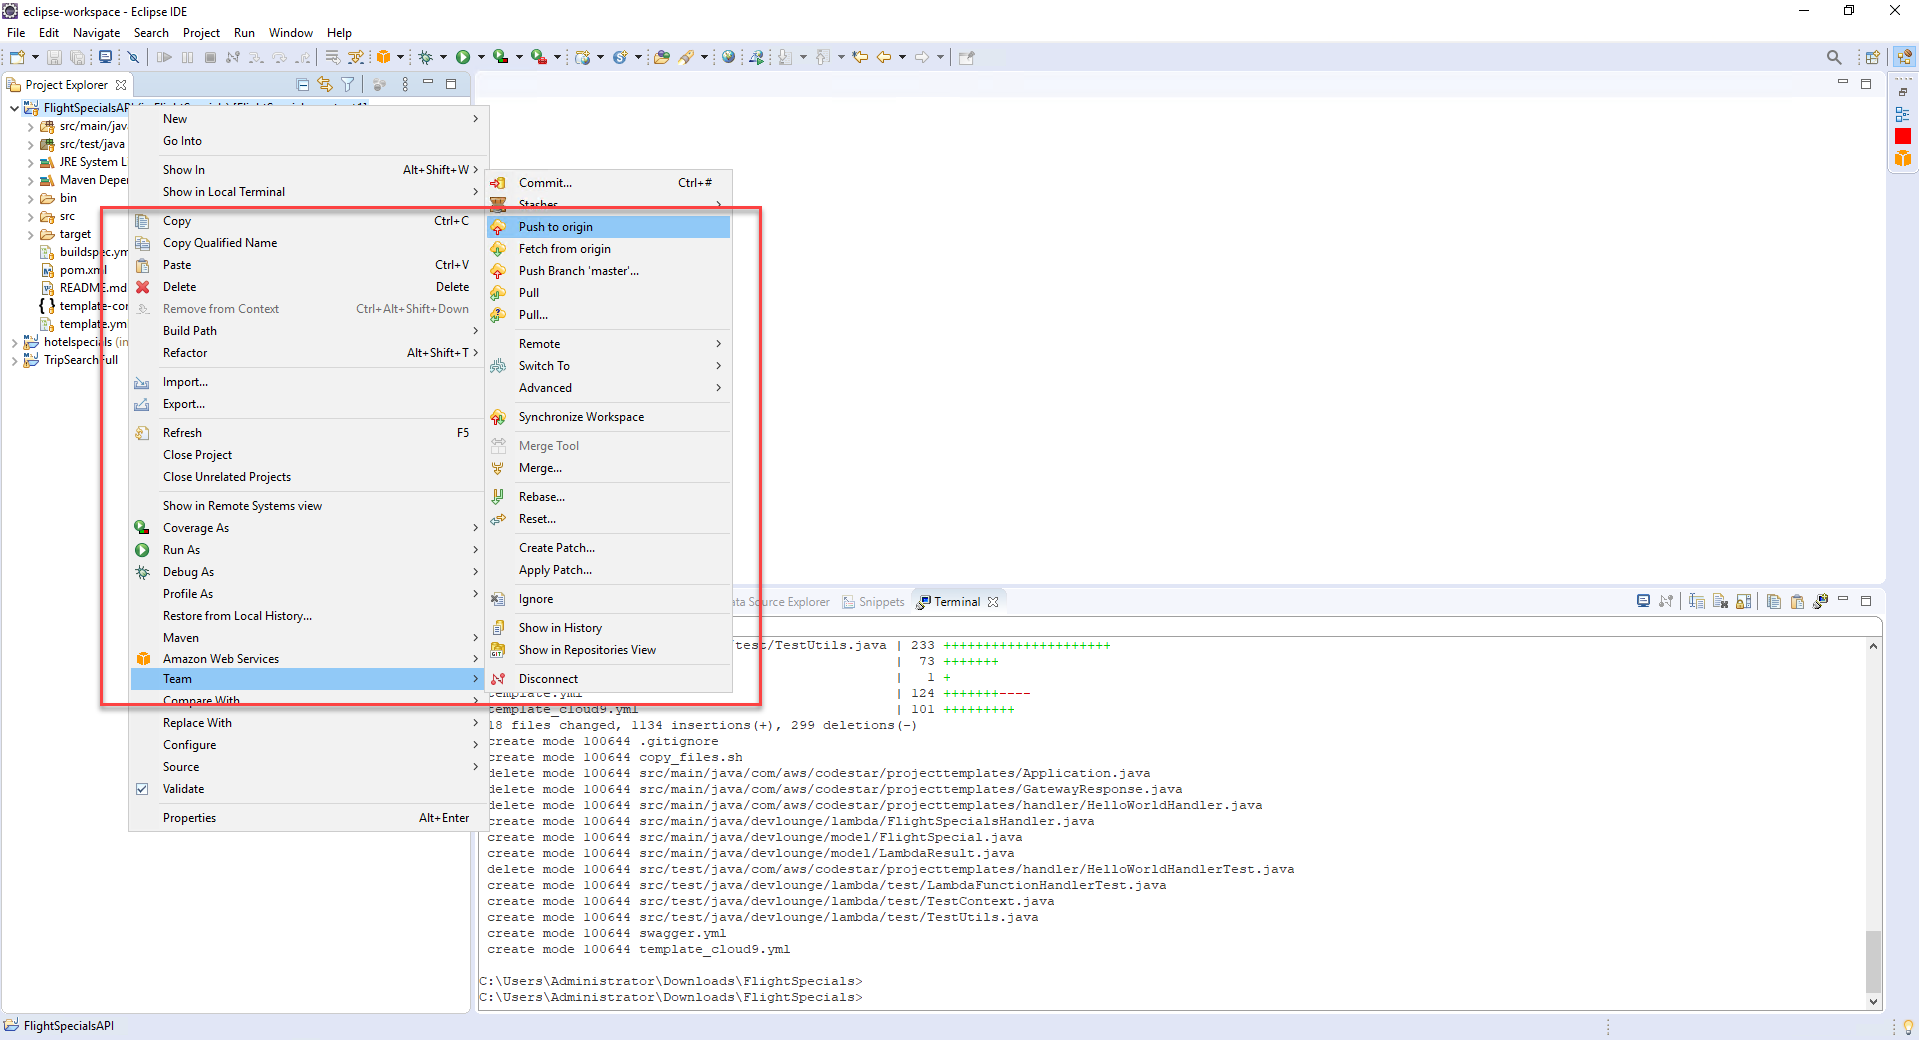
git merge new-implementation - Push the changes to CodeCommit using Eclipse by right-clicking the project root and click Team | Push to Origin…
- Issue
You need to perform the push from Eclipse because the git credentials are embedded within the Eclipse environment. You could also configure the command line environment with the git credentials but that is beyond the scope of this lab.
It will take a few moments to push the code and commence the deployment. Checking in the source code and templates will trigger the pipeline to build and deploy the new implementation. AWS CodePipeline will now use CloudFormation to deploy the following resources:
- The Lambda function implemented by the Java code you checked into CodeCommit
- IAM role for the Lambda function
- API Gateway configuration for the API
While you have some time, spend a few minutes to explore the buildspec.yml, swagger.yml and template.yml files which define the Amazon API Gateway, AWS Lambda function and the build/deployment process through AWS CodeBuild. You will notice that the builspec.yml file uses the same AWS CLI command to package the deployment that you used when you manually packaged the HotelSpecials API earlier.
Do not execute these commands below, they are here as a reference!
mvn package shade:shade
aws cloudformation package --template template.yml --s3-bucket $S3_BUCKET --output-template template-export.yml
The template.yml file uses the Serverless Application Model (SAM) transform to define the REST API, as opposed to how we approached this in the HotelSpecials API example. In HotelSpecials, the CloudFormation template used canonical CloudFormation to define the REST API so that it could be explicit about the API definition and include the swagger definition inline. The FlightSpecials example uses a more declarative approach and left the details to SAM. You are free to mix CloudFormation and SAM in the same template, as you can see from these examples.
Note that the $S3_BUCKET environment variable is automatically replaced by CodeBuild when the build step is performed, and replaced by the S3 Bucket that CodeStar provisioned when it set up the project.
Test the FlightSpecials API
You can check the status of the deployment of the code change through the pipeline back on the CodeStar project dashboard. Once the deployment has completed through the CI/CD pipeline, you are ready to test the API.
- Open the API Gateway console in the browser and under APIs, click the
iDevelop - Flight Specials APIlink to reveal the resources for the API. - Click on the Stages link beneath the iDevelop - Flight Specials API.
- Expand the prod root element in the Stages list to reveal the hierarchy.
- Click on the GET method
- Click on the Invoke URL value in the prod - GET - /flightspecials panel. After a moment while the Lambda function is initialised, you should see the JSON result of querying the mySQL database from the Lambda function. For example:
{
	"succeeded": true,
	"message": "",
	"errorCode": 0,
	"data": [
        {
            "id": 1,
            "header": "London to Prague",
            "body": "Jewel of the East",
            "cost": 93,
            "expiryDate": 1504072439813
        },
        {
            "id": 2,
            "header": "Paris to London",
            "body": "Weekend getaway!",
            "cost": 182,
            "expiryDate": 1504074888702
        }
    ]
}
If you see a JSON payload with no errors, you have successfully deployed an API and supporting Lambda function that queries the mySQL database. Notice how much quicker and easier that was to deploy without any manual intervention, and you didn’t even have to interact with the AWS CLI or Console? Everything was driven by the source control check-in process.
You are now ready to integrate these APIs with the TravelBuddy web site.