Microservice Authentication
Setting Up Authentication For The Microservice
Right now, if you click the Go! button on the web site and do not enter a city to filter, you will see a dialog with all available trips. We want to change this behaviour so that you must be logged in in order to be able to search for all trips without a filter. This is just an example to demonstrate how we could limit certain API calls to only authenticated users.
- Go to AWS API Gateway Console.
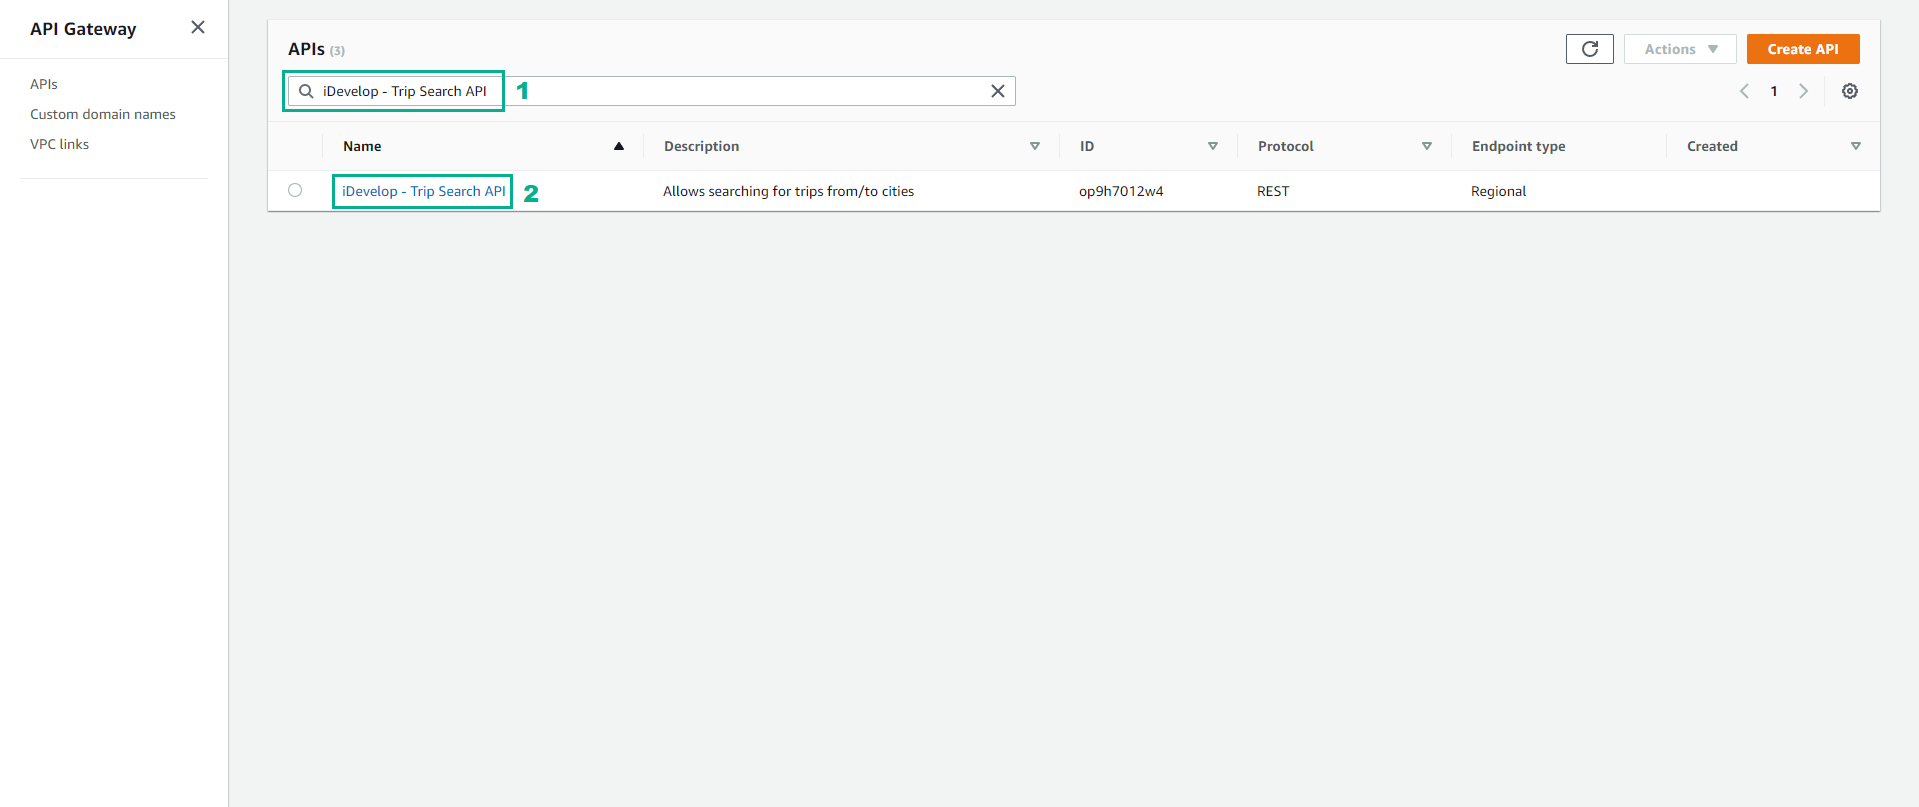
- Type
iDevelop - Trip Search APIto the search bar - Click iDevelop - Trip Search API
- Click Gateway Responses
- Select Unauthorized
- Click Edit
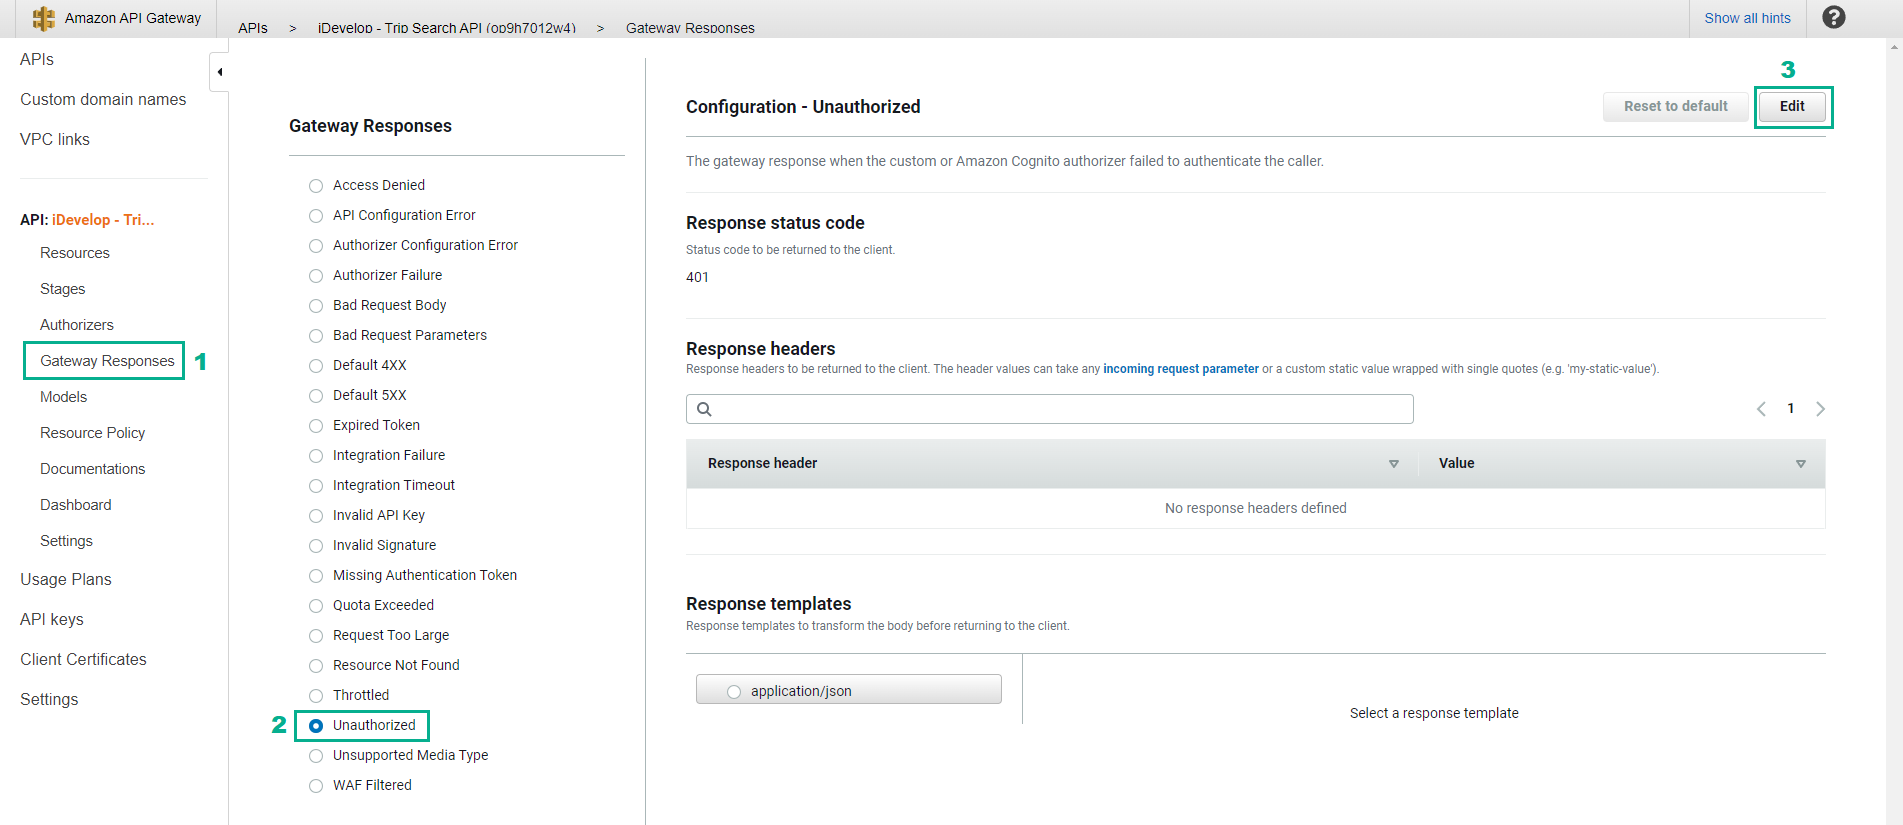
- In order for our web application to be able to receive the unauthorized 401 status, we need to add CORS headers to the response. Without the headers, the browser will not have permission to receive the 401 status. We have already enabled CORS for status 200 responses when we set up the API Gateway endpoints earlier. But we need to explicitly allow for status 401 to be returned.
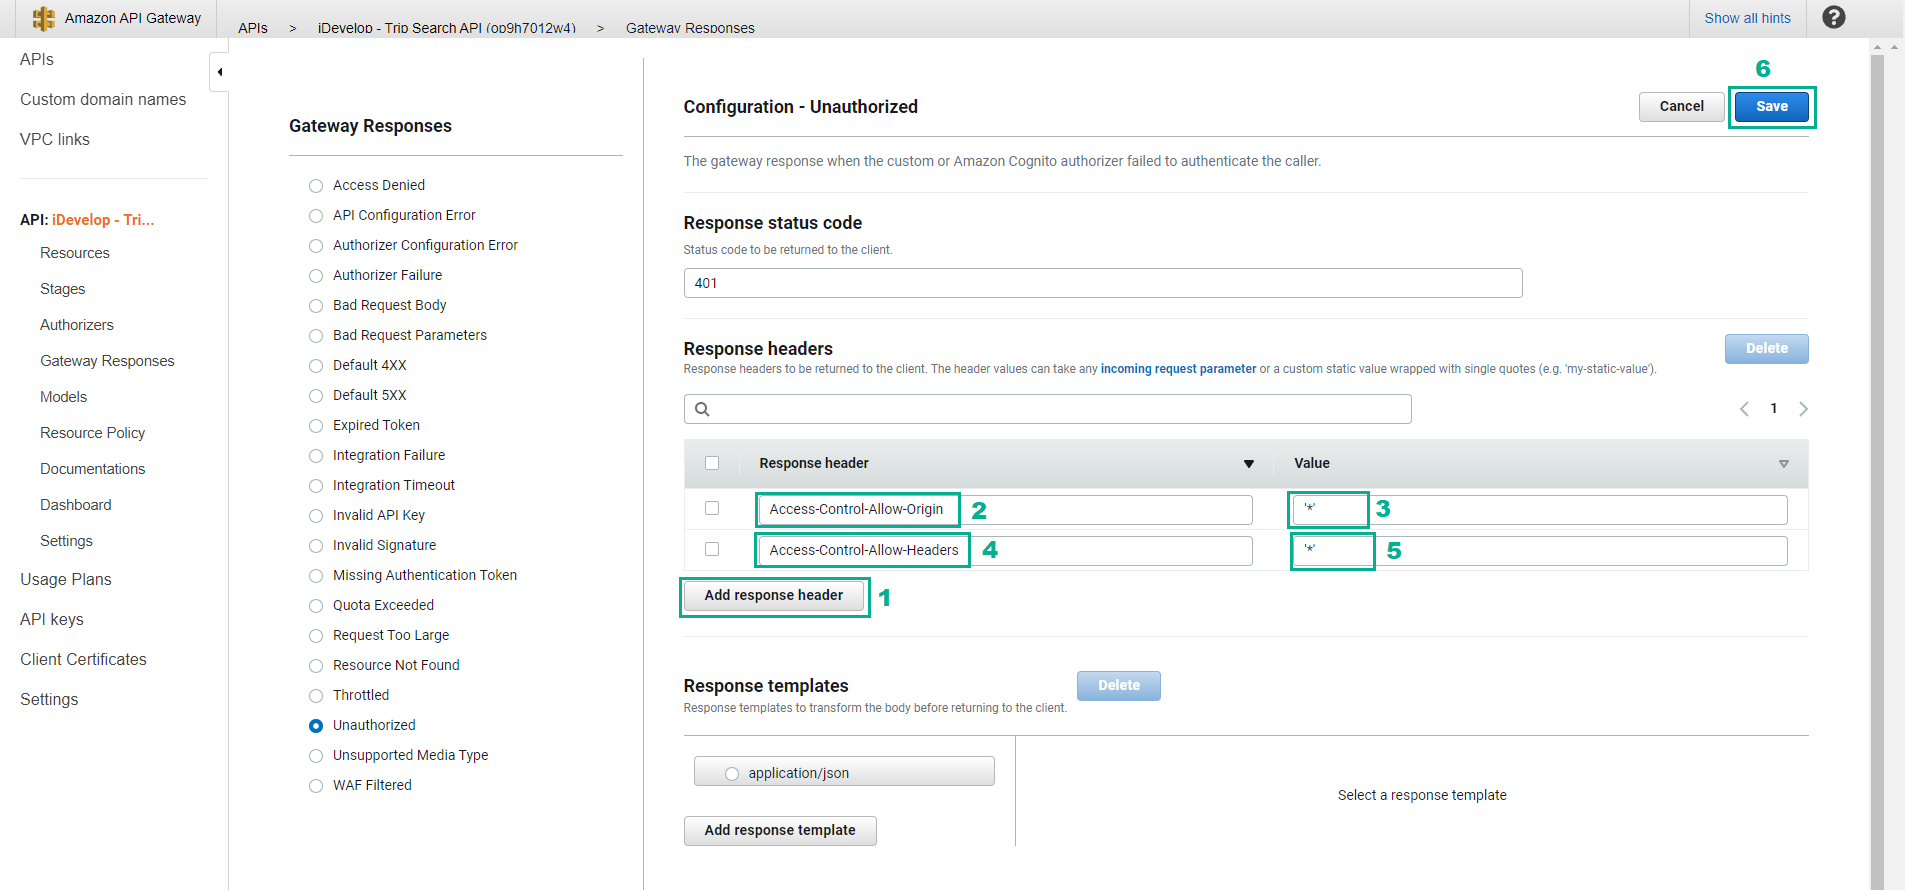
- Click Add response header
- In the Response header column of the first Response Header, type
Access-Control-Allow-Origin - In the Value column, type
'*' - In the Response header column of the second Response Header, type
Access-Control-Allow-Headers - In the Value column, type
'*' - Click Save
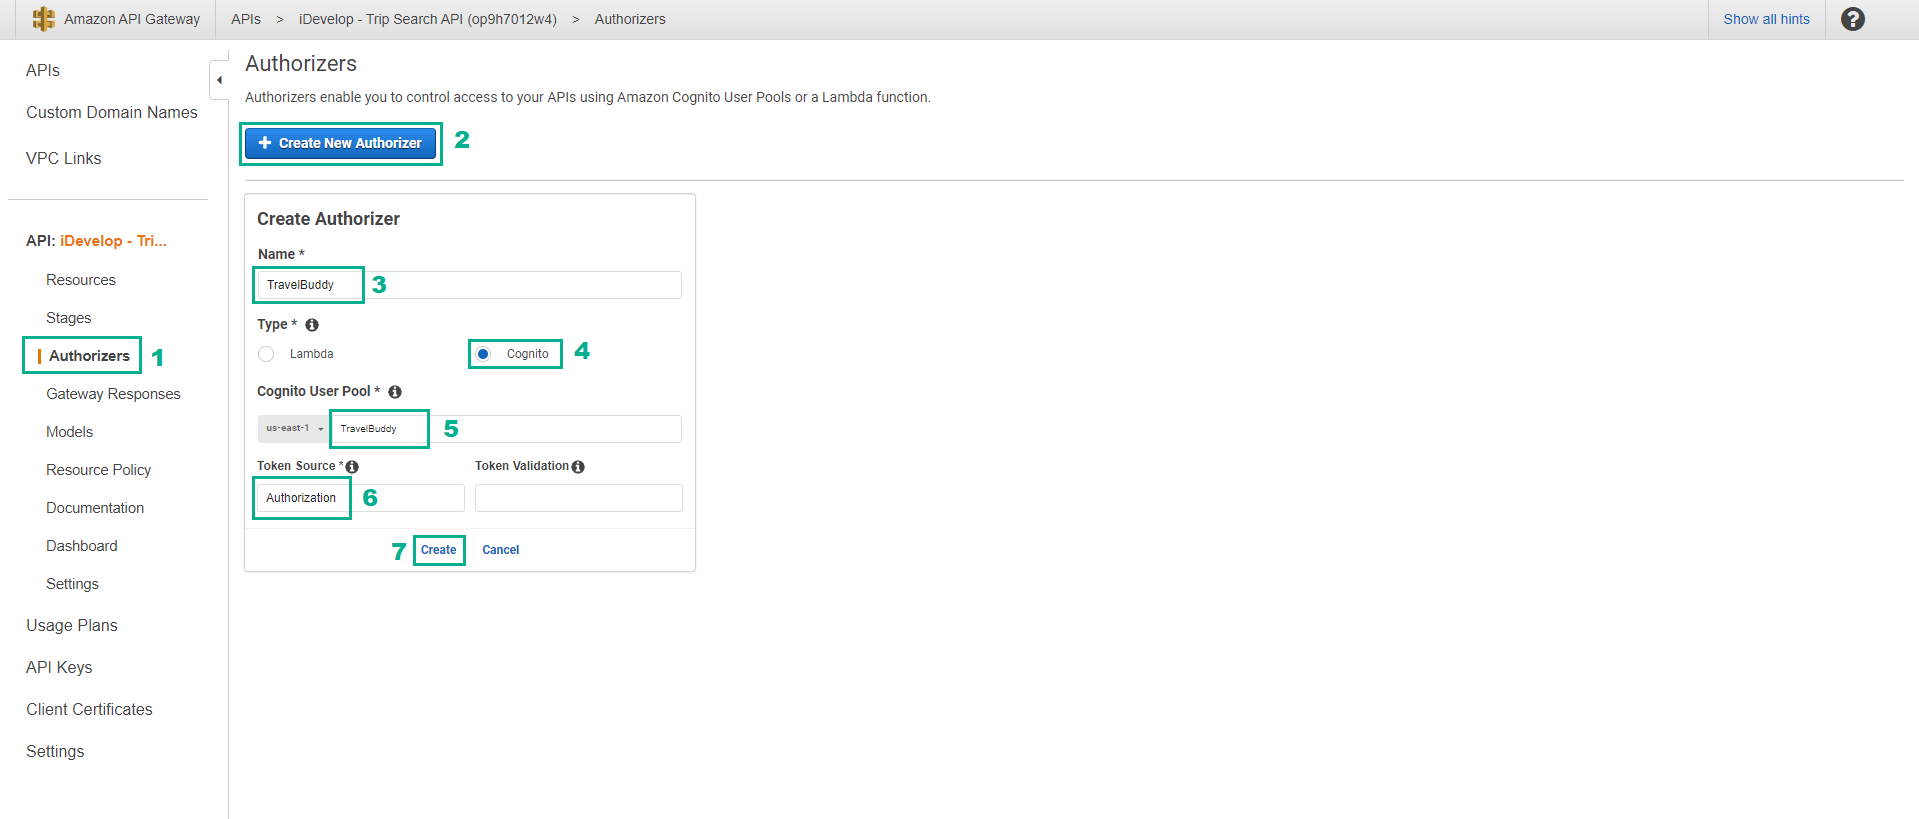
Create an Authorizer that uses the Cognito User Pool
API Gateway integrates tightly with Cognito for authorization. You simply need to declare your Cognito User Pool as an authorizer for your API.
- Click Authorizers
- Click Create New Authorizer
- In the Name section, type
TravelBuddy - In the Type section, select Cognito
- In the Cognito User Pool section, select TravelBuddy
- In the Token Source section, type
Authorization - Click Create
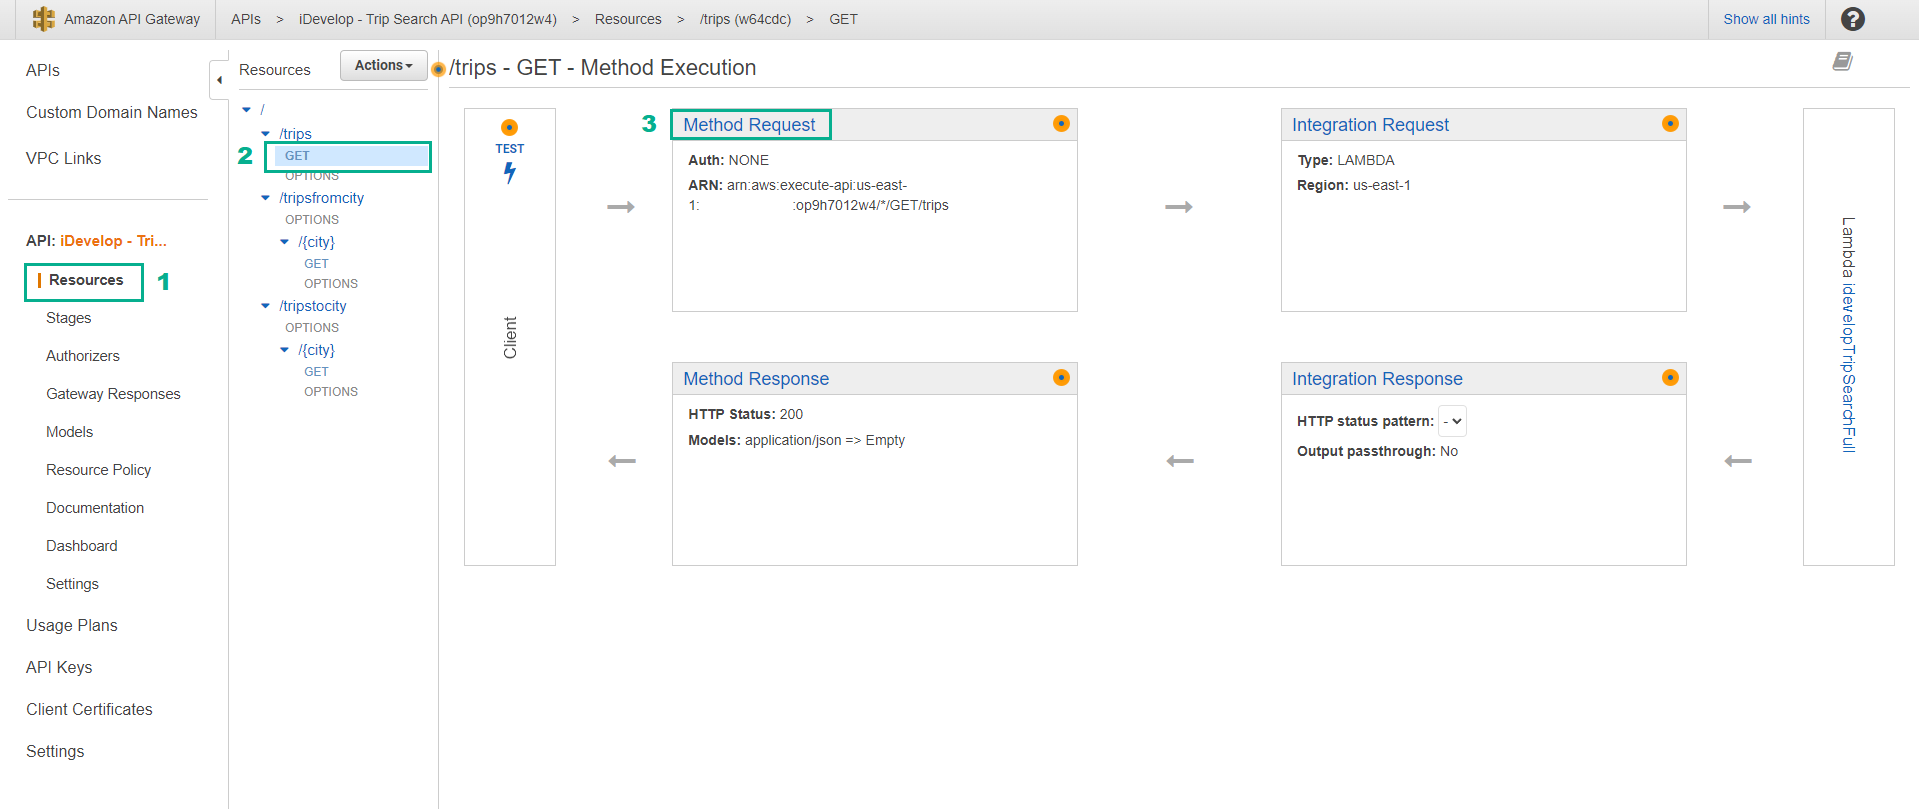
Mark the /trips microservices to require authentication
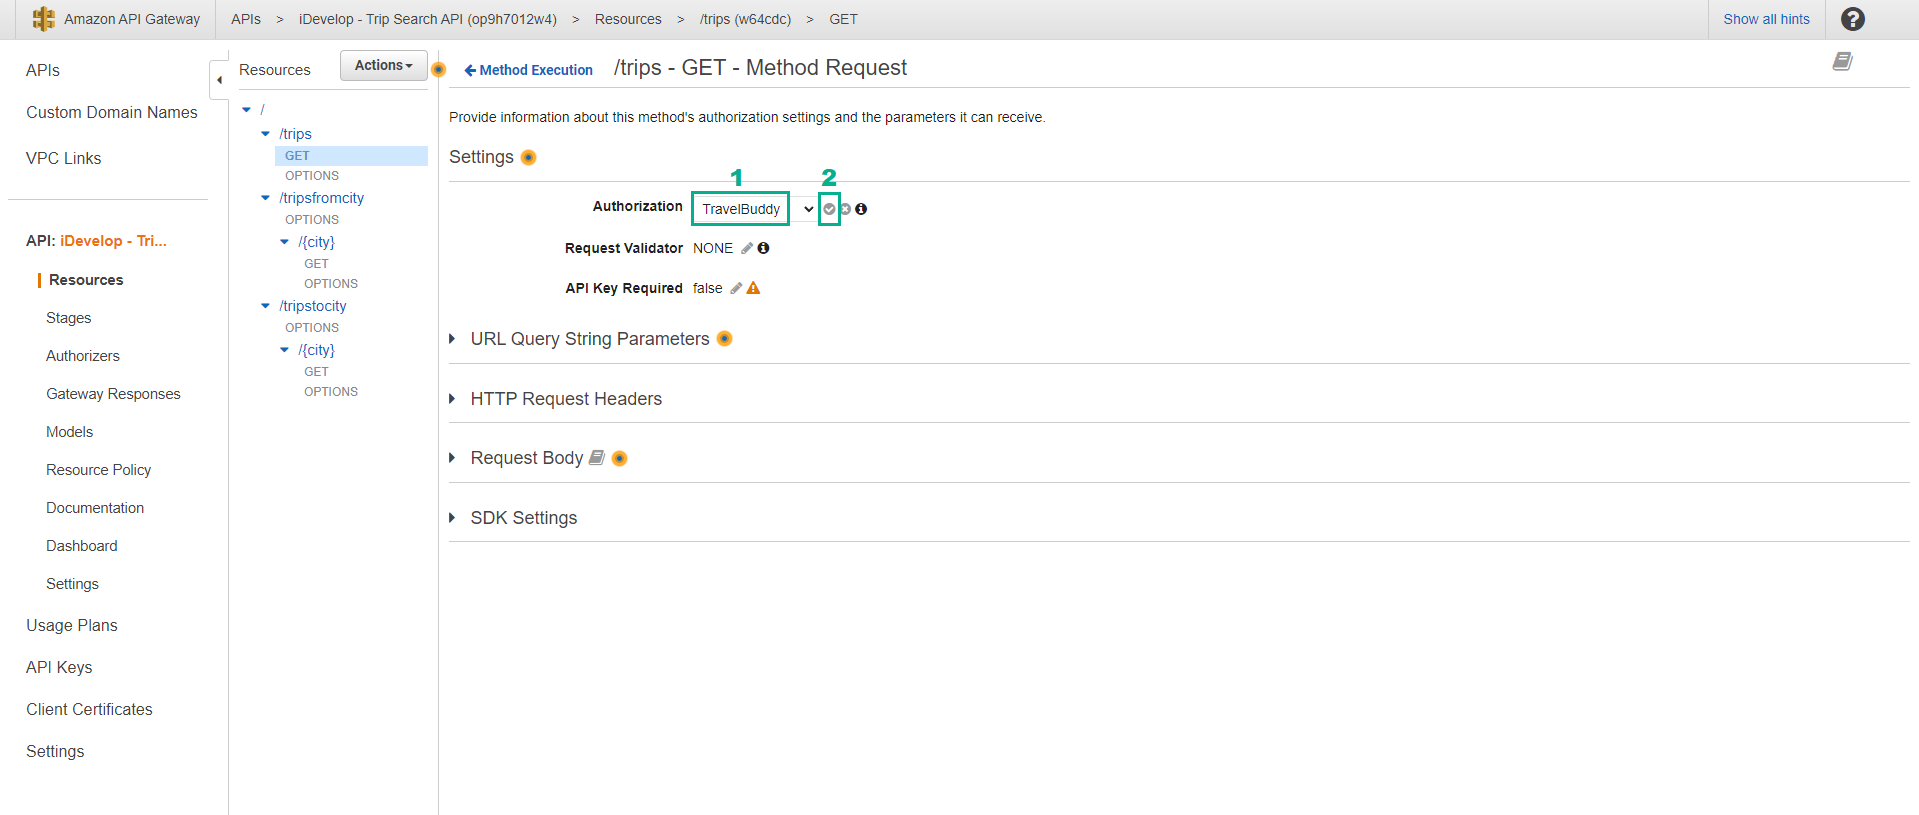
- Click Resources
- Click the GET method beneath /trips
- Click Method Request
- In the Authorization section, click the pencil icon
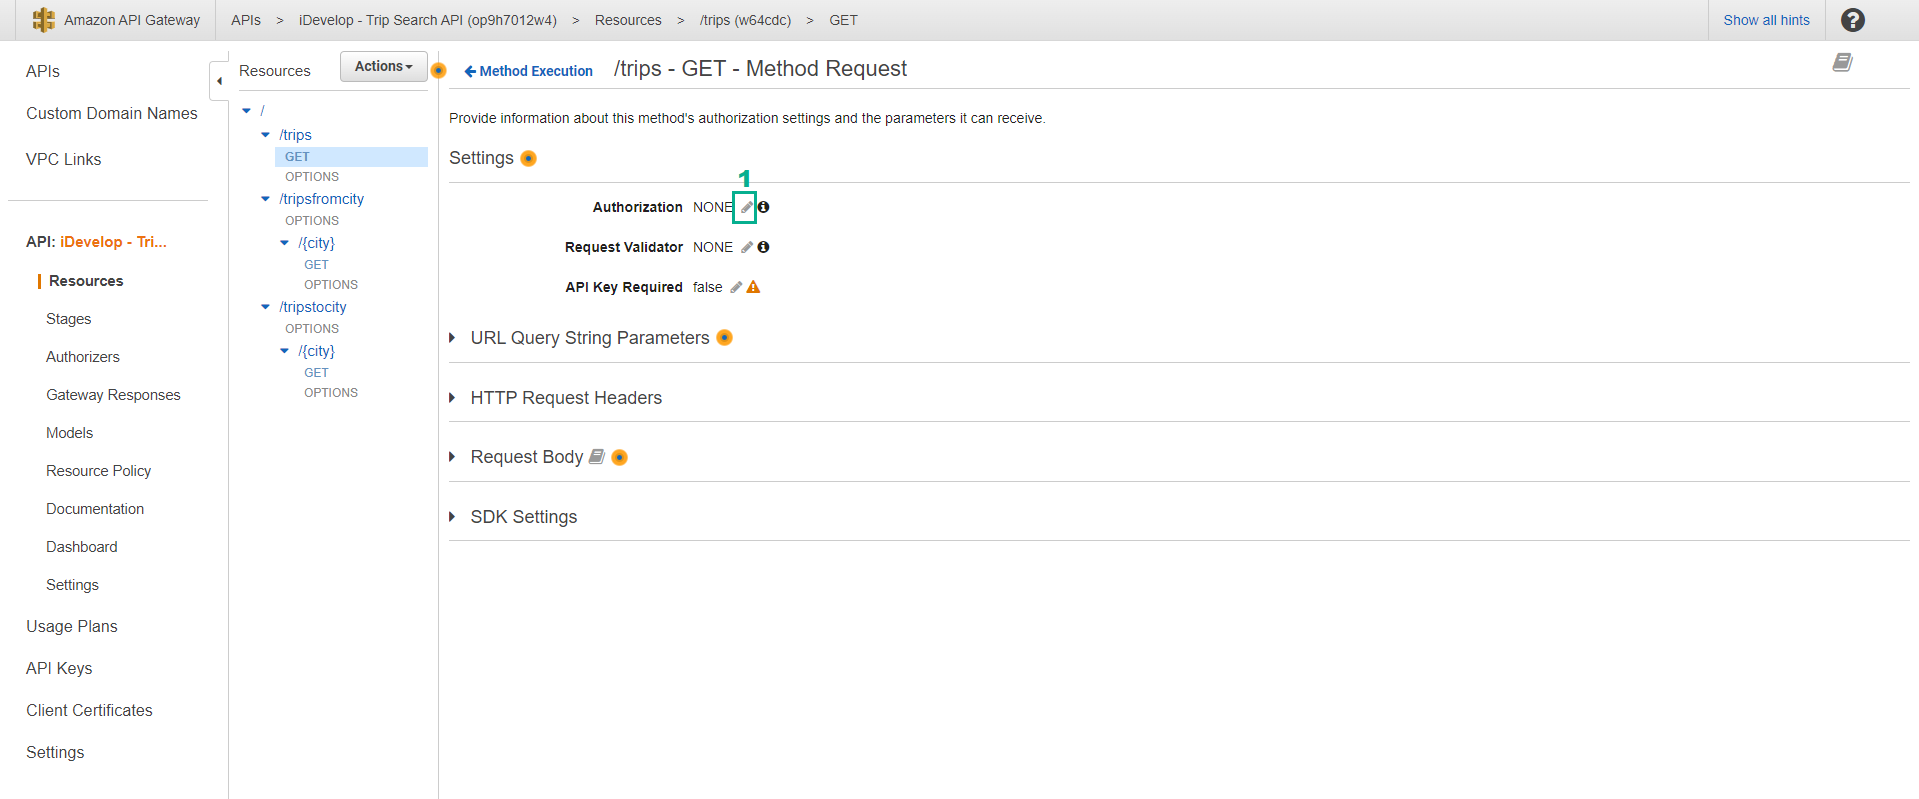
- Select TravelBuddy. This is the authoriser we created in the previous step, and links to the Cognito User Pool we are using for our user database. If it does not appear, try refreshing your browser.
- Click the grey tick next to the field to save the change.