Build A Client To Consume The API
Build A Client To Consume The API
You now have a working model of the web site running as an SPA calling for data via RESTful APIs hosted on AWS Lambda, and served from Amazon API Gateway. These data feeds are considered public because the user does not need to be signed-in and provide credentials for the call to the API. In this exercise, we will take a look at how we can require authentication to make the API calls, and the use of API Keys to enforce call-rate throttling and quota management. To demonstrate, we will use a Java client application, to show how you can consume the auto-generated Java SDKs in your applications.
Create Response Model for the TripSearch API
In order for the SDK generator to create the appropriate classes for a strongly-typed language like Java (as opposed to Javascript, for example) we need to tell API Gateway what the shape or schema of the request/response objects looks like. In the TripSearch API, we are using the GET method for each of the three API calls. Therefore, there is no schema for inbound requests because the city parameter is passed on as part of the URL. If we instead changed the method to POST, we would need to pass in the city parameter in the body payload, and would need to create a model for this object schema for the code generator to create a Java class for us to bind to.
The result data from the API calls is returned in the body of the response. In order for the code generator to create an appropriate class to represent this response, we need to create a response model, and set it as the method response model.
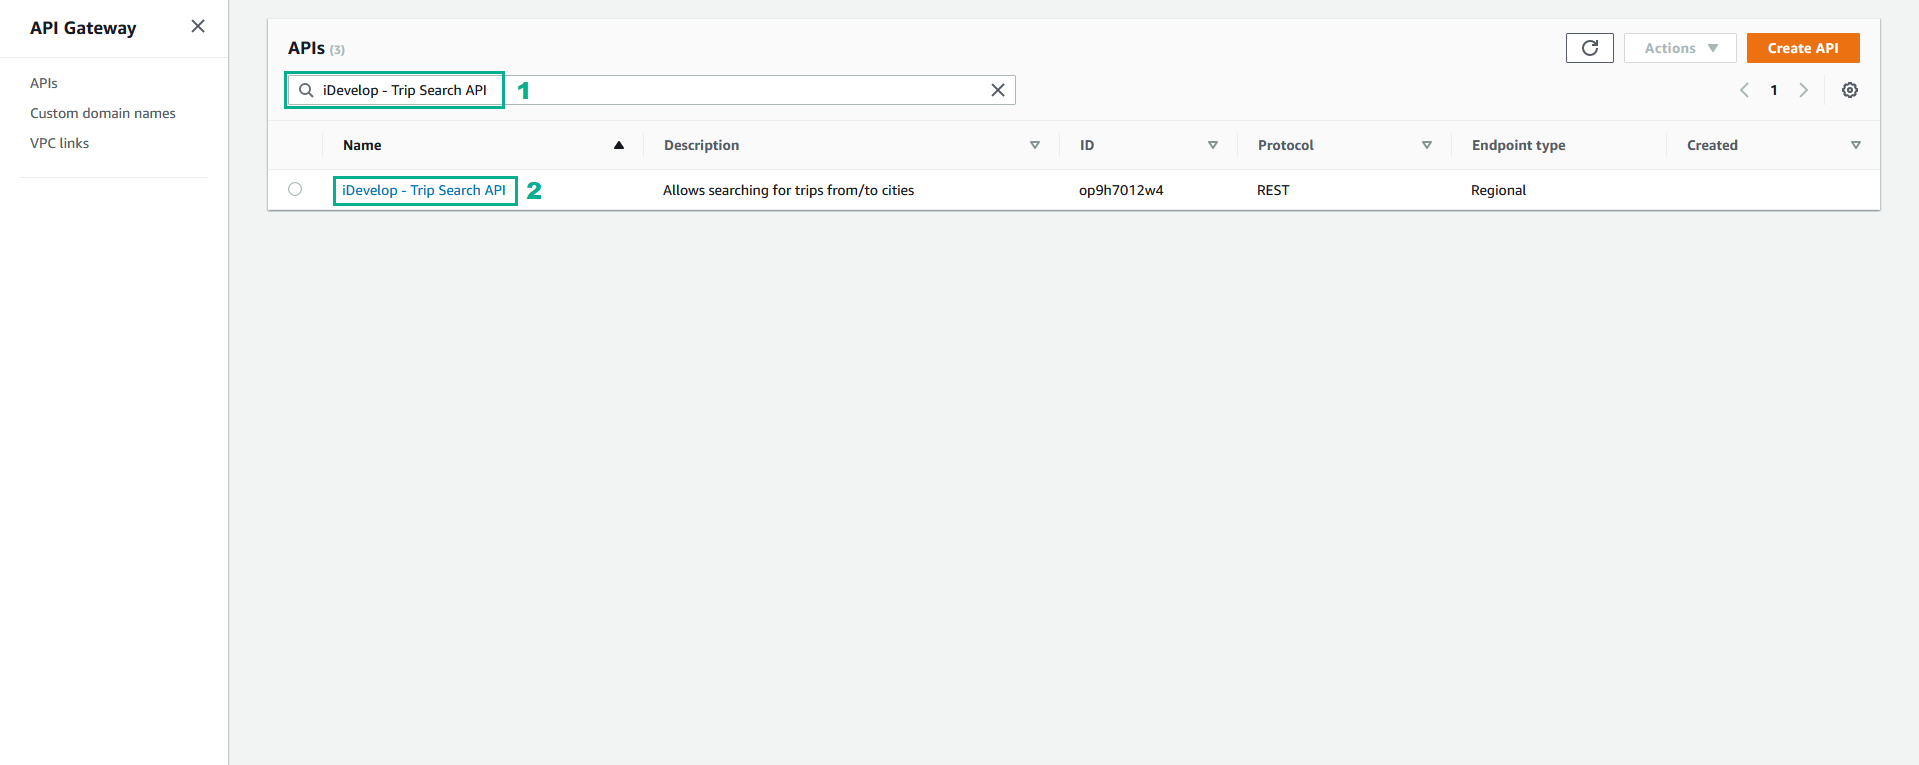
- Go to AWS API Gateway console
- Type iDevelop - Trip Search API to the search bar and press Enter
- Click iDevelop - Trip Search API
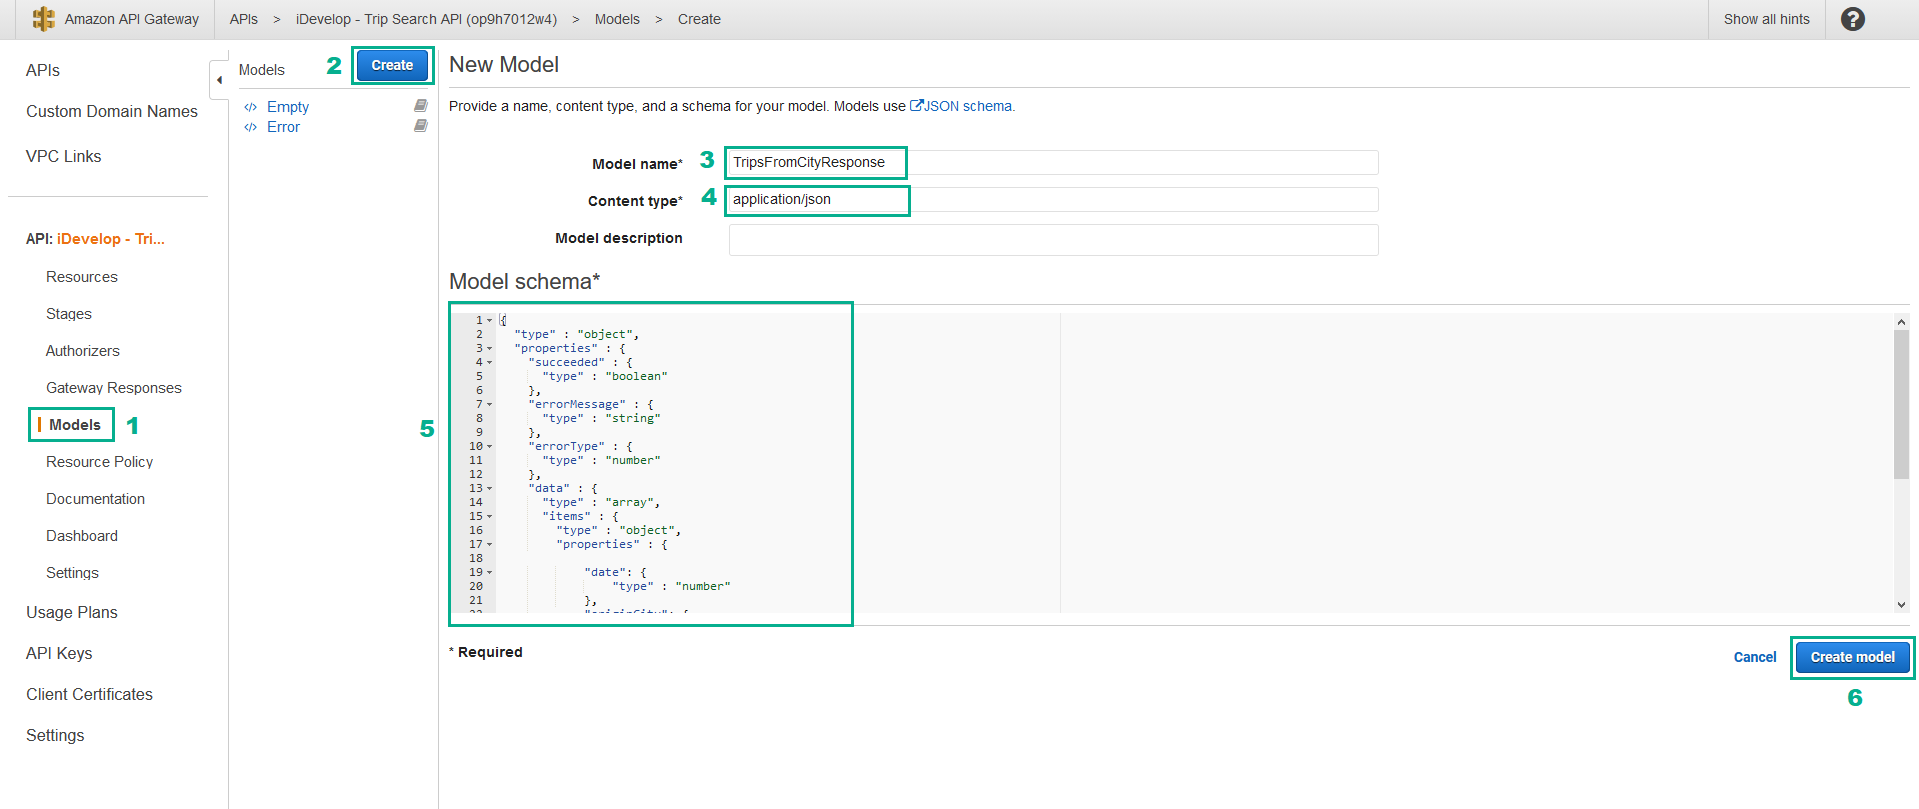
- Click Models
- Click Create
- In the Model name section, type
TripsFromCityResponse - In the Content-type section, type
application/json - In the Model schema section, type
{
  "type": "object",
  "properties": {
    "succeeded": {
      "type": "boolean"
    },
    "errorMessage": {
      "type": "string"
    },
    "errorType": {
      "type": "number"
    },
    "data": {
      "type": "array",
      "items": {
        "type": "object",
        "properties": {
          "date": {
            "type": "number"
          },
          "originCity": {
            "type": "string"
          },
          "destinationCity": {
            "type": "string"
          },
          "airline": {
            "type": "string"
          }
        }
      }
    }
  },
  "title": "TripsFromCityResponse"
}
- Click Create model
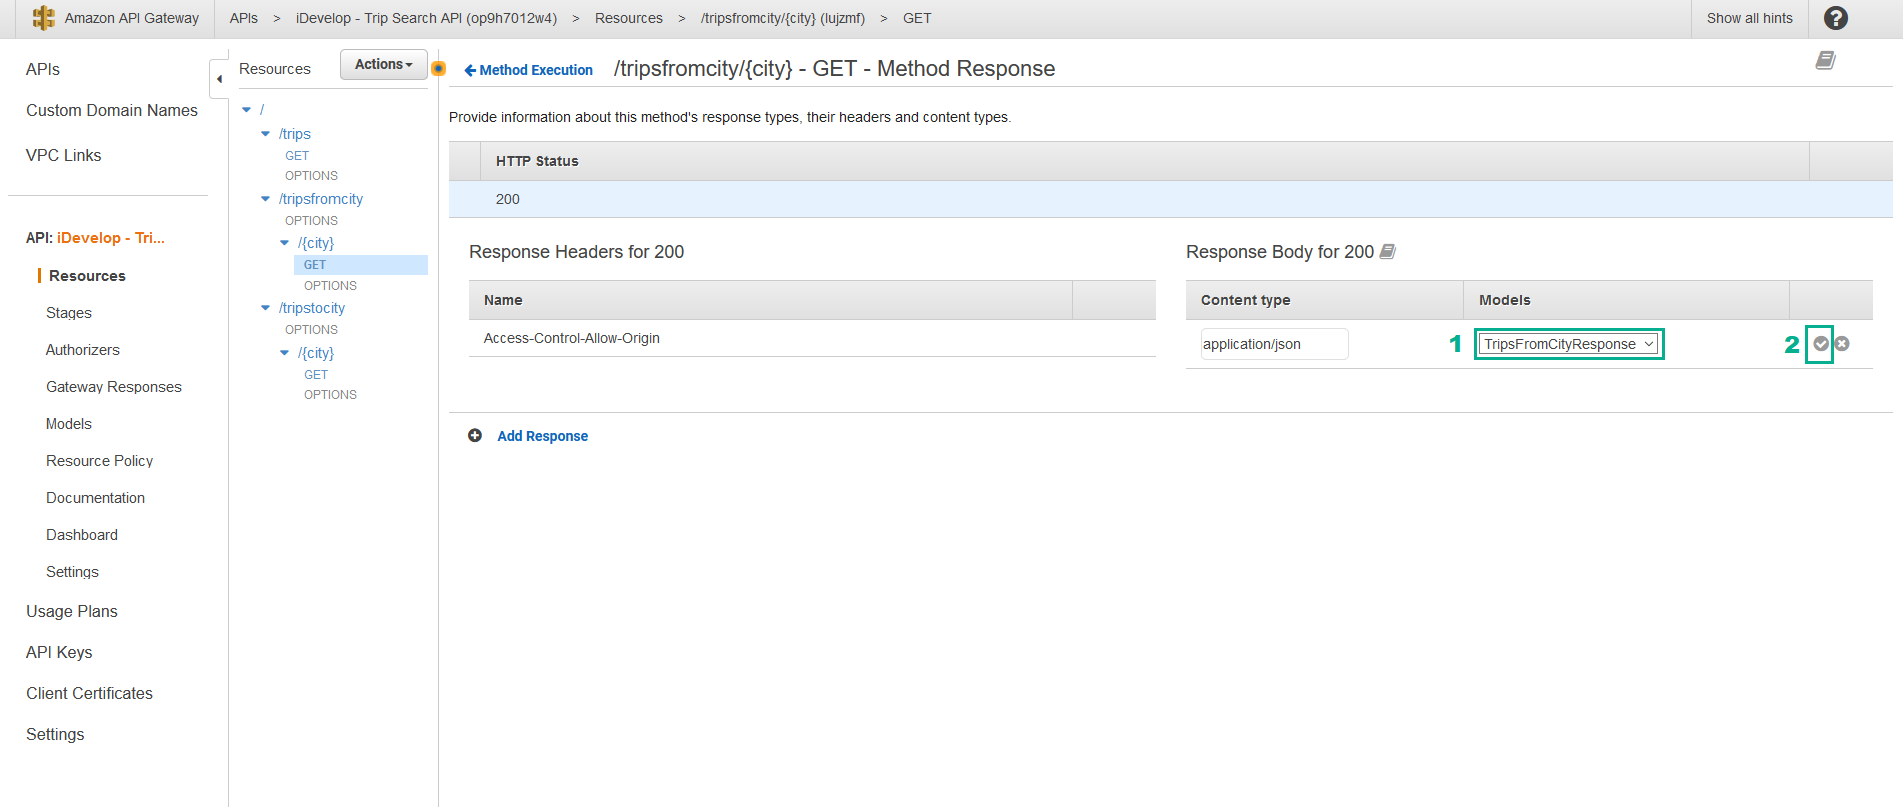
Assign the TripsFromCityResponse model to the /tripsfromcity API call
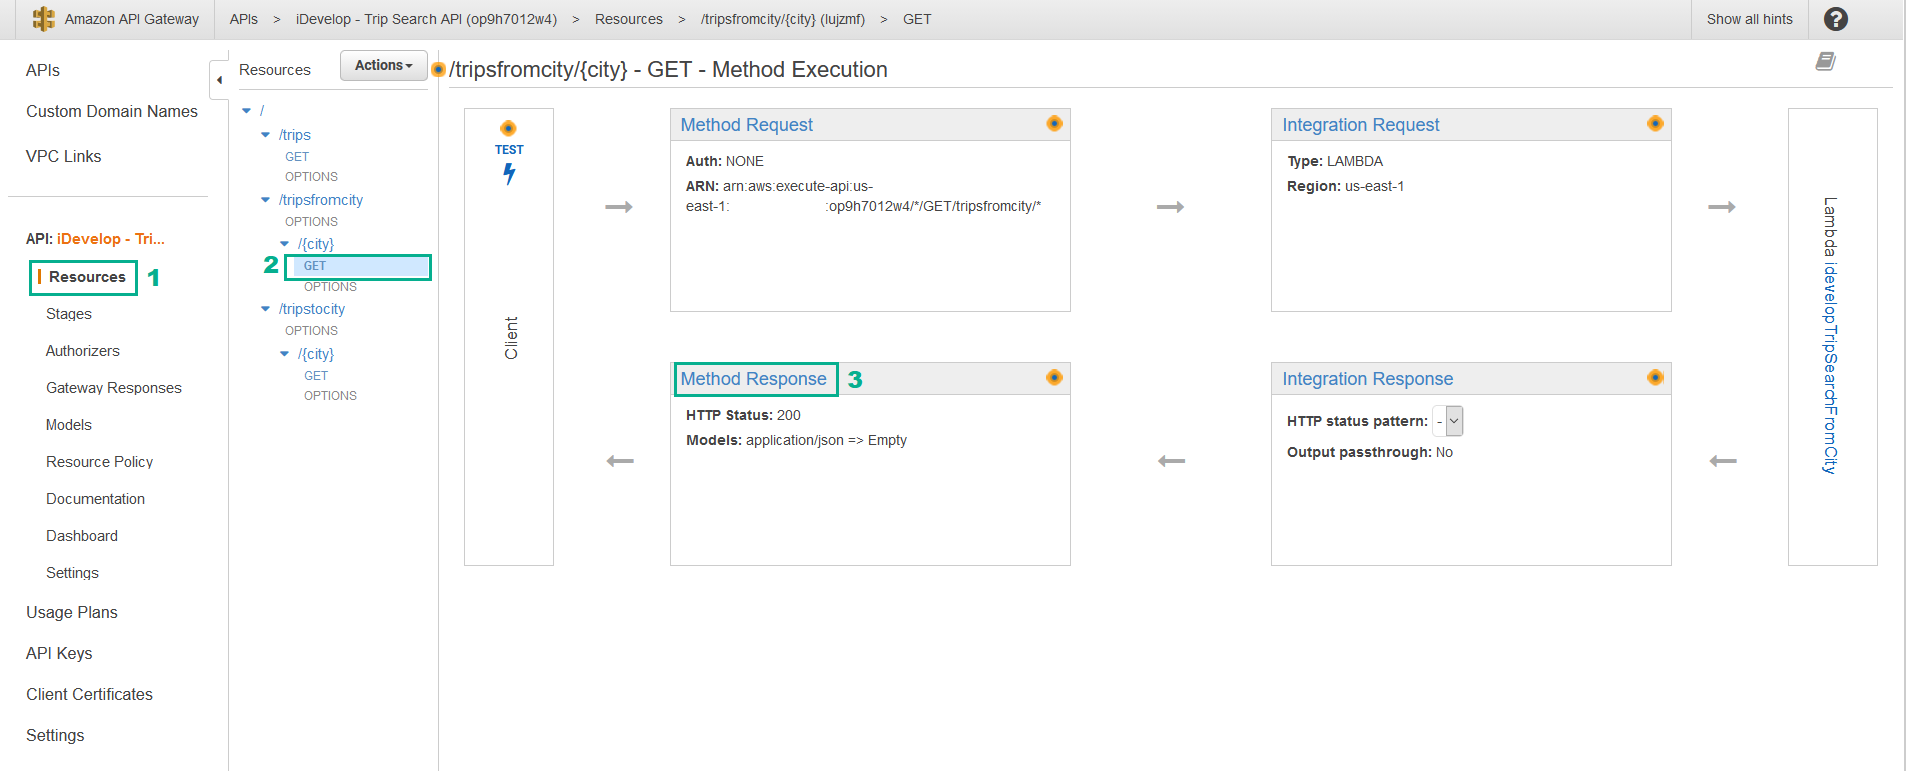
- Click Resources
- Click the GET method beneath /tripsfromcity/{city}
- Click Method Response
- In the /tripsfromcity/{city} - GET - Method Response panel, click the arrow next to HTTP Status to reveal the panel
- Under Response Body for 200 click the pencil icon next to the Empty model.
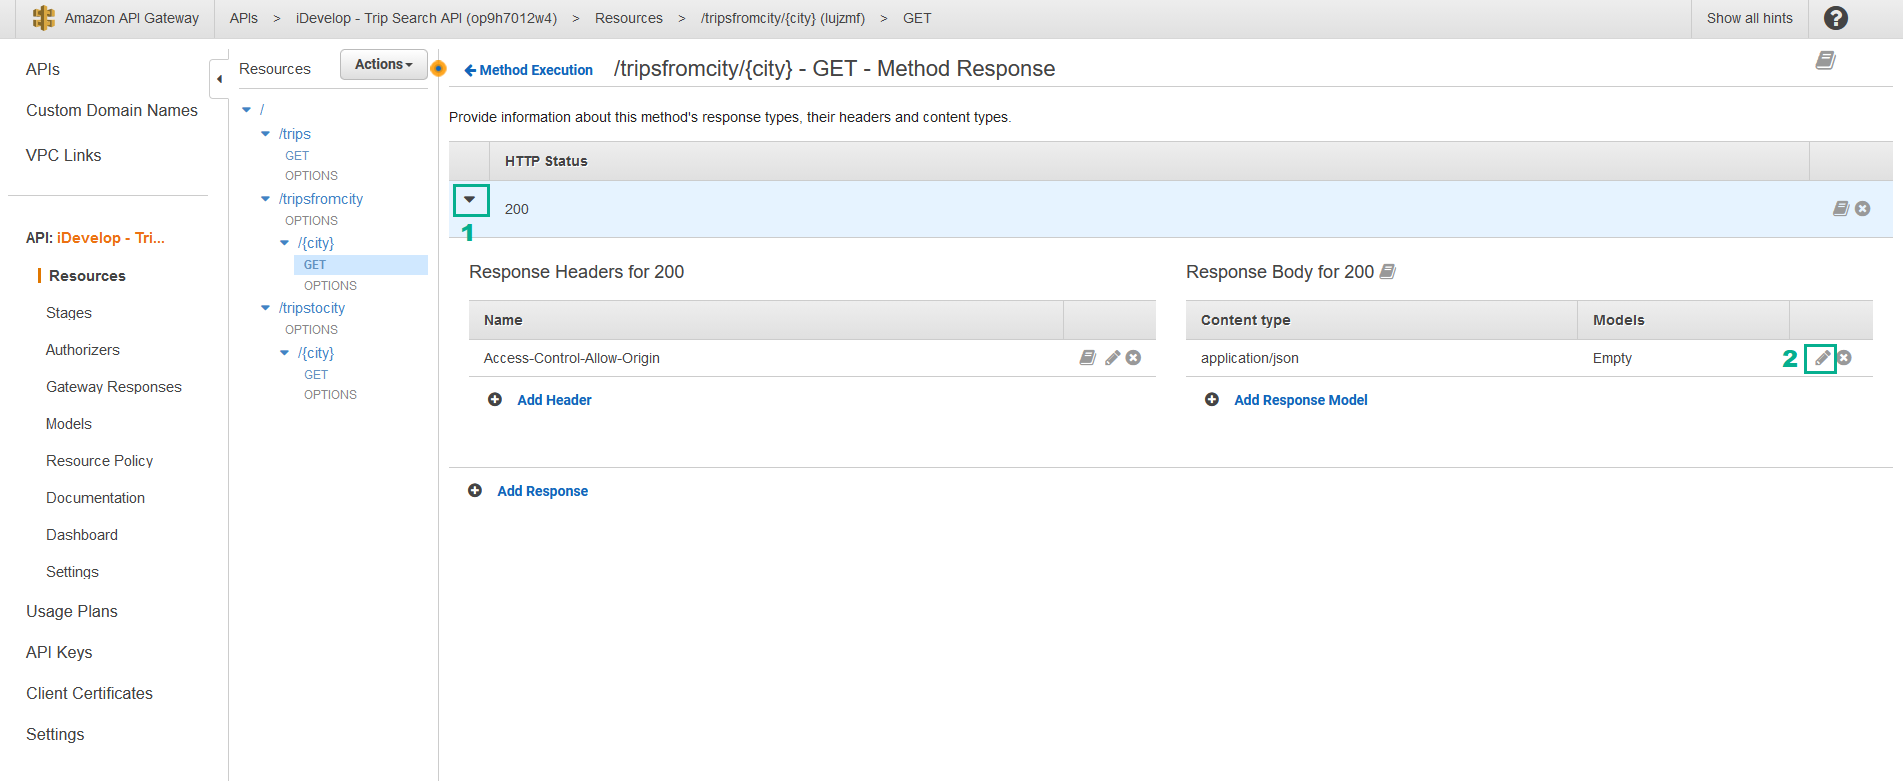
- The field becomes a drop-down list. Select TripsFromCityResponse
- Click the grey tick to commit the change
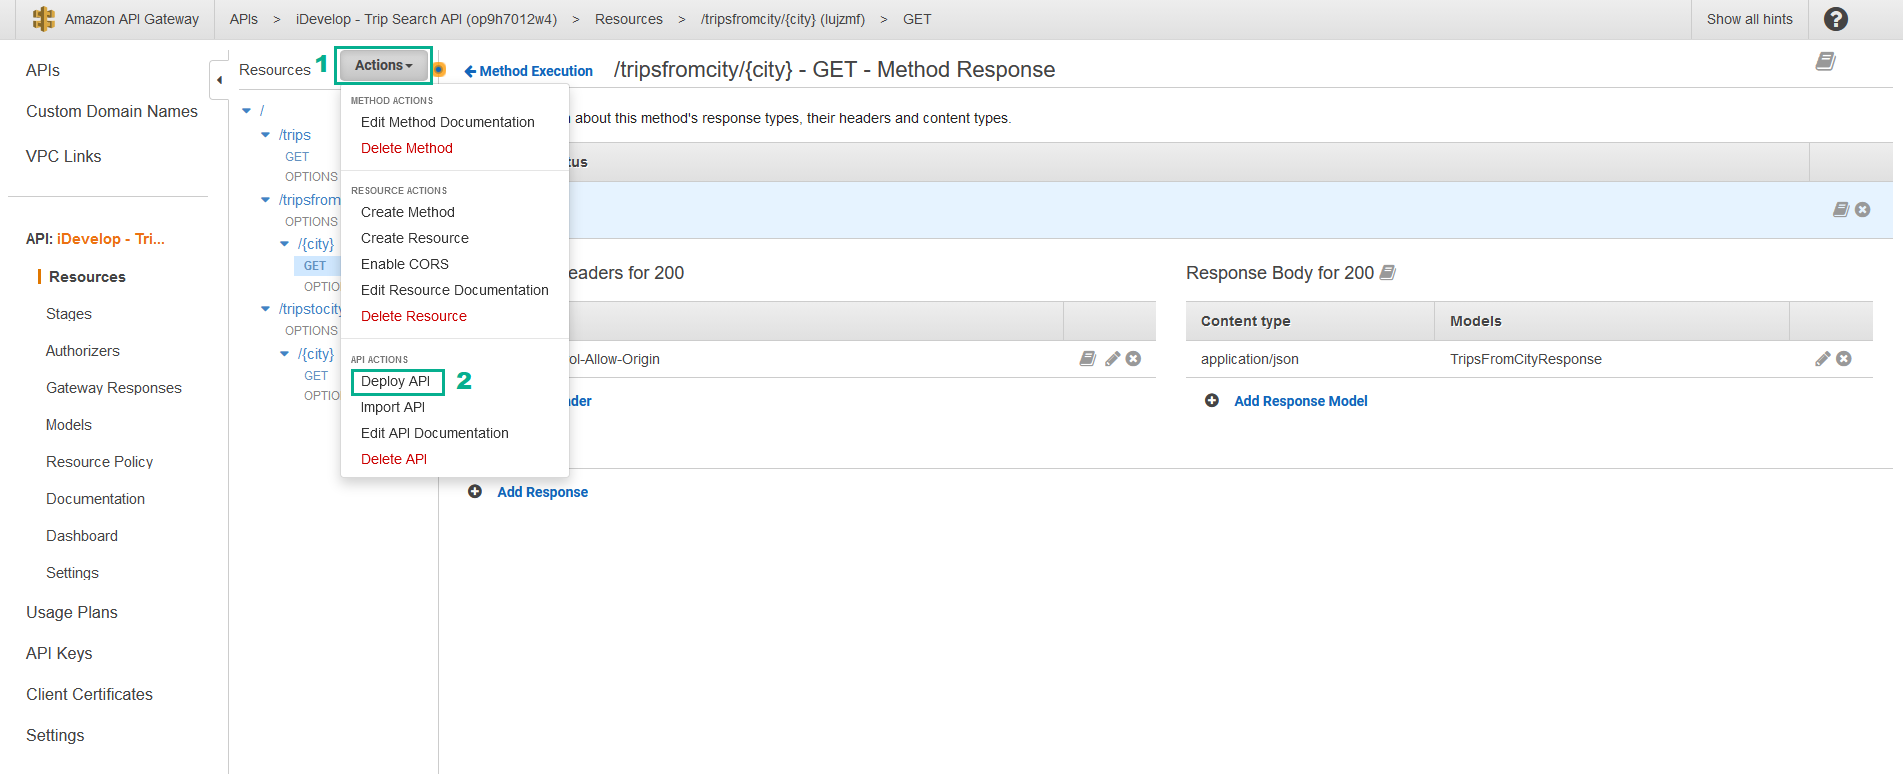
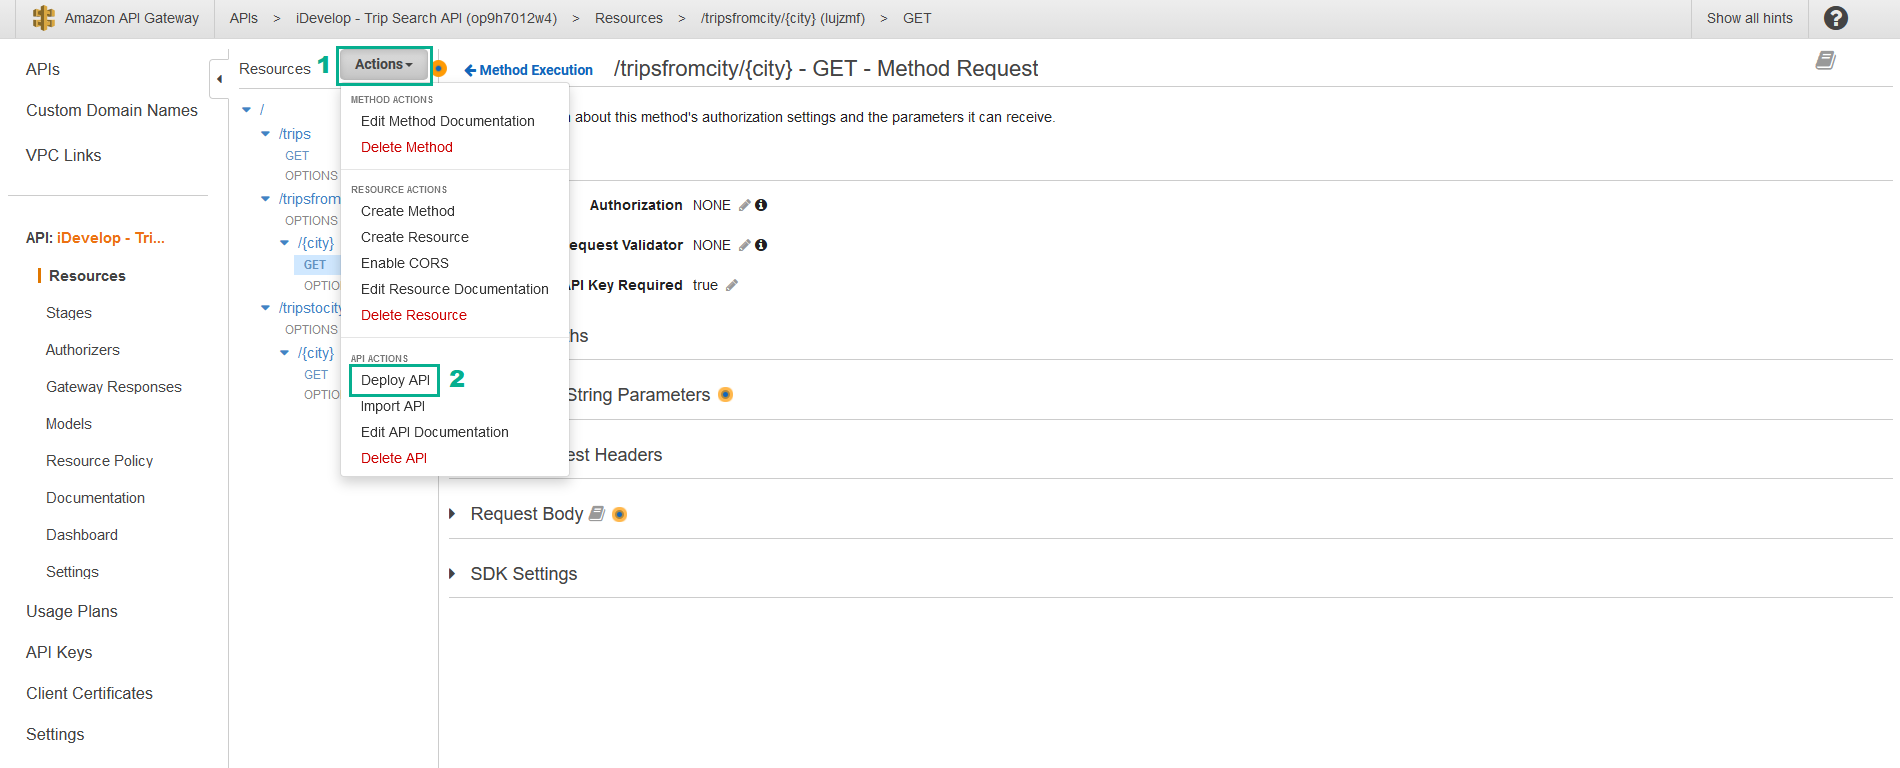
- Click Actions
- Click Deploy API
- In the Deployment stage section, select prod
- Click Deploy

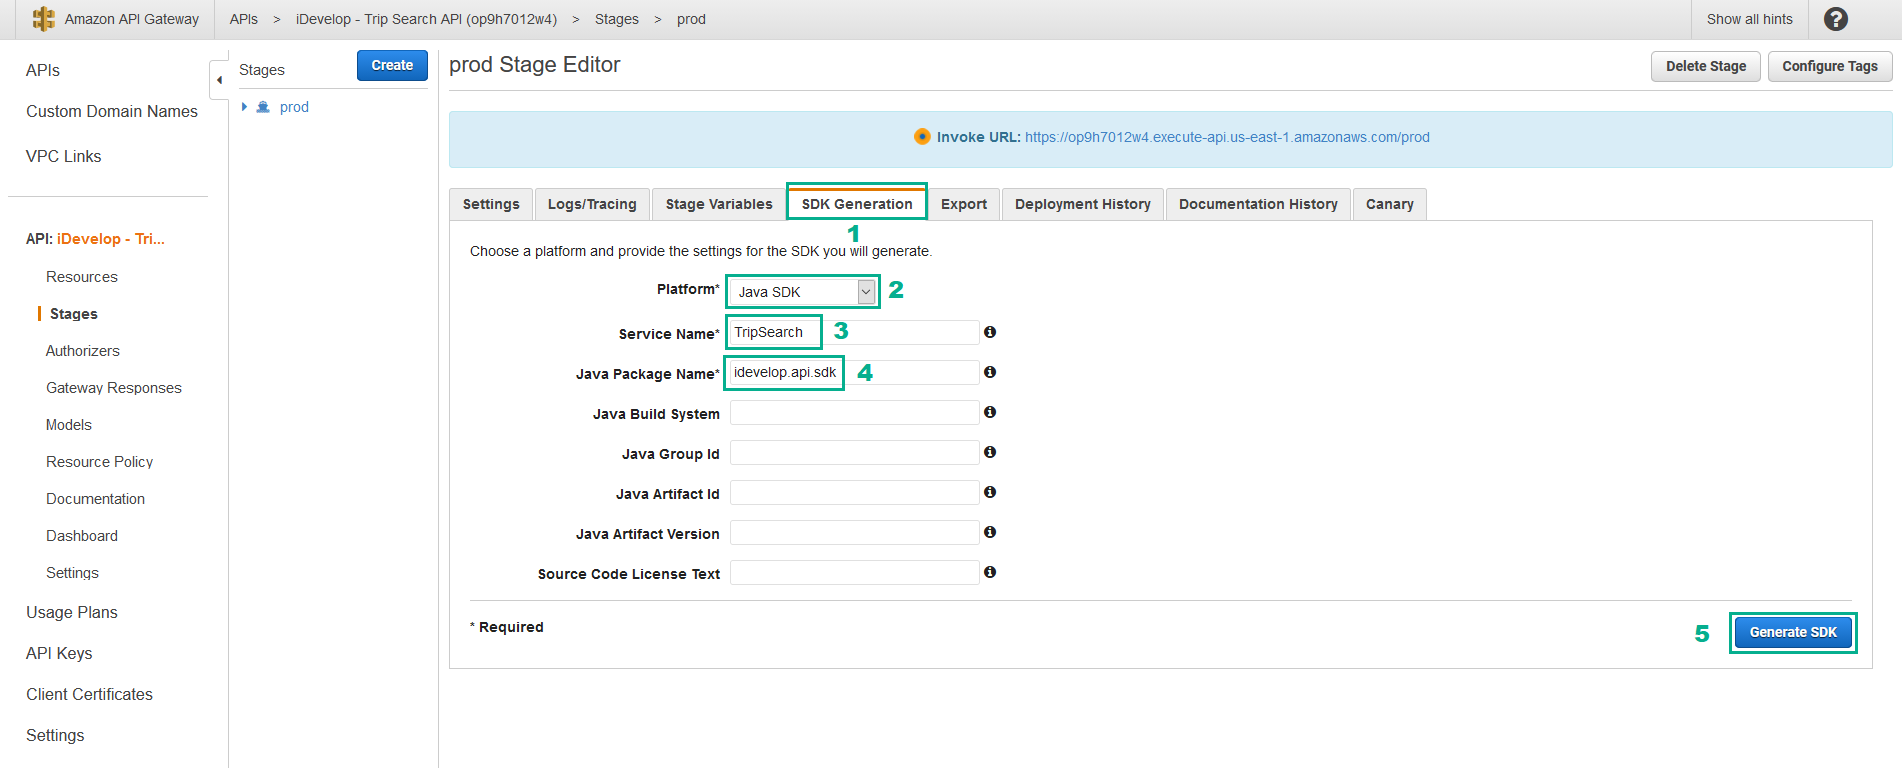
- On the prod Stage Editor that appears, click SDK Generation
- In the Platform section, select Java SDK
- In the Service name section, type
TripSearch - In the Java package name section, type
idevelop.api.sdk - Click Generate SDK. The Java SDK will be generated and downloaded as a ZIP file.
- Extract the downloaded ZIP file we downloaded in step 8
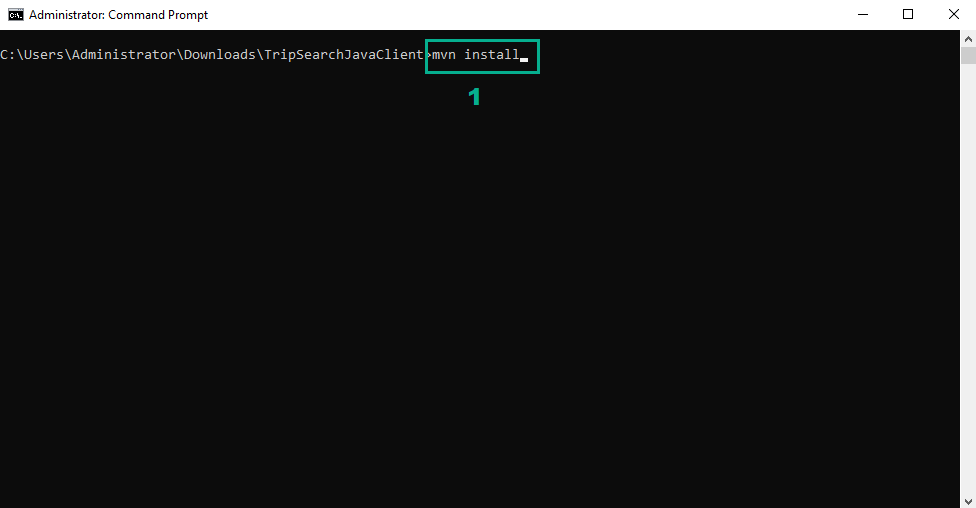
- Open Command Prompt and navigate to the directory of the downloaded SDK has been exploded (the directory is called generated-code)
- Execute the following command
mvn install
 This will compile and install the SDK in your local Maven repository and we will refer to it in the next steps.
Build a Java client application that consumes the API
- Download the TripSearchJavaClient.zip file and extract
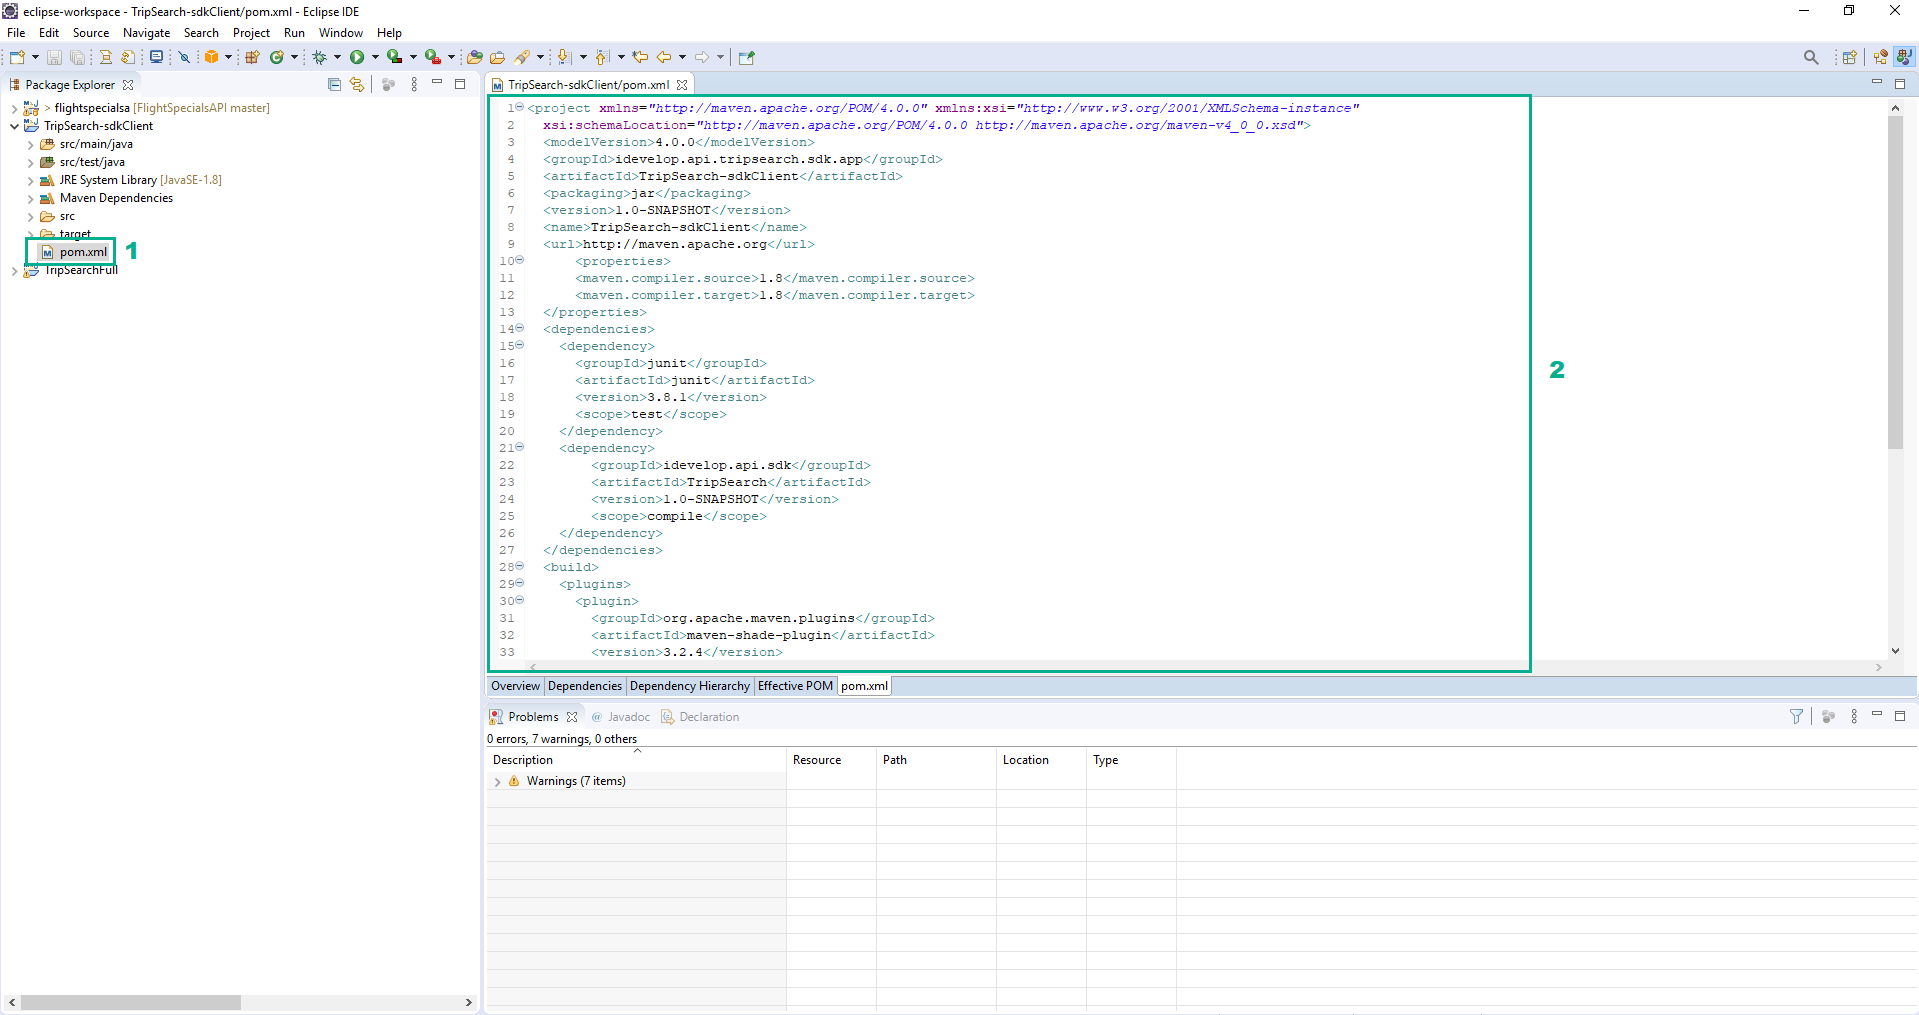
- In the Eclipse IDE, open the project we extracted in step 10
- Open the pom.xml file
- Replace the pom.xml file contents with the following:
<project xmlns="http://maven.apache.org/POM/4.0.0" xmlns:xsi="http://www.w3.org/2001/XMLSchema-instance"
  xsi:schemaLocation="http://maven.apache.org/POM/4.0.0 http://maven.apache.org/maven-v4_0_0.xsd">
  <modelVersion>4.0.0</modelVersion>
  <groupId>idevelop.api.tripsearch.sdk.app</groupId>
  <artifactId>TripSearch-sdkClient</artifactId>
  <packaging>jar</packaging>
  <version>1.0-SNAPSHOT</version>
  <name>TripSearch-sdkClient</name>
  <url>http://maven.apache.org</url>
      <properties>
      <maven.compiler.source>1.8</maven.compiler.source>
      <maven.compiler.target>1.8</maven.compiler.target>
  </properties>
  <dependencies>
    <dependency>
      <groupId>junit</groupId>
      <artifactId>junit</artifactId>
      <version>3.8.1</version>
      <scope>test</scope>
    </dependency>
    <dependency>
        <groupId>idevelop.api.sdk</groupId>
        <artifactId>TripSearch</artifactId>
        <version>1.0-SNAPSHOT</version>
        <scope>compile</scope>
    </dependency>
  </dependencies>
  <build>
    <plugins>
      <plugin>
        <groupId>org.apache.maven.plugins</groupId>
        <artifactId>maven-shade-plugin</artifactId>
        <version>3.2.4</version>
        <executions>
          <execution>
            <phase>package</phase>
            <goals>
              <goal>shade</goal>
            </goals>
            <configuration>
              <transformers>
                <transformer implementation="org.apache.maven.plugins.shade.resource.ManifestResourceTransformer">
                  <mainClass>idevelop.api.tripsearch.sdk.app.App</mainClass>
                </transformer>
              </transformers>
            </configuration>
          </execution>
        </executions>
      </plugin>
    </plugins>
  </build>
</project>
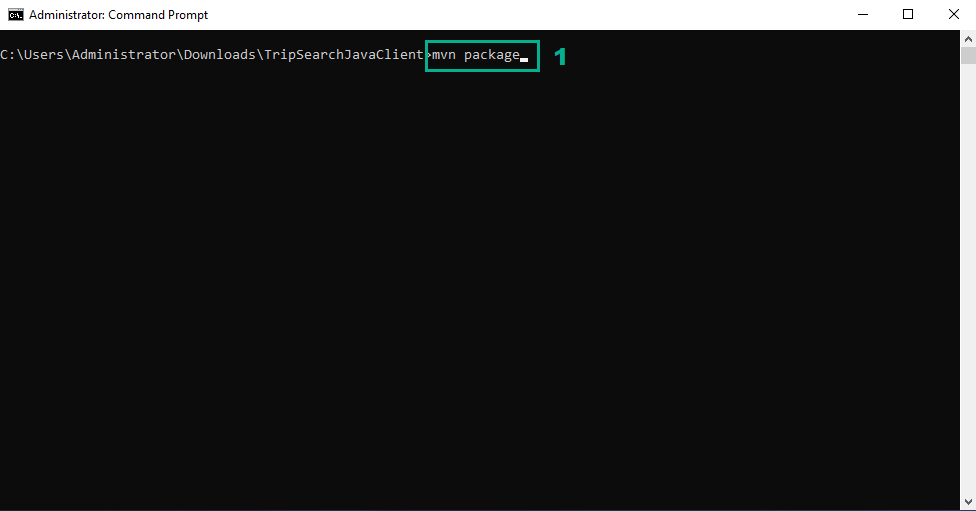
 12. In the Command Prompt, navigate to the directory of the project we extracted in step 10
- Execute the following command
mvn package
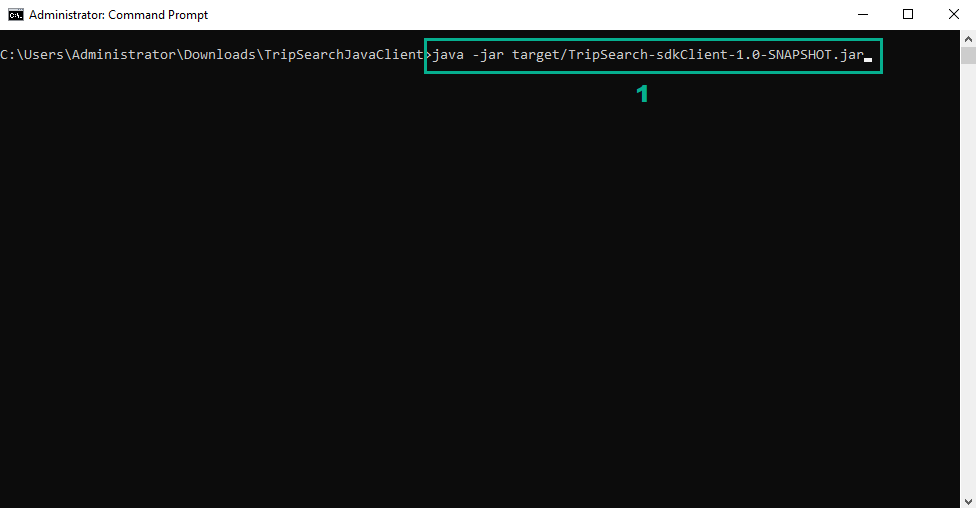
 13. Execute the following command to run project
java -jar target/TripSearch-sdkClient-1.0-SNAPSHOT.jar
- You will see an output.
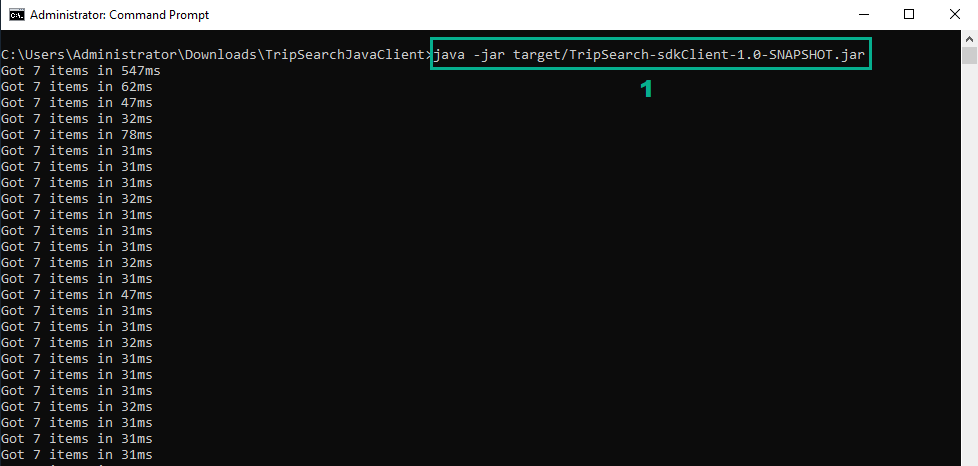
The example API consumer will time how long each call to the API takes, and display the results. It will make a maximum of 100 calls as quickly as it can.
If we had many of these clients consuming the API rapidly, we could overwhelm the provisioned infrastructure, so we need some way of throttling calls. We can use Usage Plans to do this.
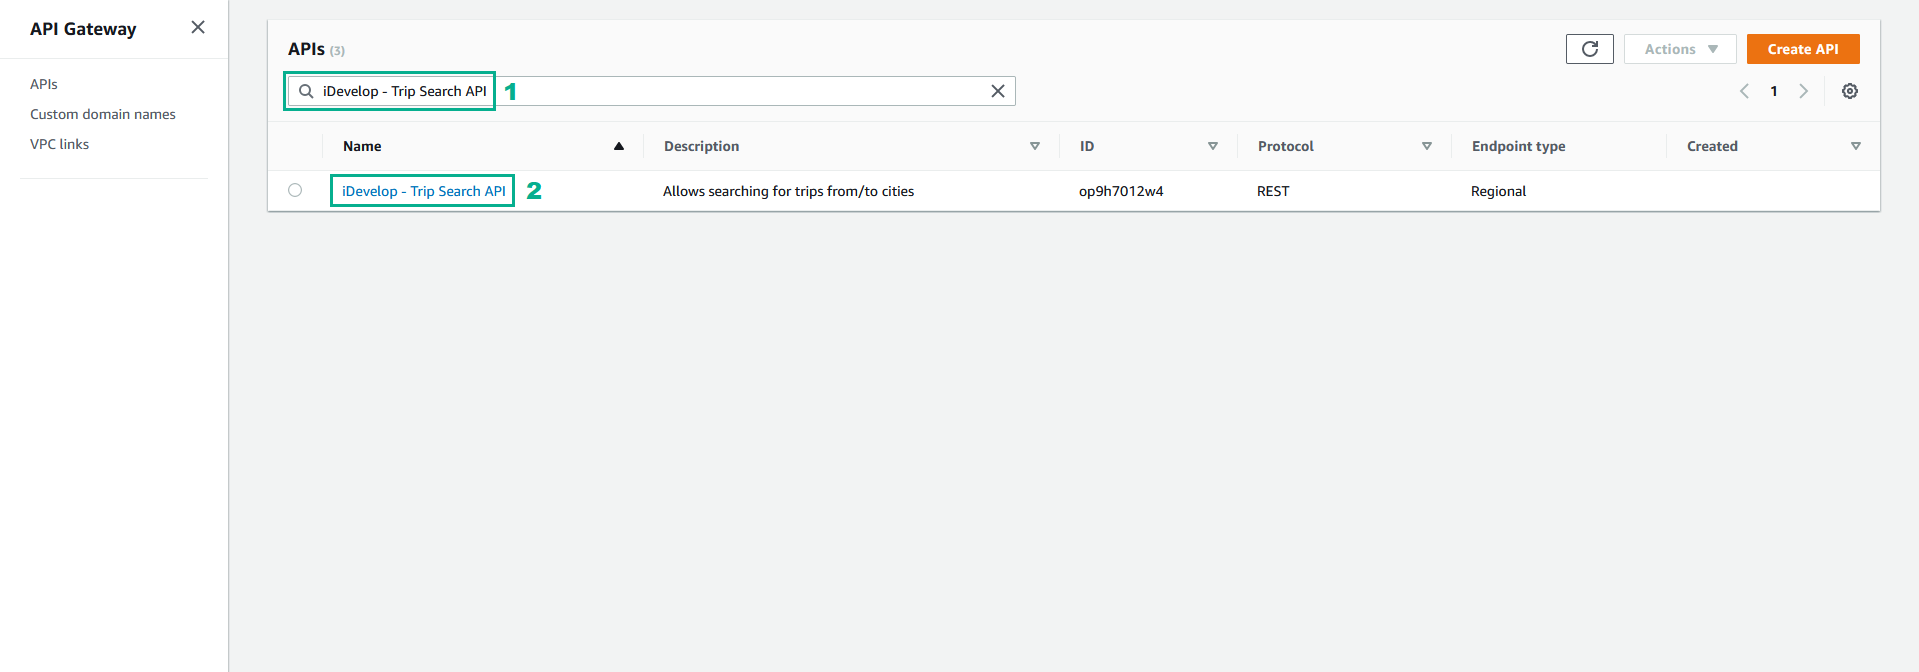
- Go to AWS API Gateway console
- Type iDevelop - Trip Search API to the search bar and press Enter
- Click iDevelop - Trip Search API
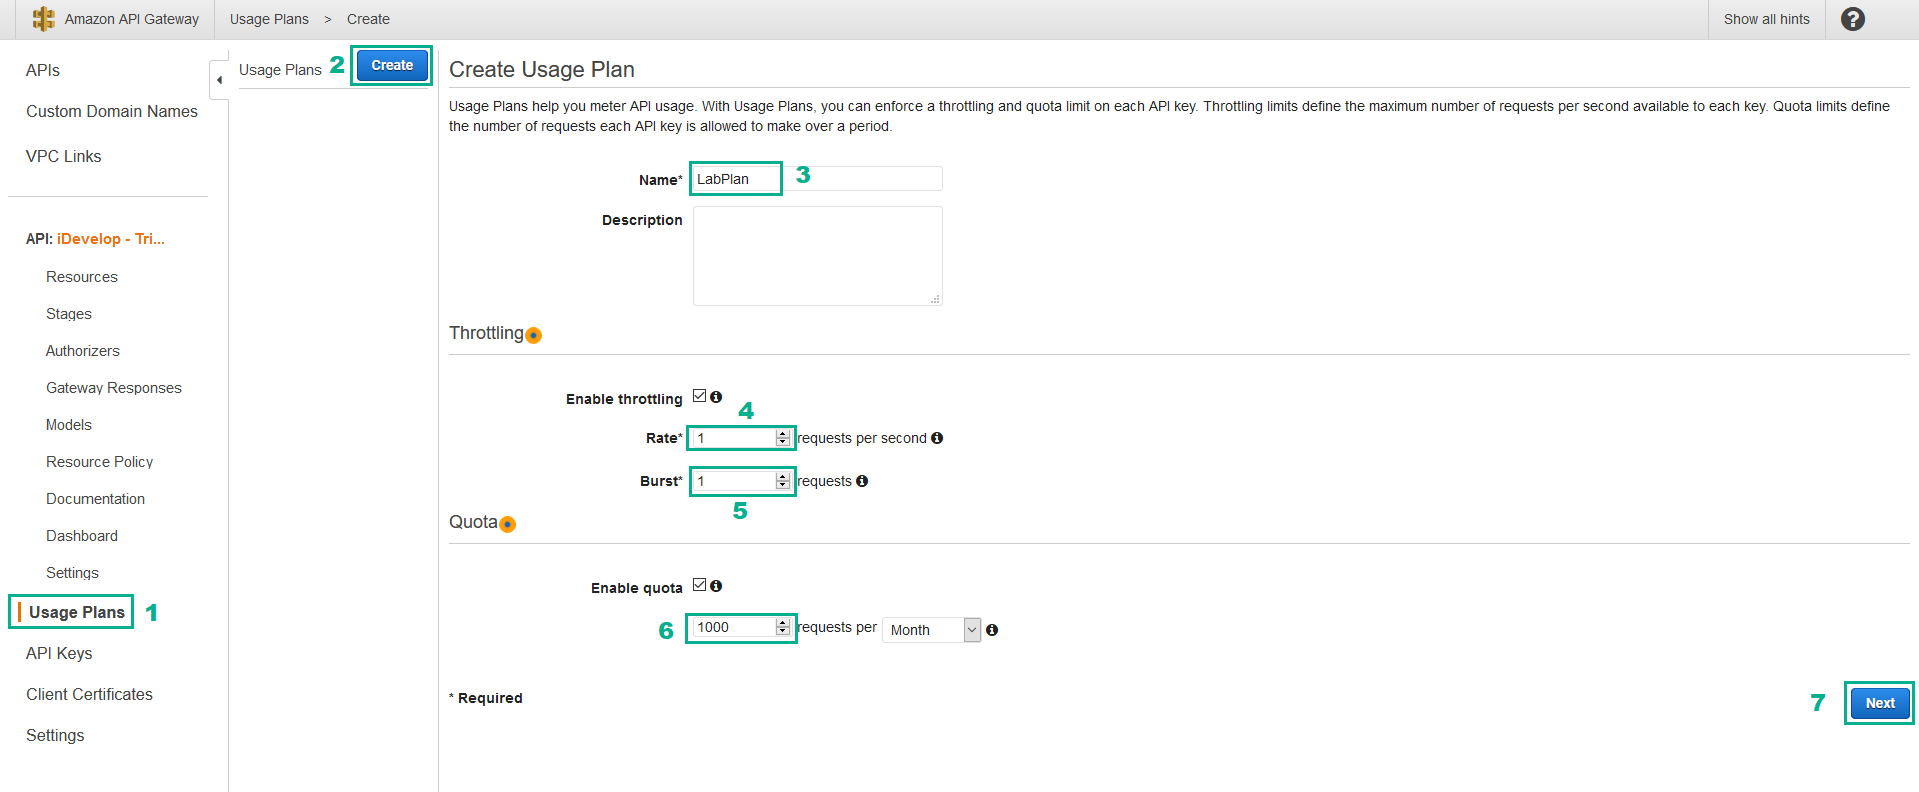
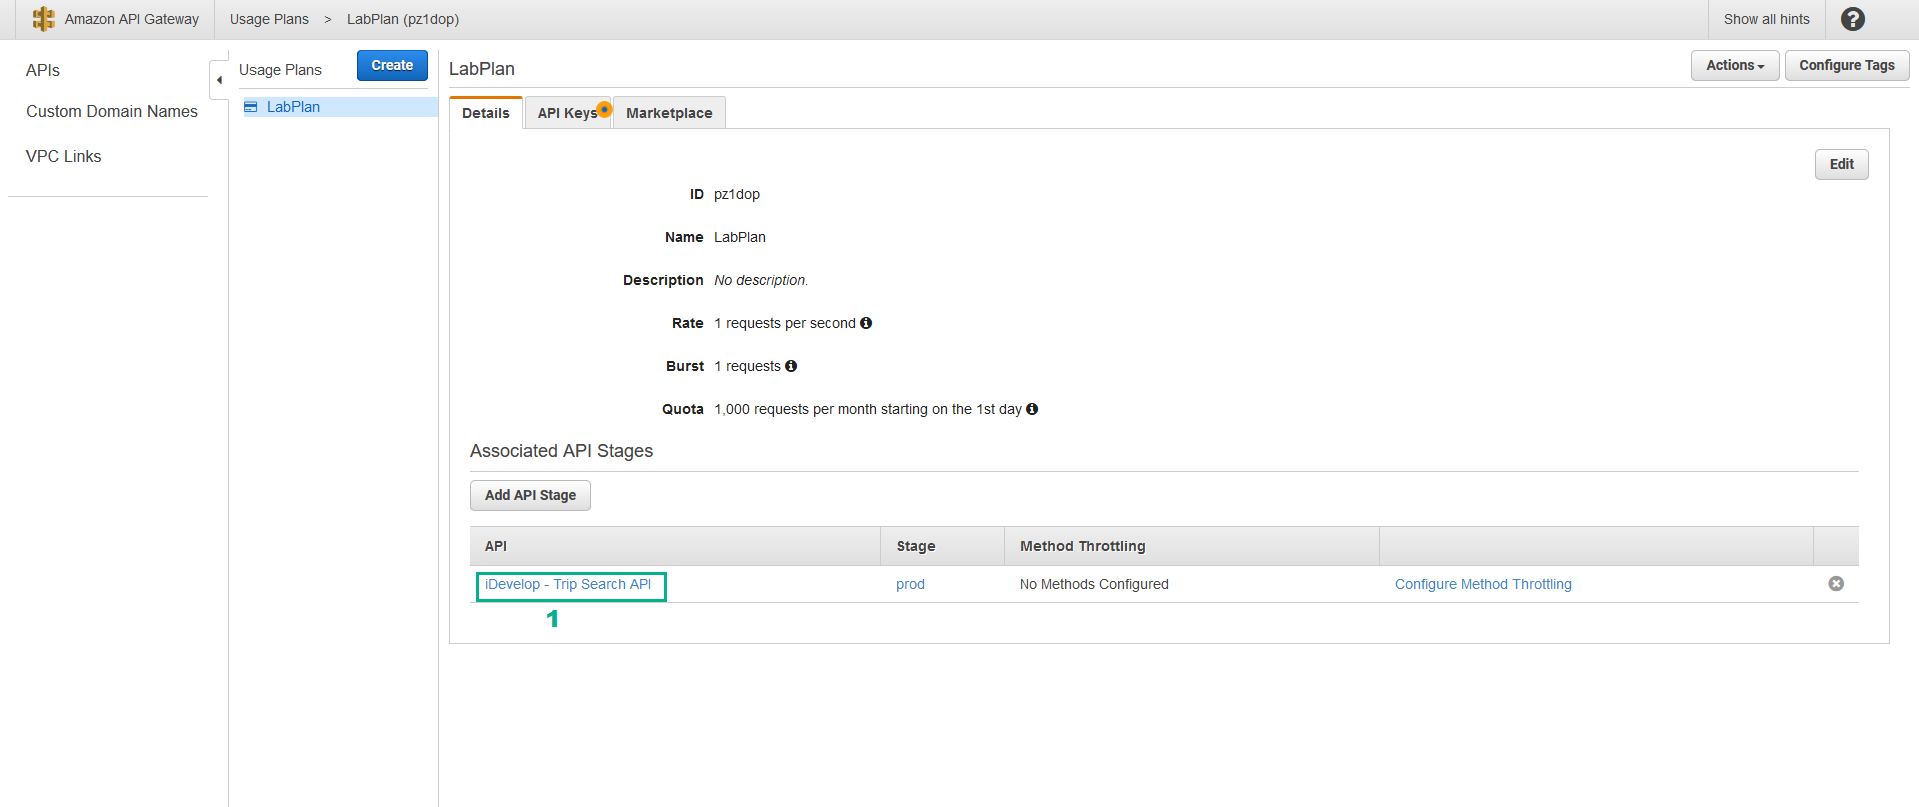
- Click Usage Plans
- Click Create
- In the Name section, type
LabPlan - In the Rate section, type
1 - In the Burst section, type
1 - In the Quota section, type
1000per month - Click Next
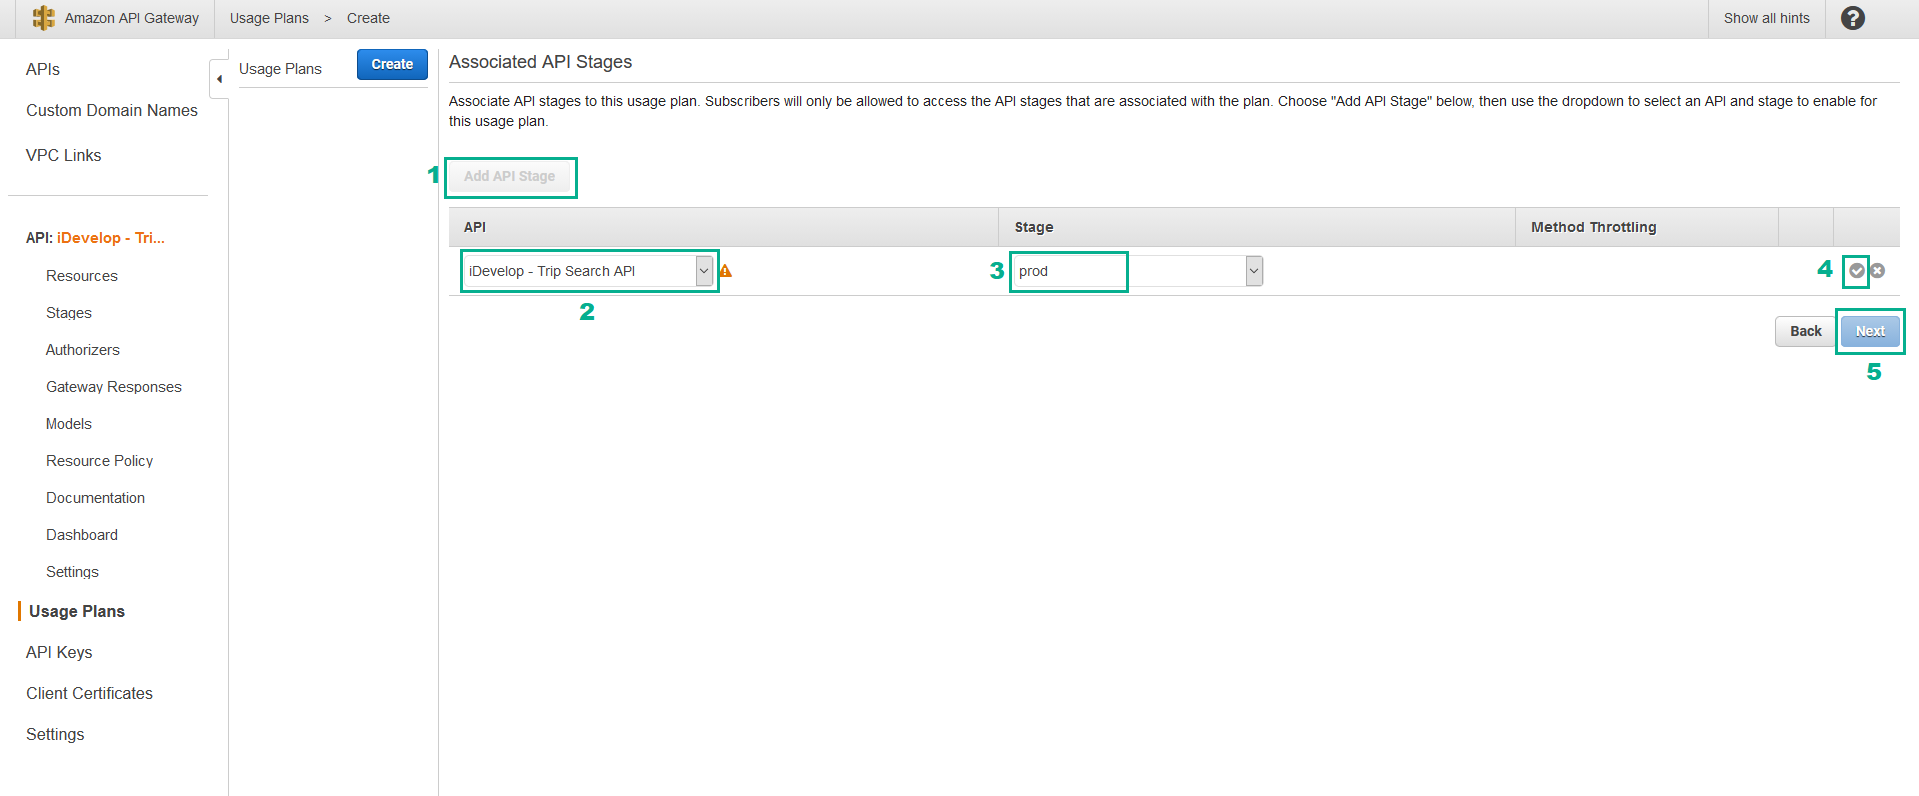
- Click Add API Stage
- In the API drop-down list, select iDevelop - Trip Search API
- In the Stage drop-down list, select prod
- Click the grey tick icon to commit the changes
- Click Next
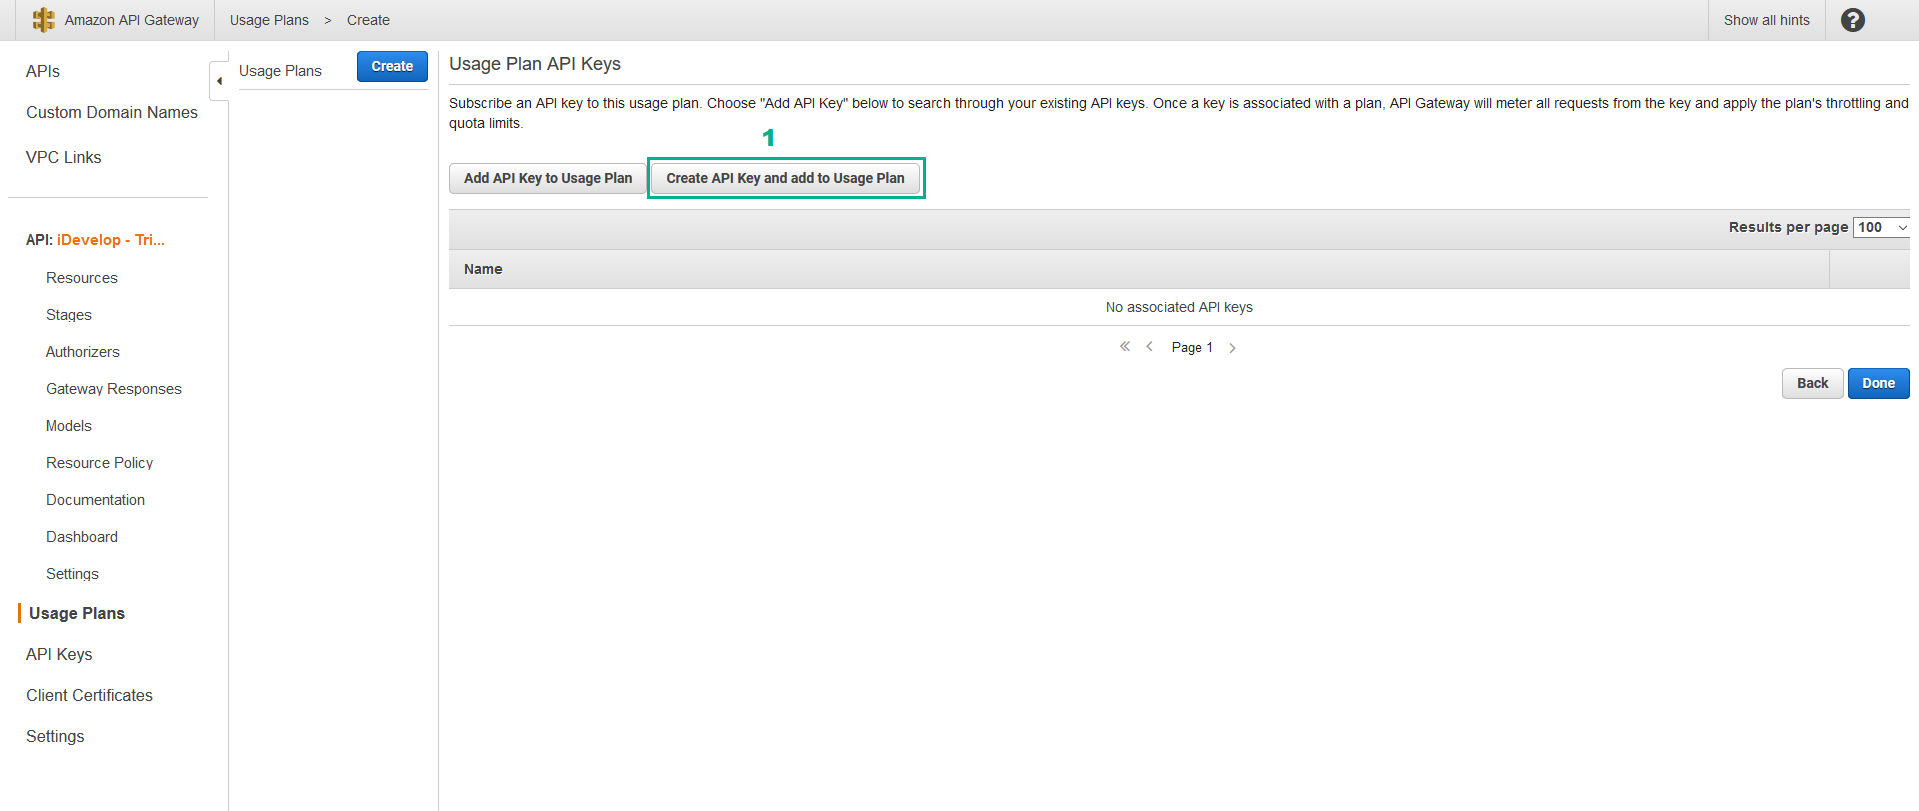
- CLick Create API Key and add to Usage Plan
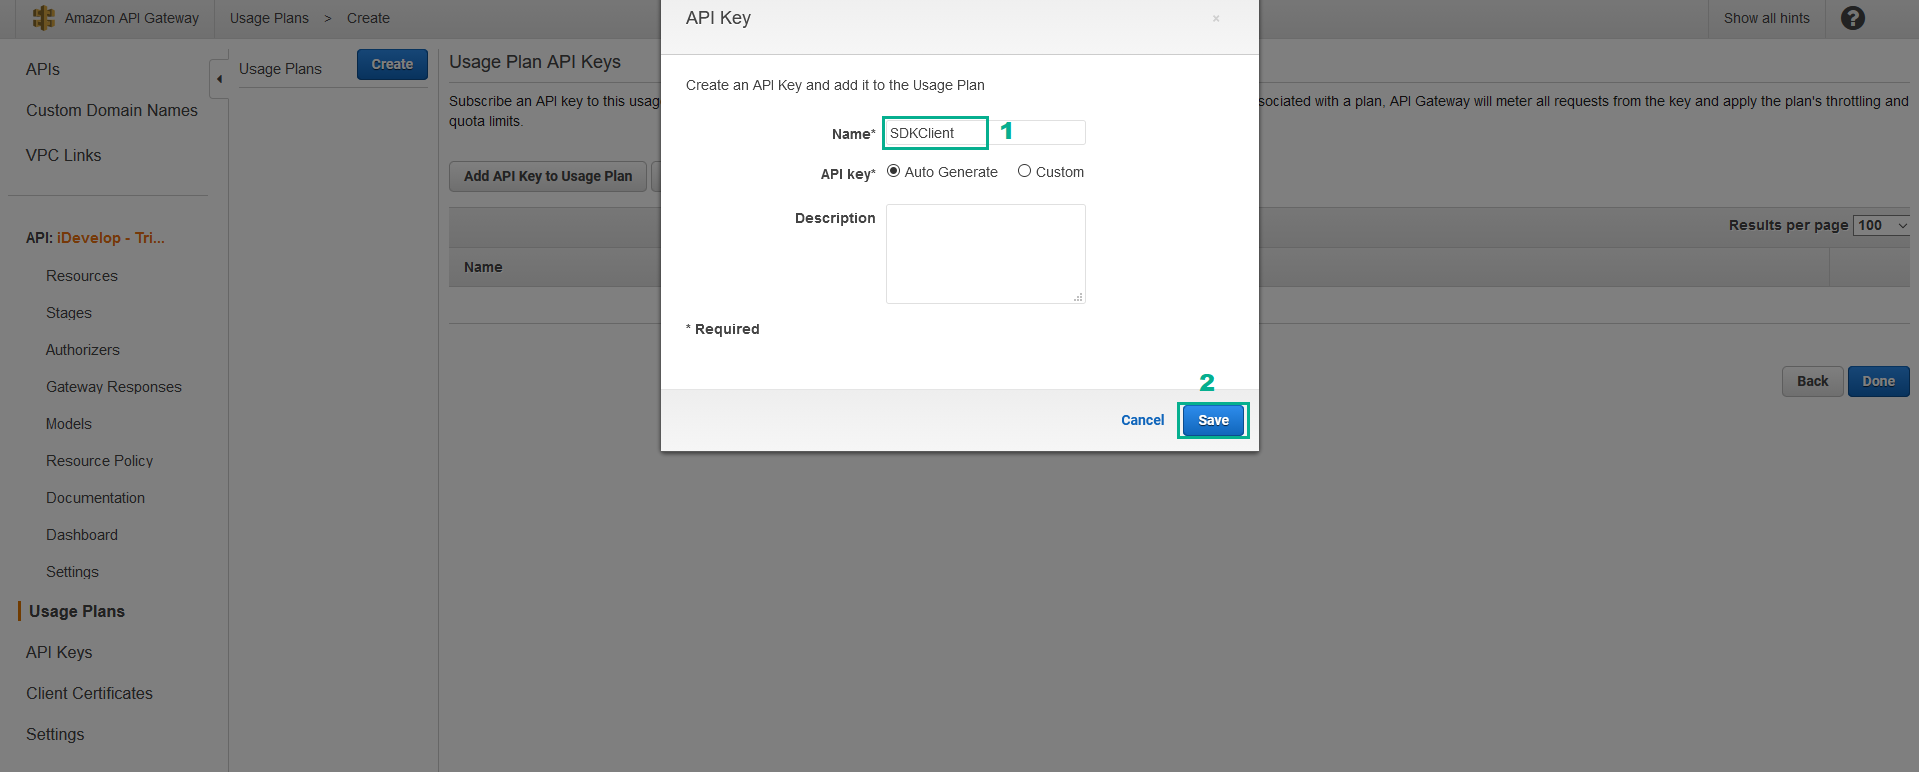
- In the dialog that appears, for Name type
SDKClient
- Click Save
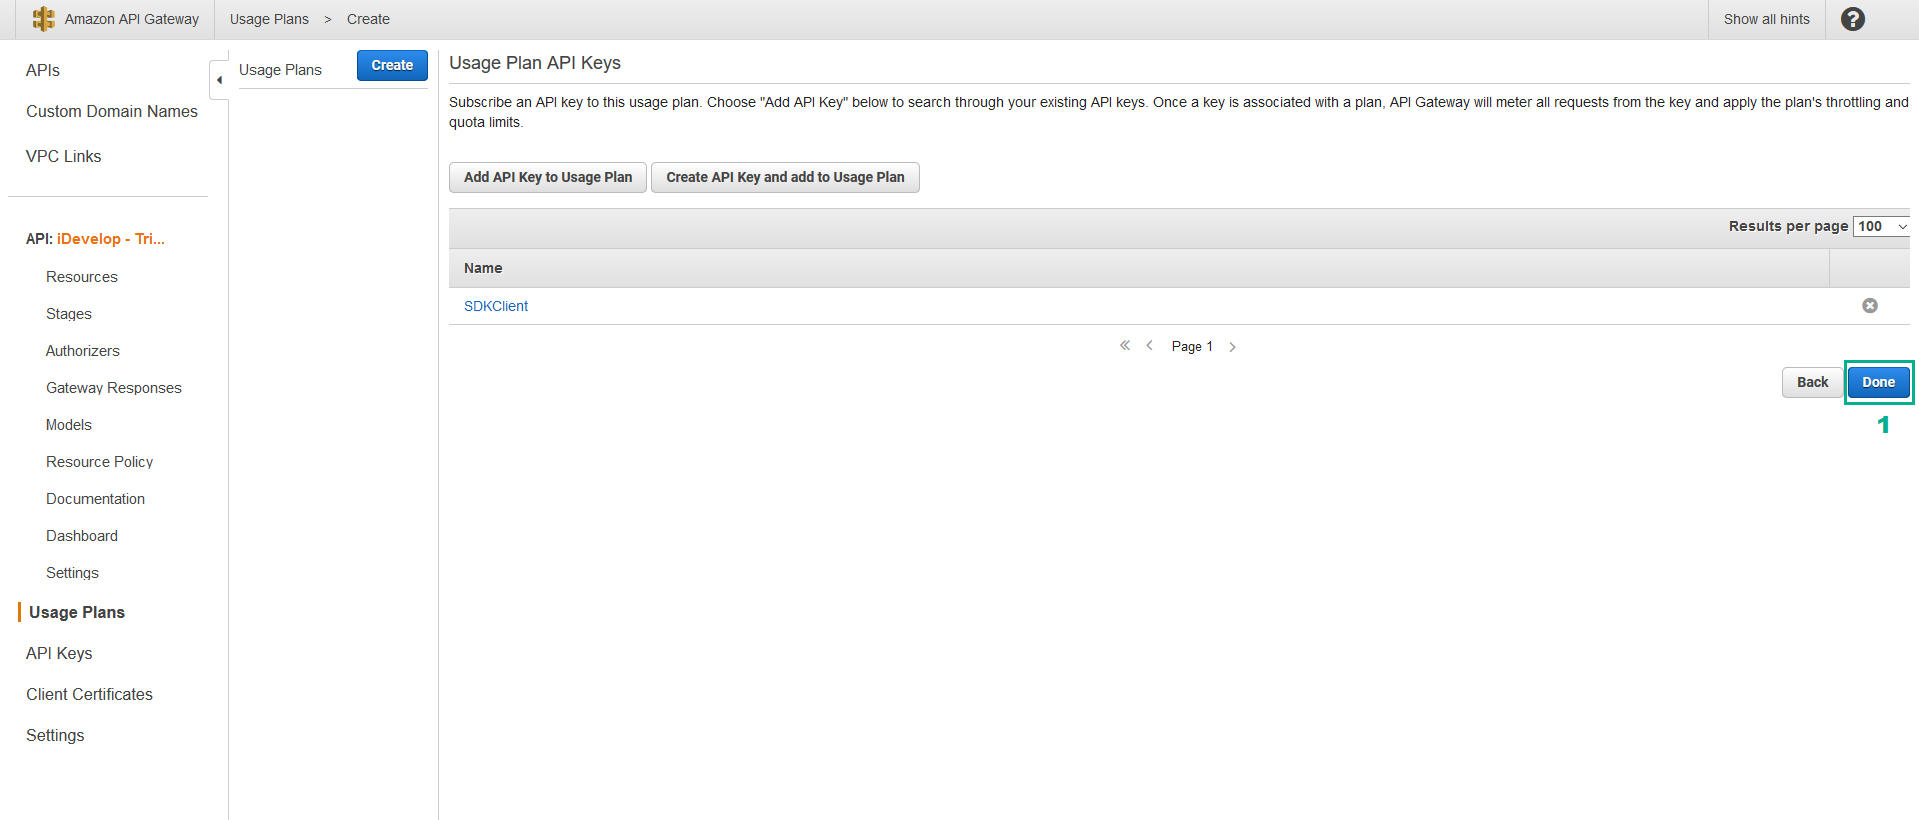
- Click Done, A new API key will be created and associated with the usage Plan.
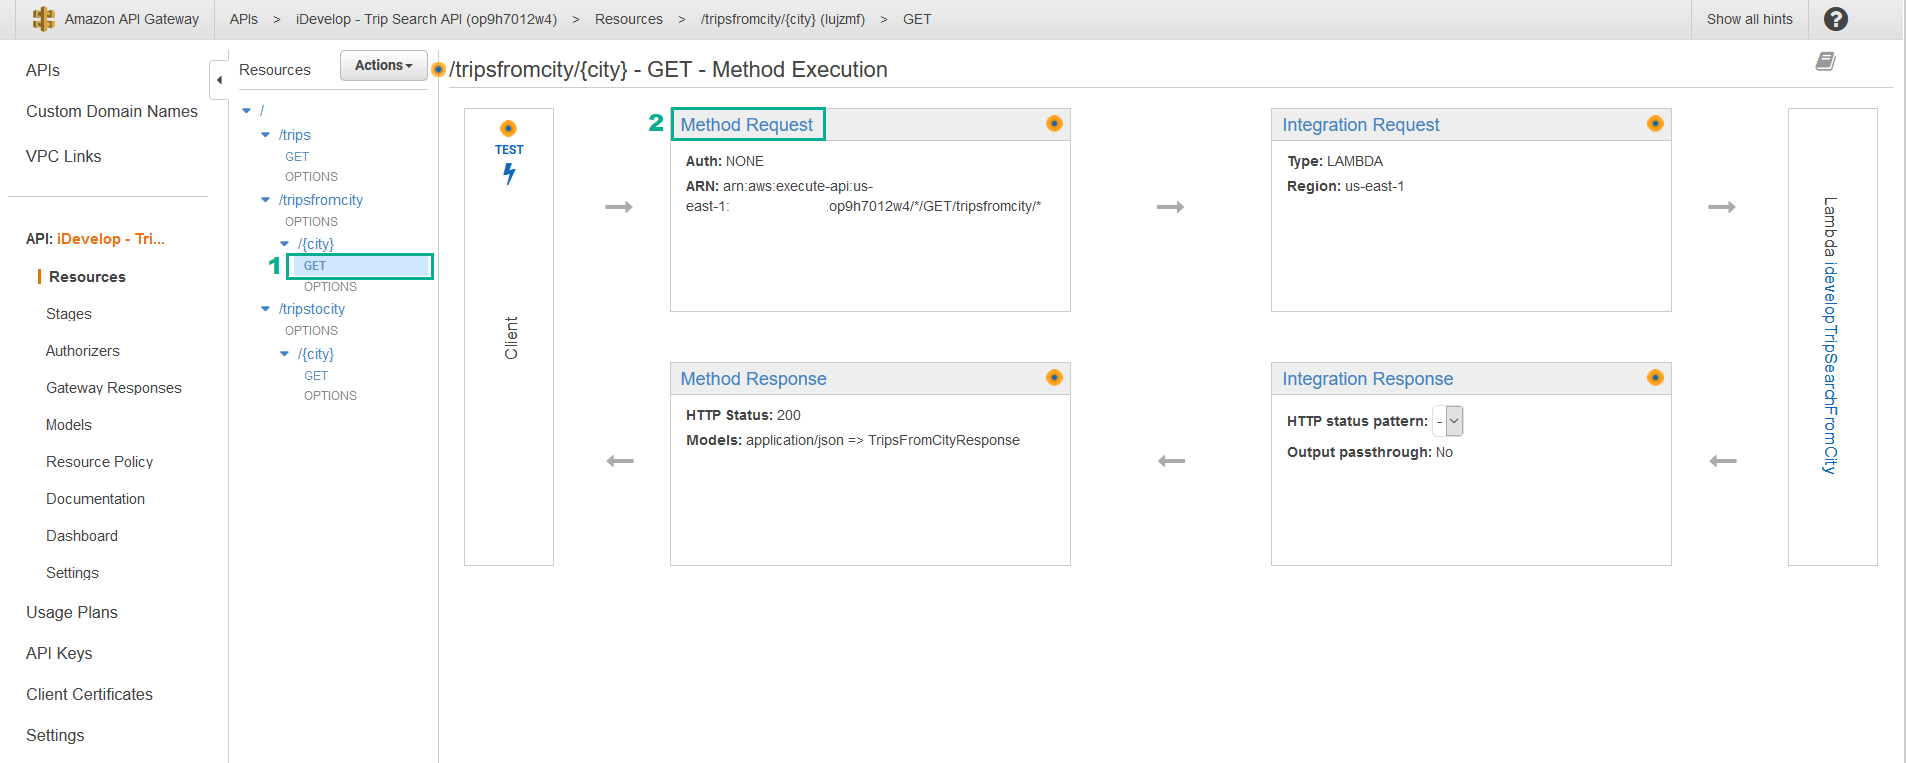
- Click iDevelop - Trip Search API
- Click the GET method beneath /tripsfromcity/{city}
- Click Method Request
- In the API Key Required section, click the pencil edit icon
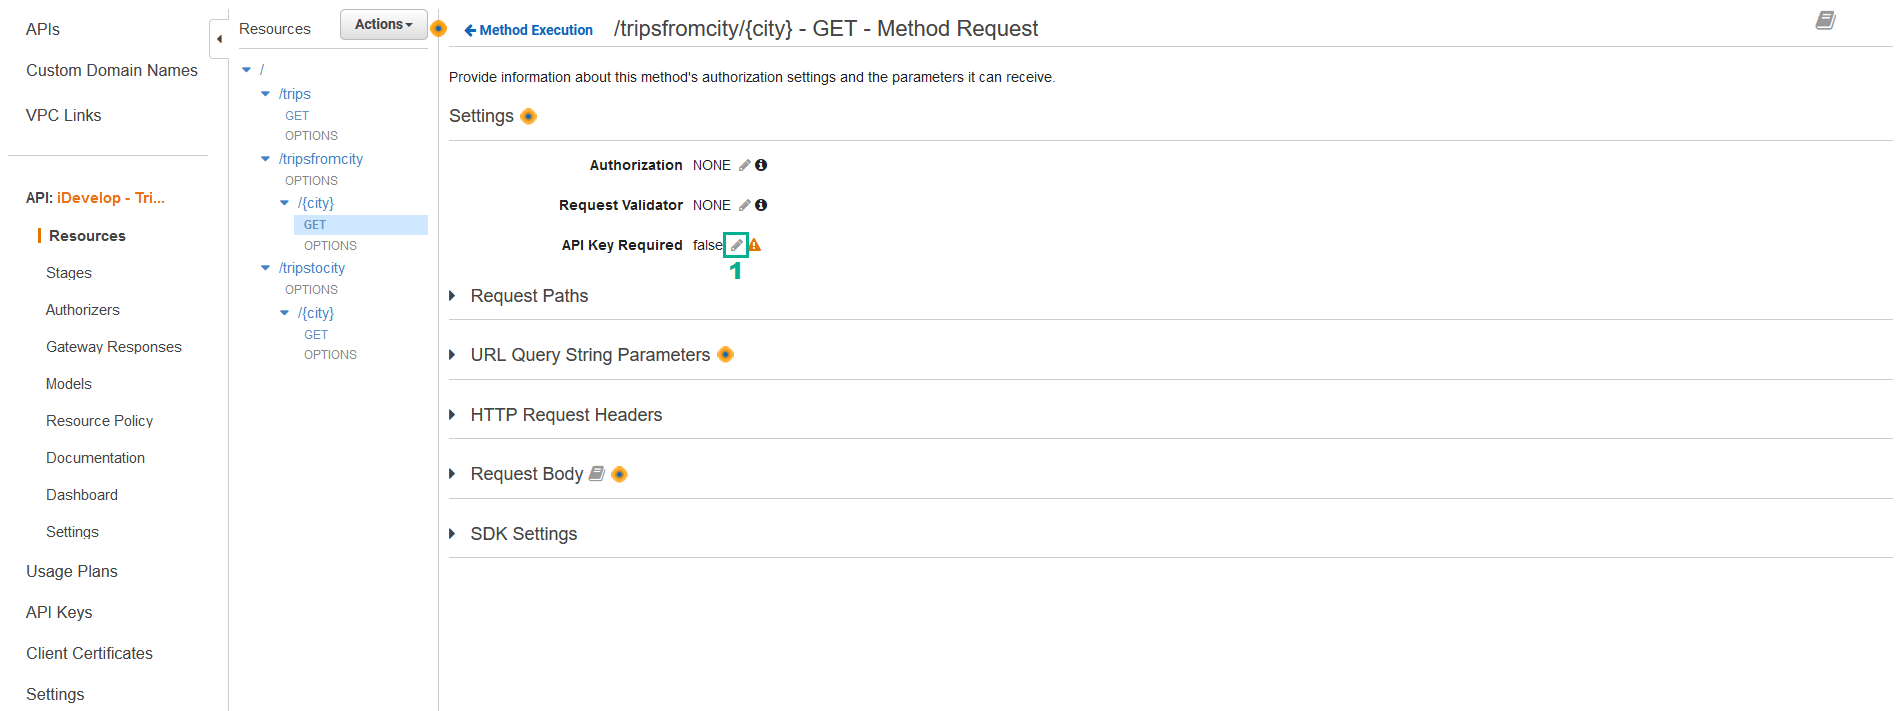
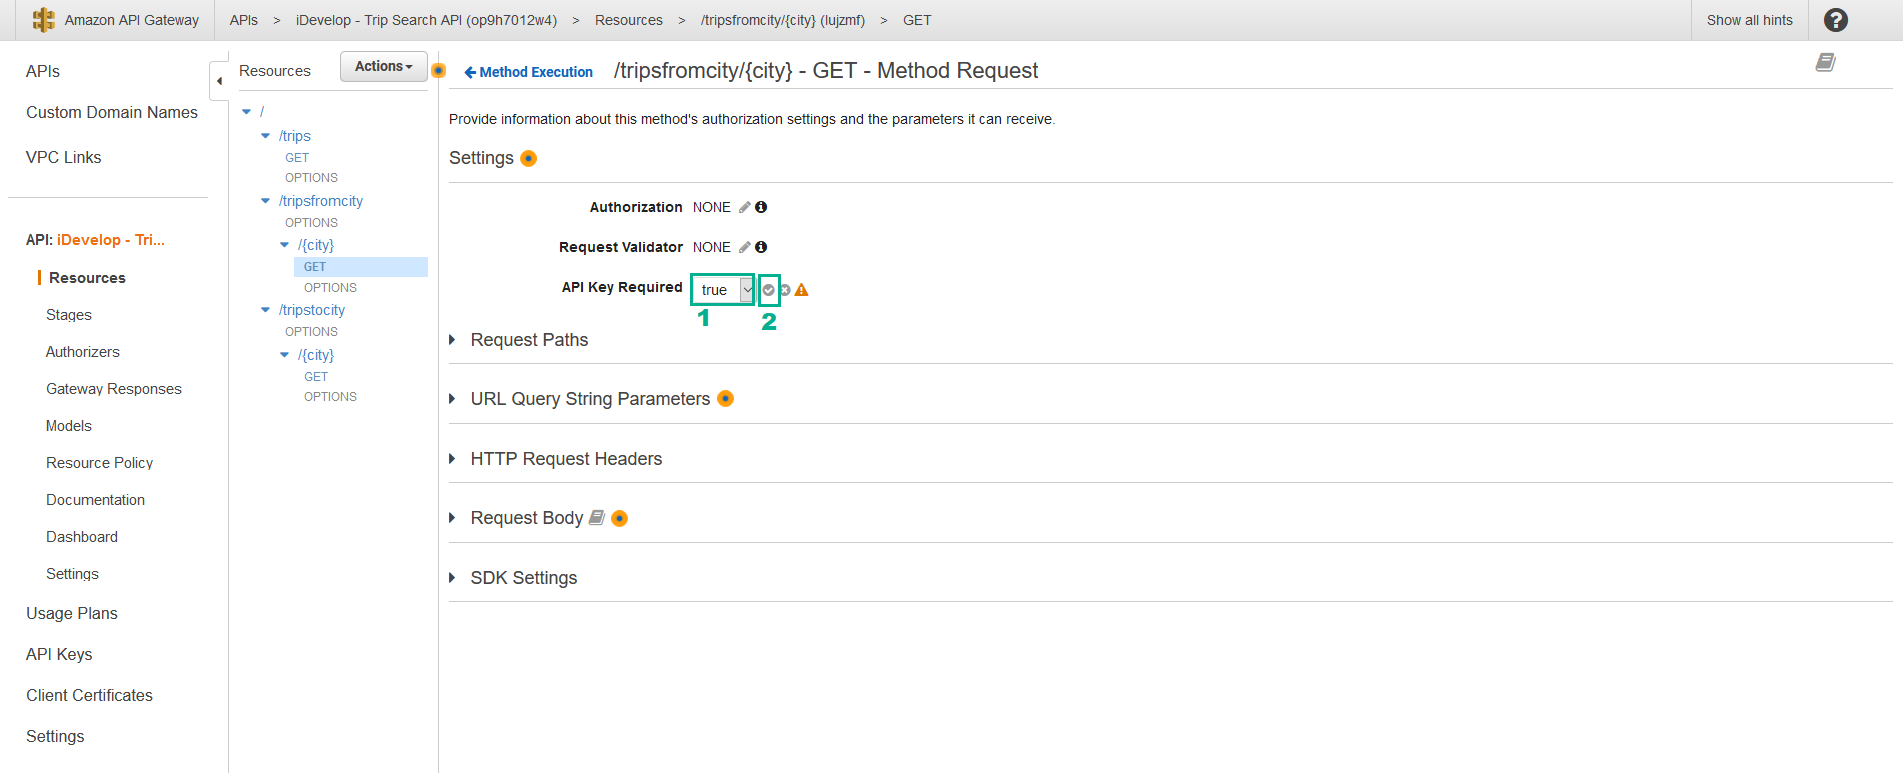
- Select True
- Click the grey tick icon to commit the change
- Click Actions
- Click Deploy API
- In the dialog that appears:
- In the Deployment stage section, select prod
- Click Deploy

- In the prod Stage Editor, click SDK Generation
- In the Platform section, select Java SDK
- In the Service name section, type
TripSearch - In the Java package name section, type
idevelop.api.sdk - Click Generate SDK. The Java SDK will be generated and downloaded as a ZIP file.

- Extract the ZIP file we downloaded in step 26
- Open Command Prompt and navigate to the directory of the downloaded SDK has been exploded (the directory is called generated-code)
- Execute the following command
mvn install
This will compile and install the SDK in your local Maven repository, overwriting the previous version.
Test the newly generated SDK with the Java client app
- In the Command Prompt, navigate to the directory of the project we extracted in step 10
- Execute the following command to run application
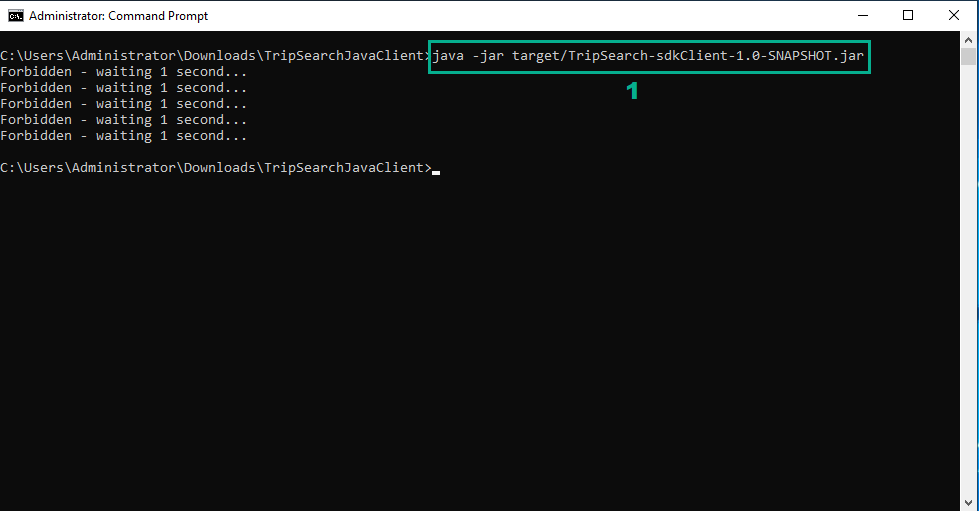
java -jar target/TripSearch-sdkClient-1.0-SNAPSHOT.jar
- Since you have set the /tripsfromcity/{GET} endpoint to require an API Key, but have not actually set an API in the client application, you will see a Forbidden error
Set the API Key in the client code and re-run the API consumer application with throttling enabled
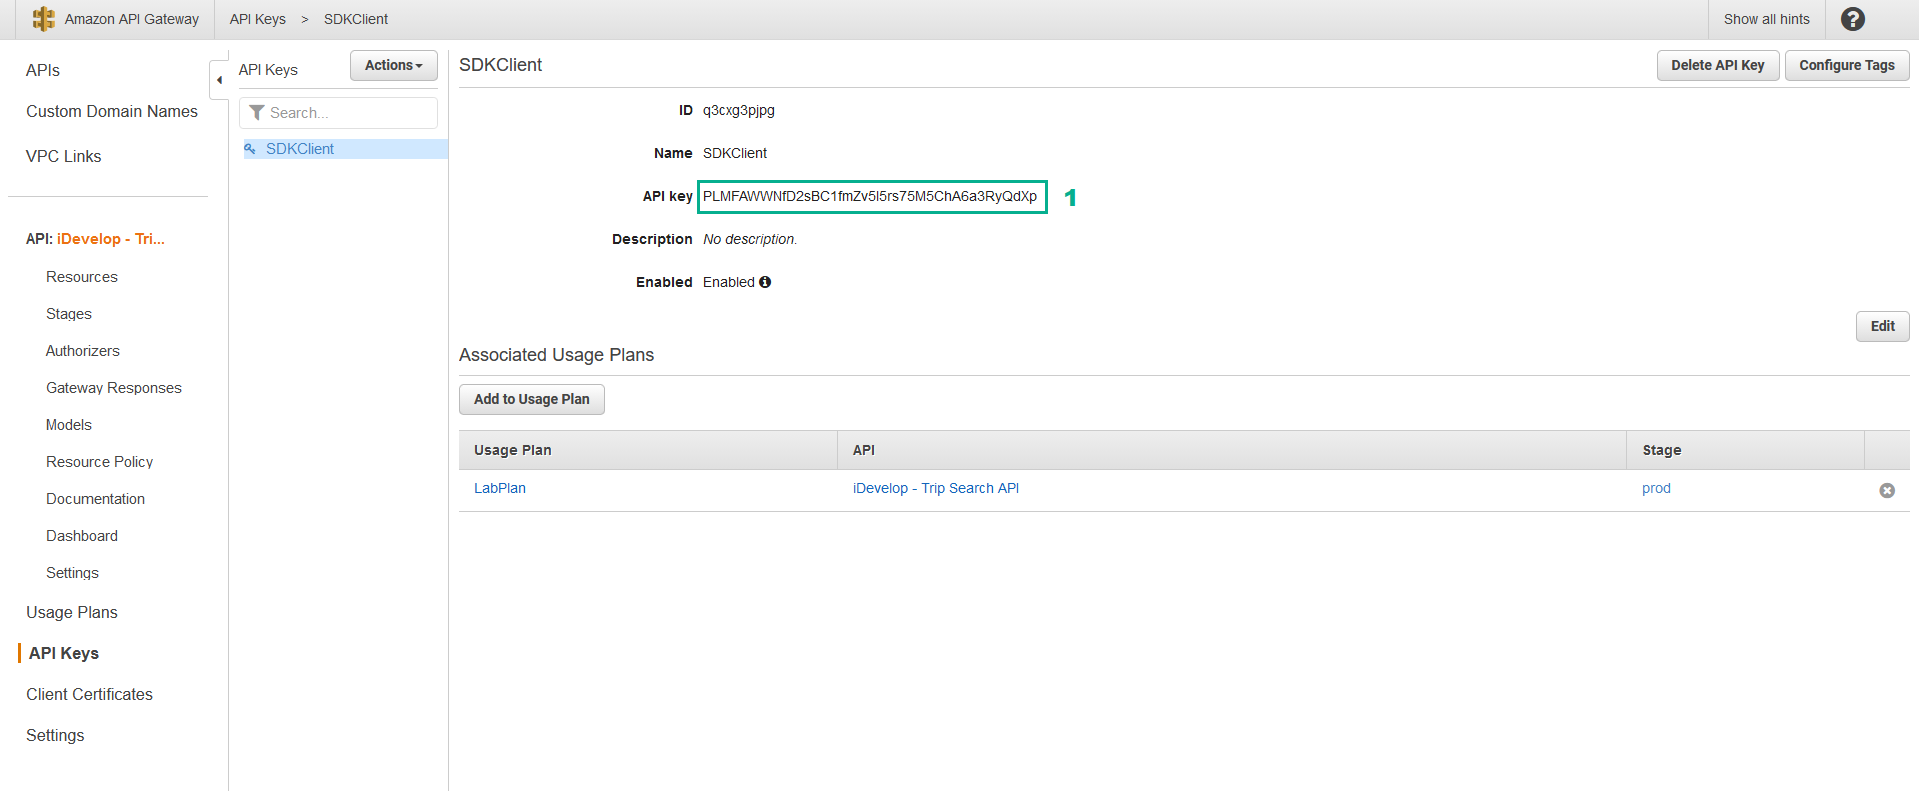
- Click API Keys
- Click SDKClient
- In the API Key section, click show to show the auto-generated API key
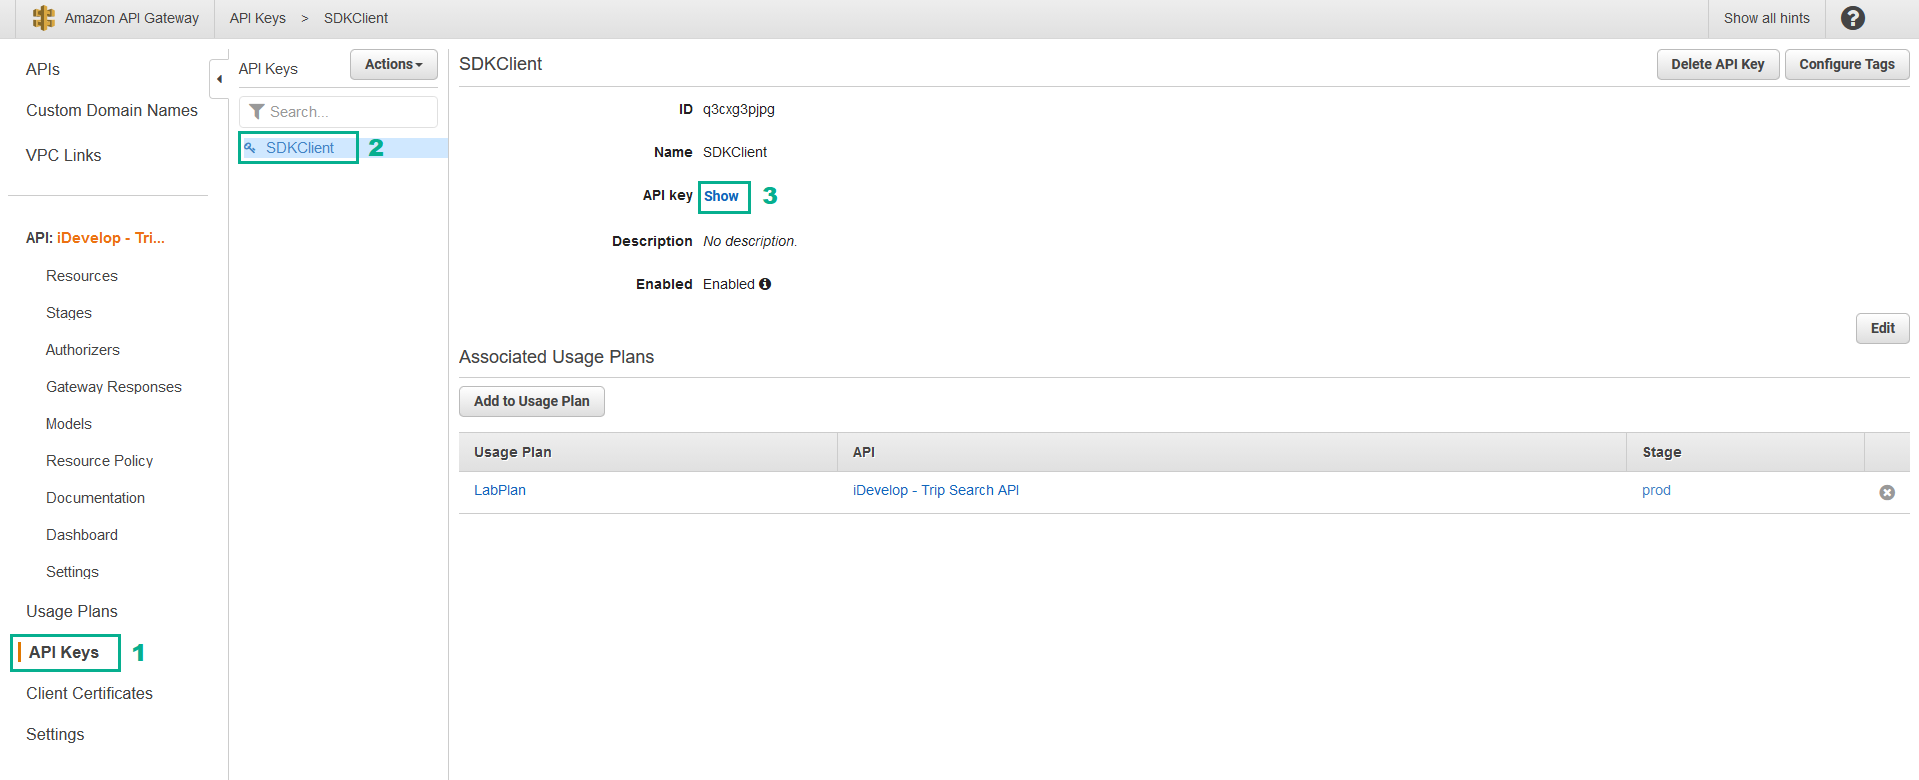
- Save the API key in the API key section
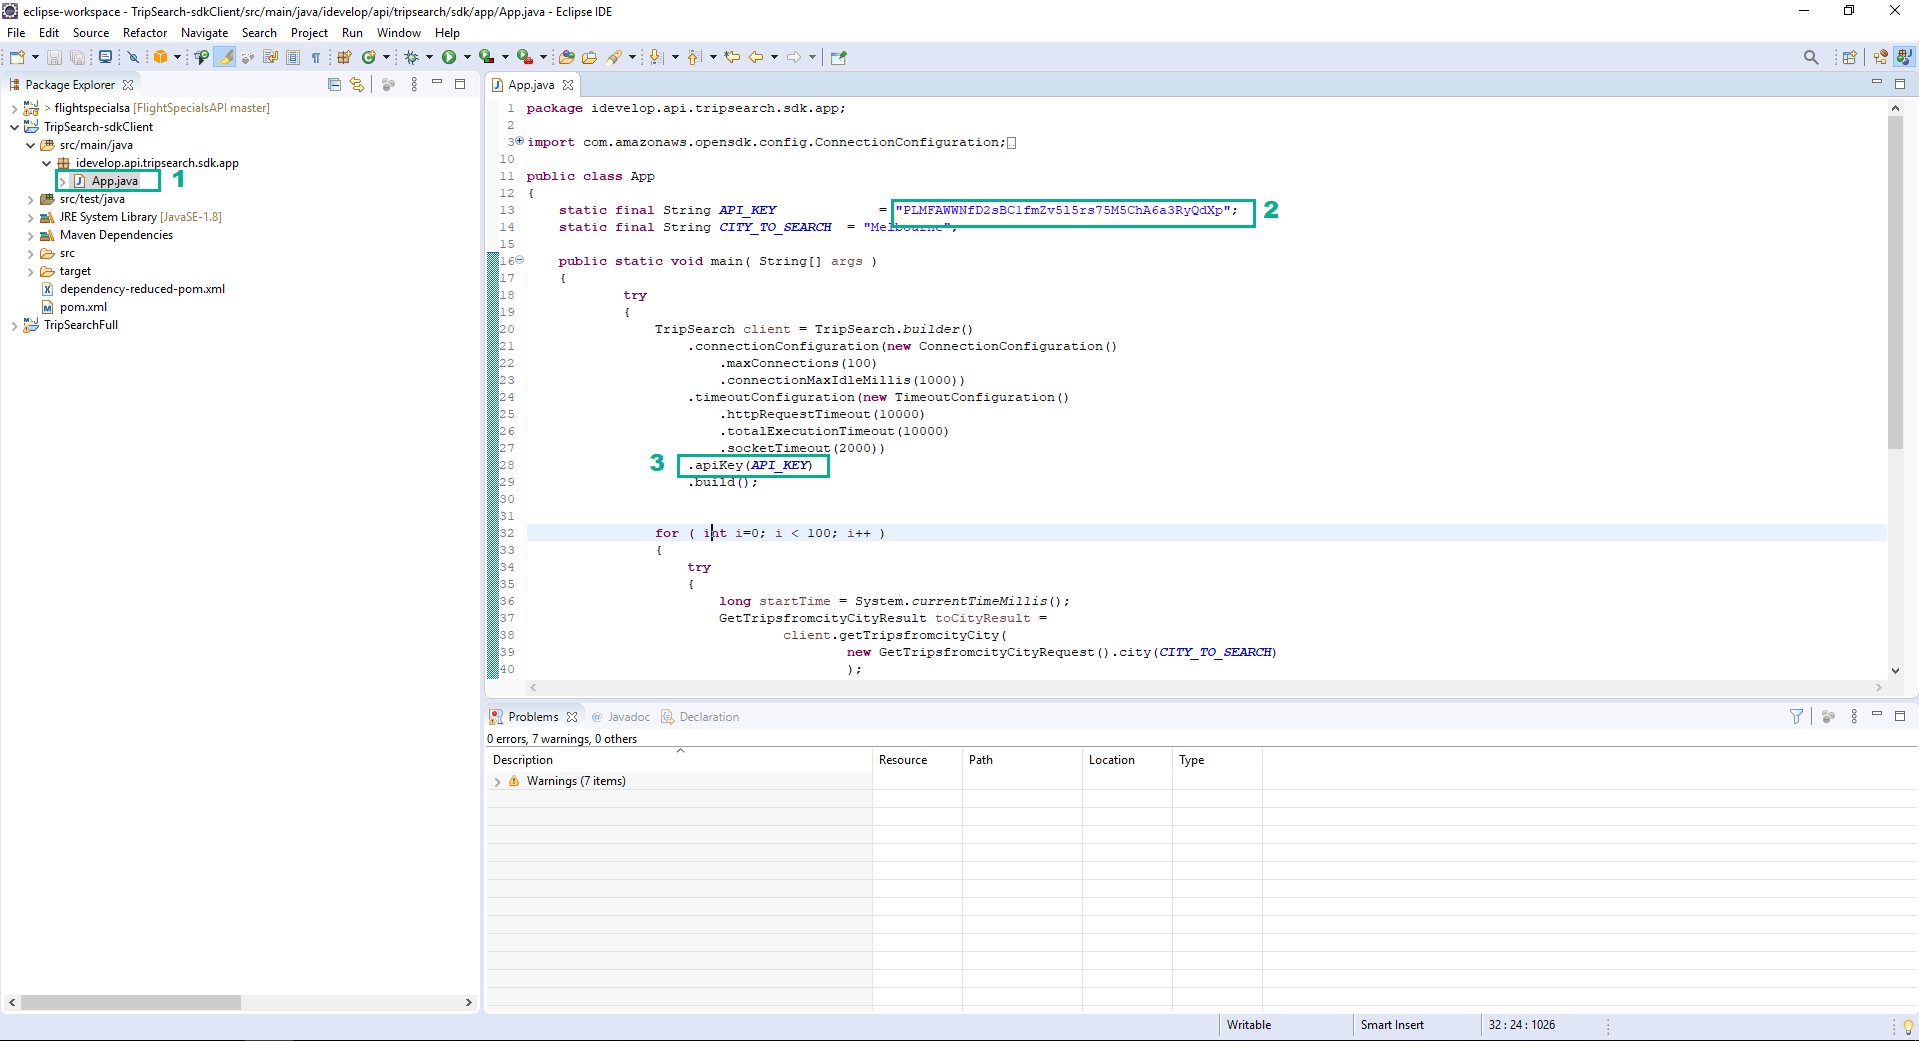
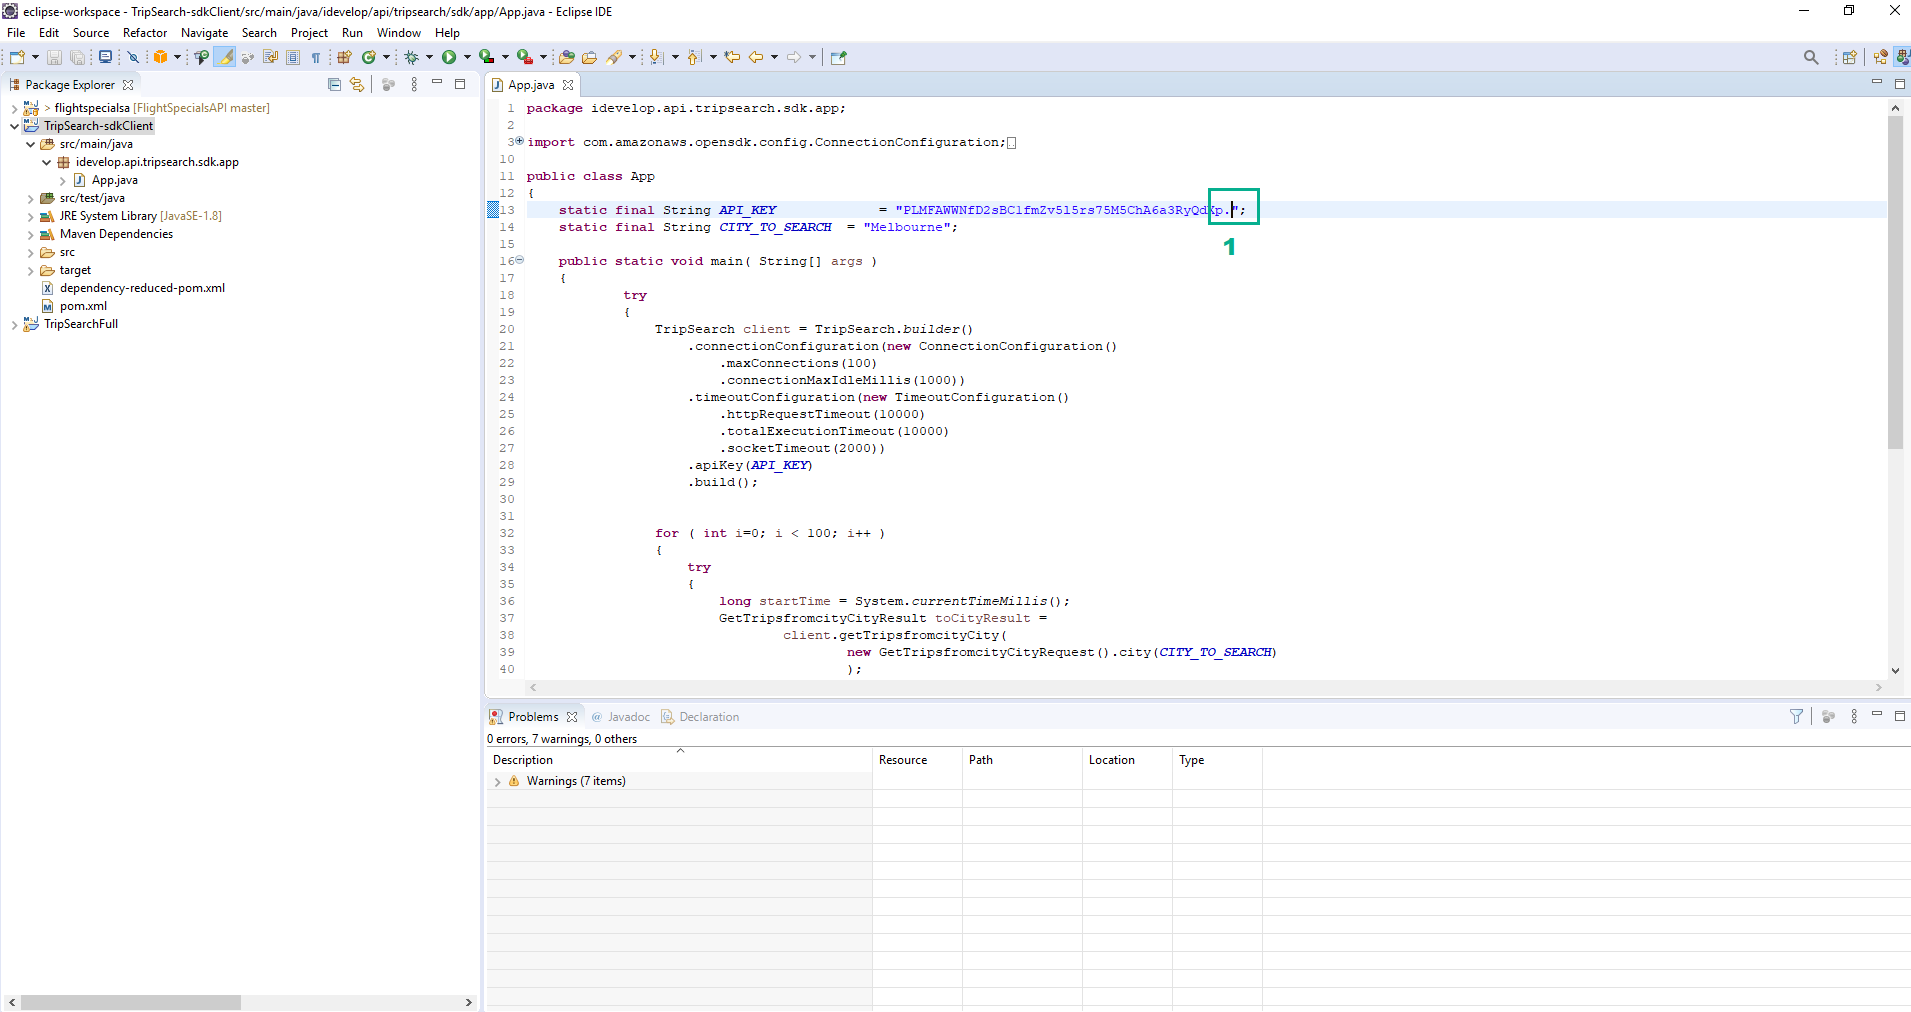
- In the Eclipse IDE, open the file whose the path is /src/main/java/idevelop/api/tripsearch/sdk/app/App.java
- Replace <REPLACE_WITH_API_KEY> with the API key value we saved in step 30
- In the same file, locate the commented out call to apiKey(API_KEY) in the TripSearch builder call. You may have to run a Maven Update on the project to pick up the .apiKey as we updated the jar in the last step and Eclipse may not have picked it up. Now that you have required an API Key in the API Gateway call, the SDK created for you will contain a call to allow the key to be set. If you have no API Key requirements, the code generator does not emit this functionality so in the provided code, it is commented out. You need to enable the call in the client code to allow the API Key to be set correctly.
- Save
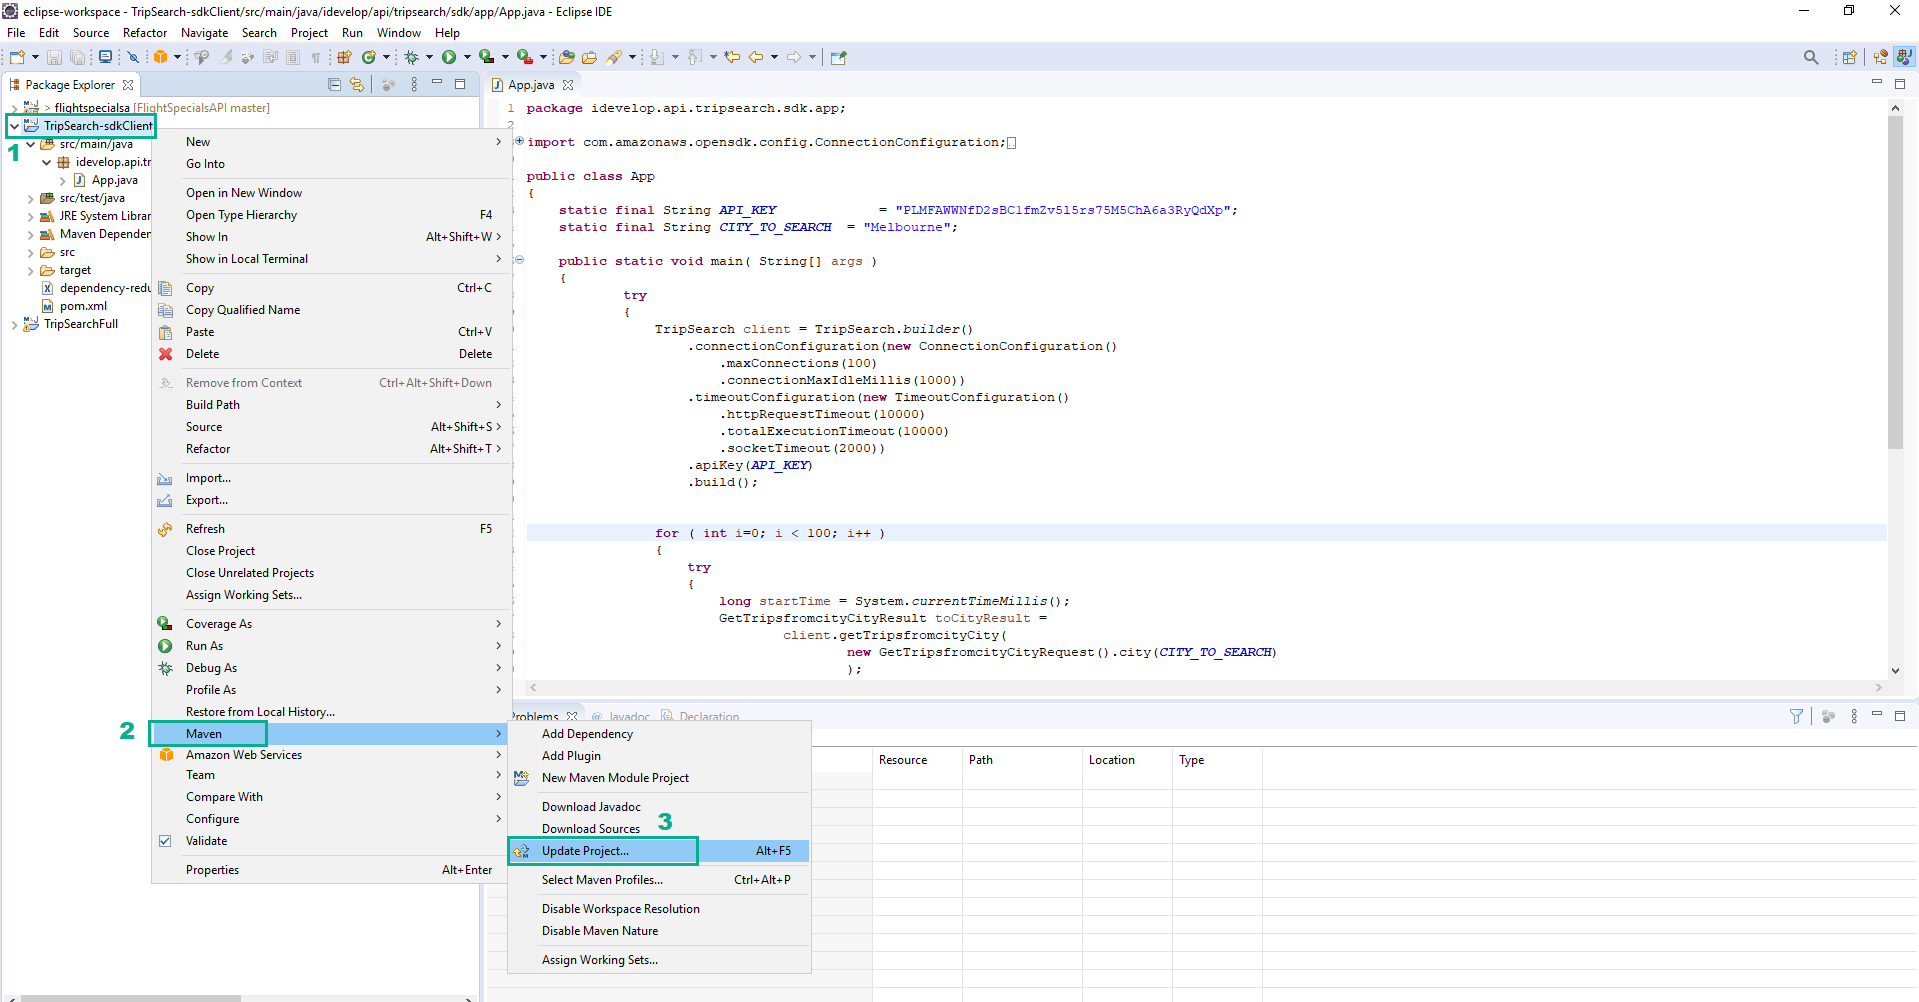
- In the Eclipse IDE, right-click on the TripSearch-sdkClient project
- Click Maven
- Click Update Project…
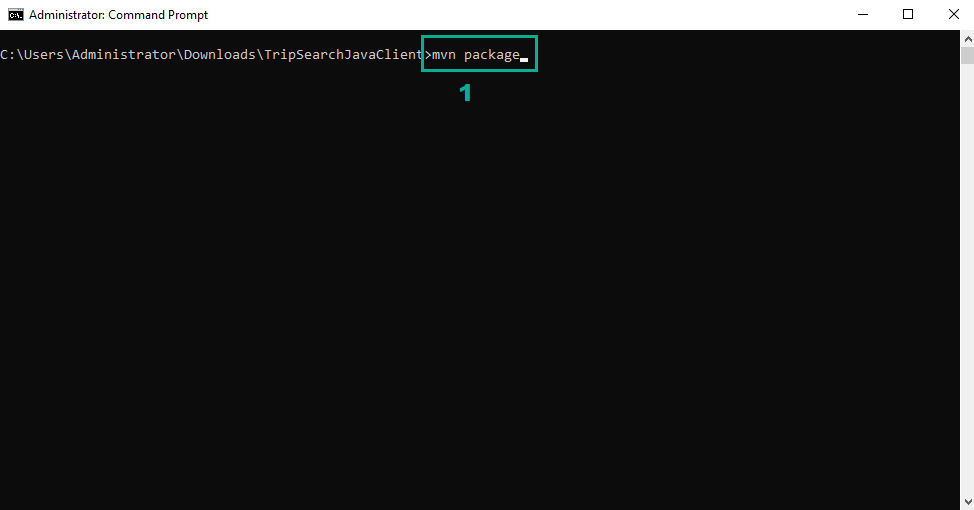
- In the Command Prompt, execute the following command
mvn package
 34. In the Command Prompt, execute the following command
java -jar target/TripSearch-sdkClient-1.0-SNAPSHOT.jar
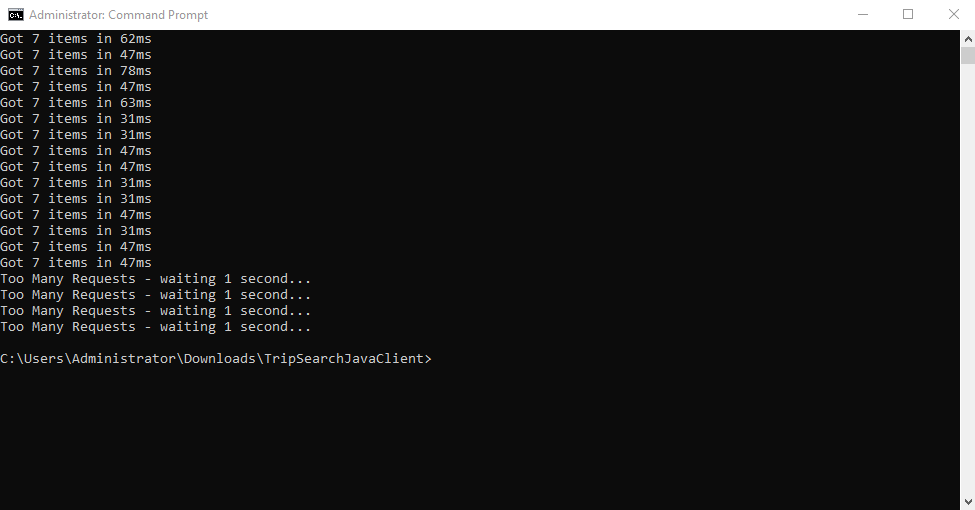
 35. You will now periodically start receiving errors requesting you slow down the call-rate. This is because we set a maximum call-rate of 1 call per second per API key. You will see a output
 36. As an experiment, edit the API_KEY you have set in the App class (for example, add a period at the end) which will cause it to be invalid. Re-run the app and notice that you now receive a Forbidden message. This is because you set the API Key as required for calls to the /tripsfromcity call.
 37. In the Command Prompt, execute the following command
java -jar target/TripSearch-sdkClient-1.0-SNAPSHOT.jar
- You will see a output

- Experiment with the Rate and Burst settings in the Usage Plan to see how they affect the client app calling the API
you do not need to re-deploy the API nor re-create the SDK if you change the settings in the Usage Plan.